|
|
| |
|
|
| |
| |
|
Description: This Pet
Collar is a nice way to adorn your cat, dog, or
other animal with something handmade. The design
features a buttonhole clasp. A D-Ring can be
added if you plan to use a leash.
This is a "flexible" Macrame pattern, where you
get to choose the decorative knots used for the
overall design.
There is a Pet
Leash pattern listed
separately, and both can be made using the same
type of knot, so they match.
|
|
| |
| |
| Supplies
Needed: |
| |
- One small D-Ring (optional)
- One Shank-style Button (1 inch)
|
| |
| |
| |
|
Step 1: Determine your
pet's neck size with a tape measure. It
should be loose, so you can fit your fingers
under it easily.
Cut 1 working cord, 8
times
the finished size you came up
with.
Cut 1 holding cord 6
times the
finished size.
Prepare the tips of both cords to prevent
unraveling as you work on the Pet Collar.
|
| |
|
| |
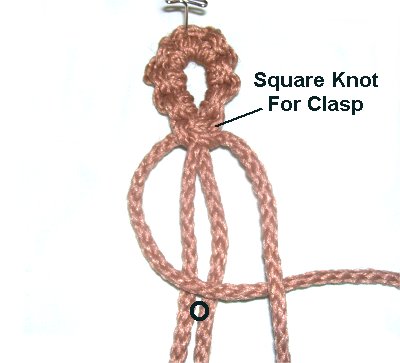
Buttonhole Clasp
|
| |
| |
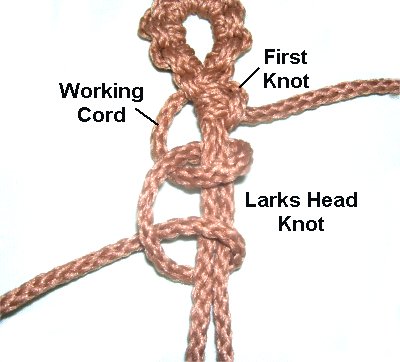
Place both cords on
your board vertically, so the
longest cord is on the left. Locate the
center and secure them at that point.
The Buttonhole
Clasp is made starting at the
center, moving towards the ends. |
| |
|
| |
 |
|
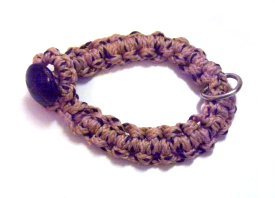
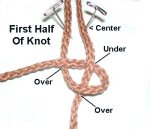
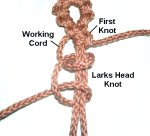
Step
2: Make the first half of a Vertical
Larks Head knot by moving
the working cord over
- under the holding cord, to
make a counter-clockwise
loop.
As you pull it left, pass it over
the working cord
to form the crossing point.
|
|
| |
|
| |
 |
|
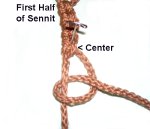
Tie the second
half of the knot
by passing the working cord under
- over the holding cord.
As you pull it left, pass it under
the working cord to make the crossing
point. |
|
| |
|
| |
 |
|
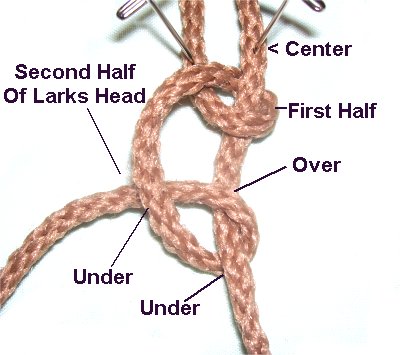
Step 3:
Repeat step 2 several times,
until the sennit measures 1.5
inches.
|
|
| |
|
| |
 |
|
Step 4: Turn the
sennit around and go back to the center.
Repeat
steps 2 and 3 to make the
second half of the clasp. Make
sure it's the same length as the first
half.
The working cord will now be on the right,
so the loops should be made clockwise.
|
|
| |
|
| |
 |
|
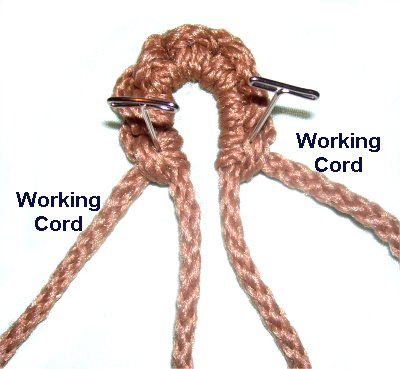
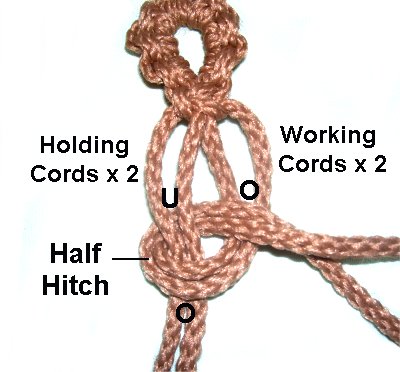
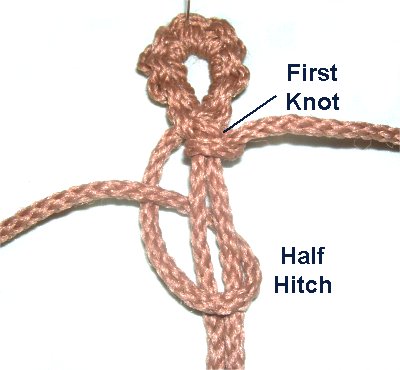
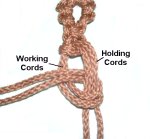
Step 5: Form a
circle with the sennit you just
made.
You now have four segments, which you
should view as four separate cords.
|
|
| |
|
| |
 |
|
Tie a tight Square
Knot, using the two
working cords.
The other two are the fillers. |
|
|
|
|
| |
 |
| |
Decorative Knot Options
|
| |
| |
|
Step 6: Below are details
about several knots suitable for the strap of
the Pet Collar. Read through the instructions
and choose one
decorative knot.
They are all listed in the Learn
Macrame section, or you can
click on the links and photos below to go to the
page indicated.
Start the first knot next to the
clasp. Stop when you have tied enough
knots to create half
the finished length of the collar. So if you are
making a 12-inch collar, stop at 6 inches.
|
| |
|
|
| |
|
|
|
|
|
| |
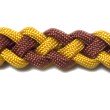
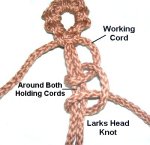
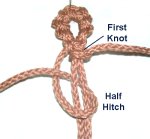
Description:
The
vertical Larks Head can be used to make the
strap for the Pet Collar. Since it
matches the knots in the loop, it's the best
choice.
Here are the instructions:
|
| |
| |
| |
 |
|
Use the
working cord on the
right.
Tie the Vertical Larks Head knot in a clockwise
direction, passing it around both
holding cords:
First Half: Over - under -
over
Second Half: Under - over
- under
|
|
| |
|
| |
 |
|
Now use the working cord on the left.
Tie the knot rotating counter-clockwise,
around both
holding cords.
The over - under pattern is the same as
the in the previous step.
Continue on, alternating back and forth
between the two working cords, until the
collar is half
the size you want.
|
|
| |
| |
|
| |
|
| |
|
|
| |
|
|
|
|
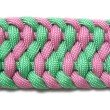
| Description: The
Alternating Half Hitch can be used to make
the Pet Collar, too. You need to
divide the cords into two sets and alternate
between each set. |
|
| |
| |
 |
|
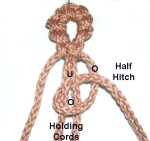
Tie the first Half Hitch with the two
cords on the right.
The cords on the left will hold the
knot.
This Half Hitch is tied by making a clockwise
loop with the working
cords over
- under - over as shown.
|
|
| |
|
| |
 |
|
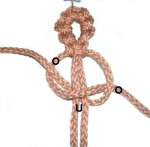
Use the two cords on the left
to make the next Half Hitch, onto those
on the
right. Rotate counter-clockwise.
Continue on, alternating back and forth
between the two sets of working cords,
until the Pet Collar is half
the size you want.
|
|
| |
|
|
| |
|
| |
|
|
| |
|
|
|
|
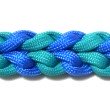
Description: Alternating
Half Hitches can be tied around holding
cords. This sennit will be
wider than the design described previously.
|
|
|
| |
 |
|
Use the right
working cord to make a Half Hitch onto both
holding cords.
This Half Hitch is tied by making a clockwise
loop with the working cords
over - under - over as shown. |
|
| |
|
| |
 |
|
Use the left
working cord to make the next Half
Hitch, onto both holding cords.
Rotate counter-clockwise.
Continue on, alternating back and forth
between the right and left working
cords.
|
|
| |
|
|
| |
|
| |
|
|
| |
|
|
|
| |
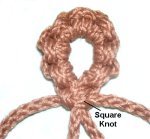
| Description:
The Square knot is a great choice,
too. Make sure you know how to tie this knot
before you get started. |
|
| |
| |
 |
|
The working
cords are furthest to the right and left.
For the first half of
the knot, move the left working
cord to the right, passing over
the two cords in the center (fillers).
|
|
| |
|
| |
 |
|
Bring the right
working cord over
the left working cord, under
the fillers, and over
the left again.
For the second half, repeat these 2
steps. Start with the working cord
on the right,
followed by the left.
|
|
| |
|
|
| |
|
| |
Other Decorative Knots
|
|
|
| Here are links to other decorative knots
suitable for the Pet Collar: |
| |
|
|
|
|
|
| |
|
|
| |
|
| |
| |
 |
|
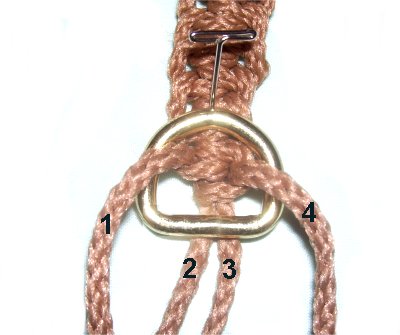
Step 7: After you have
made the first half of the collar,
mentally number the cords 1 - 4
Holding cords (2 and 3) should be under
the ring, with the working cords (1 and
4) passing through
it.
|
|
| |
|
| |
 |
|
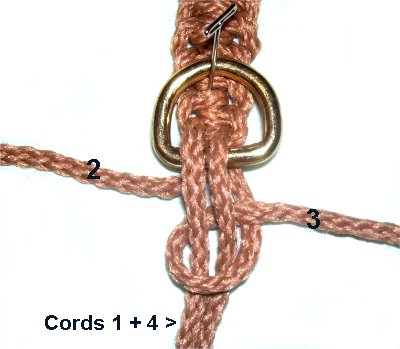
Step 8: The new
working cords
for the second half of the Pet Collar
are cord 2 and 3.
The two that were passed through the
ring (1 and 4) will now hold
the knots.
Tie the second half using the same
decorative knot.
|
|
| |
|
|
|
|
|
Finishing Touches
|
|
| |
|
Step 9: Place the collar
around the neck of your pet, to make sure it
fits properly. You should be able to slip
two fingers under it easily.
Adjust the size as needed.
Pull the working ends through the back
of a few knots, and apply glue to hold them in
place. Cut off the excess material.
Pass the remaining 2 cords through the shank of
the button (or the hole in a bead), in opposite
directions.
Pull on the cords until the button rests near
the last knots tied in the Pet Collar.
Check to make sure the button fits through the
clasp at the other end. Use a different
size button if it doesn't fit.
Tie a very
tight finishing knot to secure the
button, adding glue as you tighten it. When the
glue is dry, cut off the extra material.
|
| |
|
|
|
|
By
using any text or images on Free Macrame
Patterns, you are agreeing to our Terms
of Use
|
|
|
|
|
Have
any comments about the Pet Collar? Contact
Me.
|
|
|
| |
|
|
|
| |