|
|
| |
 |
| |
| |
|
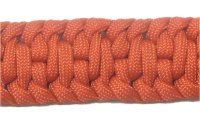
There are four Half Hitch Patterns described on
this page. They are all made by tying Half
Hitches onto a separate
holding cord, arranged in an alternating
pattern.
The sennits made with these techniques can be
used as part of plant hangers, or to make belts,
bracelets, leashes, or other long items.
Half Hitch
designs shown below:
- Basic Pattern: The most common type of
Half Hitch design
- Two-by Two Pattern: Features the
Double Half Hitch
- Progressive Pattern: Unique vintage
design
- Cobblestone Pattern: Vintage design found in
a Macrame book from 1903
|
|
|
|
|
|
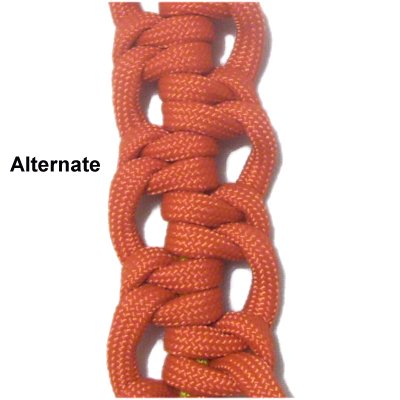
The Alternating
Half Hitch is related to
the designs on this page.
The main difference is that the knots are
tied with one cord onto the other rather
than a separate holding cord. |
|
|
| |
| |
|
|
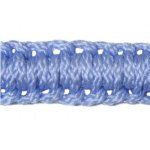
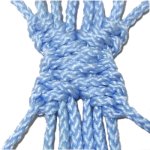
The Basket
Stitch is a variation of
the basic design described below.
There are SEVERAL holding cords, which
makes the design much wider. |
|
|
|
|
| |
|
|
| |
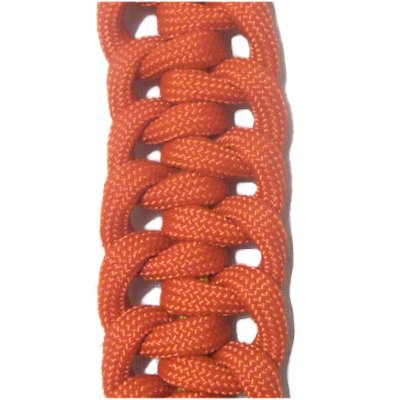
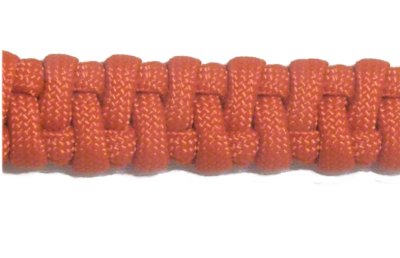
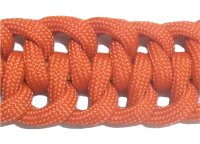
Basic Pattern
|
|
|
| |
|
|
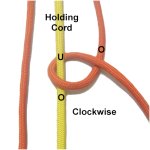
Step 1: Arrange three cords
vertically on your board or work surface.
The holding
cord is in the center.
Make sure it's secured at the top
and bottom, and has tension.
The working
cords are on either side of the holding
cord. Secure them at the top only.
|
| |
|
| |
|
|
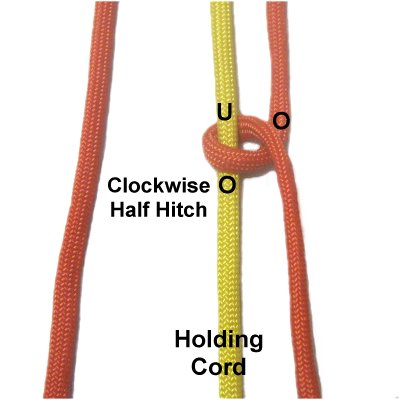
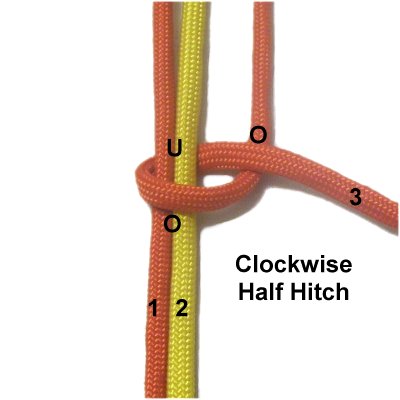
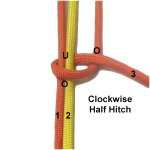
Step 2: Use the right
working cord to
tie the first Half Hitch, in a clockwise
direction.
A Half Hitch is tied by making a loop,
over
- under the holding cord, and over
the working cord.
|
|
| |
|
| |
|
|
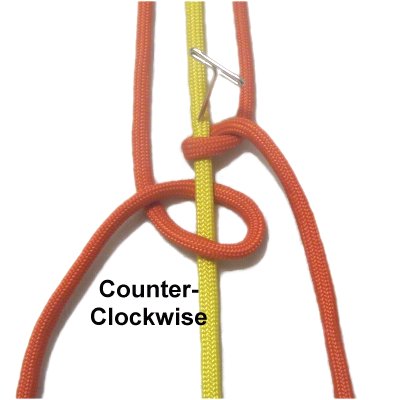
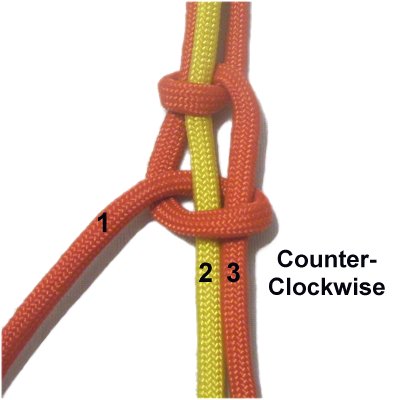
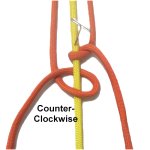
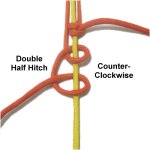
Step 3: Tie a Half
Hitch in a counter-clockwise
direction, using the left
working cord.
The Half Hitch is tied the same, no
matter which direction you make the loop
(over
- under - over).
|
|
| |
|
| |

|
|
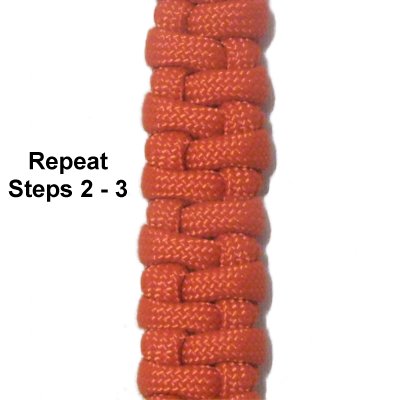
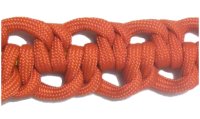
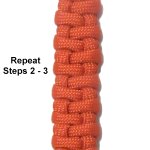
Step 4:
Repeat Steps 2 and 3 several
times, alternating between the two
working cords.
Push the Half Hitches close together as
you progress, and try to tighten them
the same so the sennit the same width in
all areas.
|
|
| |
|
|
| |
 |
| |
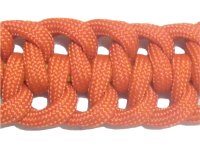
Two-By-Two Pattern
|
|
|
|
|
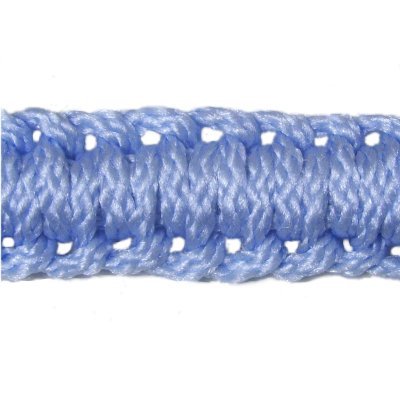
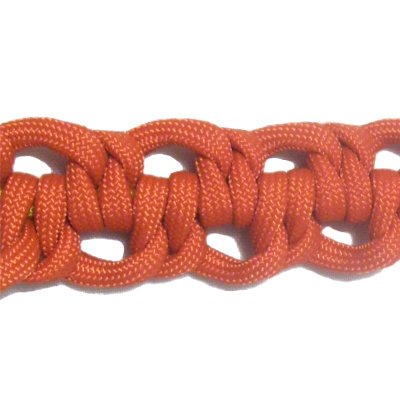
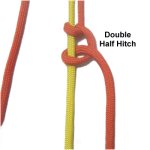
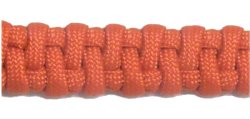
Half Hitch Patterns can be made with DOUBLE Half
Hitches. In some vintage Macrame books, they
are called Two-by-Two
patterns.
The loops along the edges are further apart than
in the basic pattern. Other cords can be attached
to the loops, which is why this design is used for
handbag straps.
Step 1:
Repeat
step 1 from the basic pattern. |
| |
| |
| |

|
|
Step 2: Tie a clockwise
Half Hitch with the right
working cord onto the holding cord.
|
|
| |
|
| |
|
|
Step 3: Using the right working cord
again, make a second Half Hitch
next to the first one.
Two
Half Hitches = 1 Double Half Hitch
Tighten
both knots firmly.
|
|
| |
|
| |
|
|
Step 4: Use the left
working cord
to make a Double Half Hitch. Rotate counter-clockwise.
|
|
| |
|
| |

|
|
Step
5: Repeat
steps 2 - 4 several
times.
Half Hitch patterns look better if the
knots are close together. So slide the
Double Half Hitches against each other
as you progress.
Make sure you keep the sennit as flat
as possible.
|
|
| |
|
|
| |
|
|
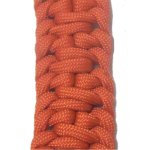
Cobblestone Pattern
|
|
|
|
|
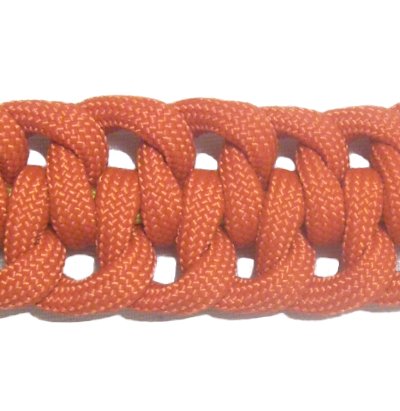
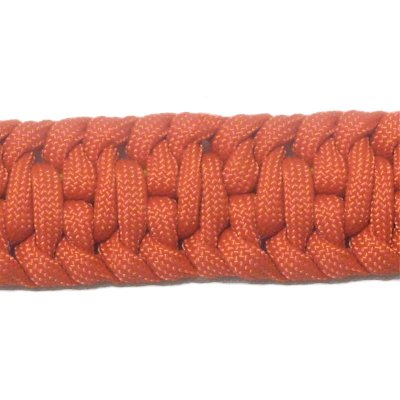
The Half Hitch patterns used in the early 1900's
are quite unique. This one is called the
Cobblestone Pattern, and it doesn't have any loops
along the edges.
The design is much more sturdy than the first two
patterns you've learned so far. It makes a nice
strap for a Macrame purse, as well as a
belt.
|
|
|
|
Step 1:
Set up the cords as you did in the previous
patterns, securing two working cords and one
filler vertically to your board.
Mentally number the three cords. |
|
|
|
|
|
Step
2: Use cord
3 to tie a clockwise
Half Hitch around cords 1 and 2. |
|
|
|
|

|
|
Step
3: Use
cord 1 to tie a counter-clockwise
Half Hitch around cords 2 and 3. |
|
|
|
|
|
|
Step
4: Repeat
steps 2 - 3 several times.
Make sure you push all the Half Hitches
close together. |
|
|
|
|
|
| |
| |
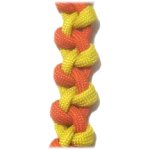
Progressive Pattern
|
|
|
| |
| |
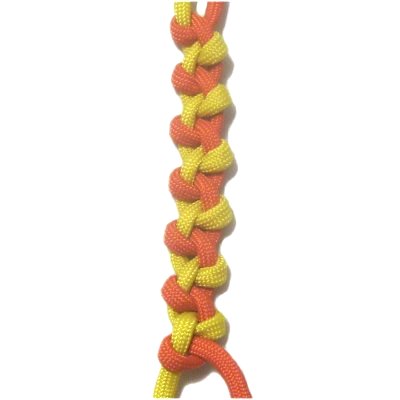
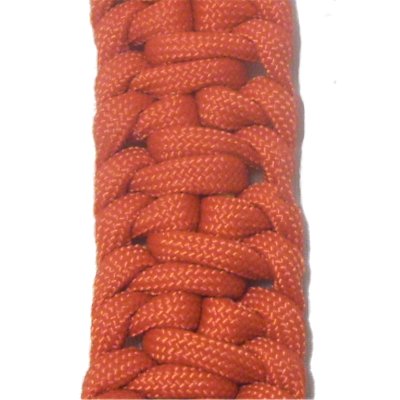
This is the most
unique of all the Half Hitch patterns on this
page. It's called a progressive
pattern, because the number of holding
cords changes. In the previous patterns, the
holding cords remained the same throughout the
design.
I found this technique in a Macrame book
written in 1899.
|
| |
|
|
|
|
The Basket
Stitch page has an expanded
version of the Progressive pattern.
The knots are tied around 1 holding cord,
then 2, and so on. That's the whole
point for this type of pattern.
Click on the link
to visit that page. |
|
|
|
|
|
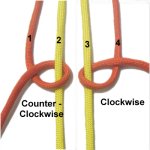
Step 1:
Secure four
cords to your board, or fold two cords
in half.
Mentally number the cords. The holding cords
are 2 and 3. |
|
| |
| |
|
|
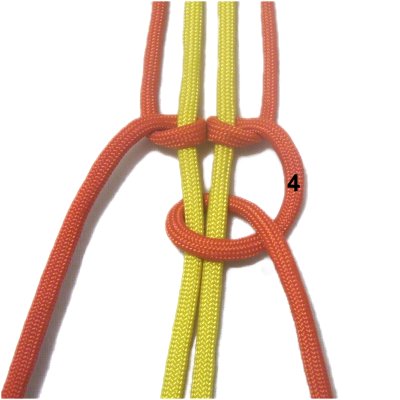
Step 2: Use cord
1 to tie a counter-clockwise
Half Hitch onto holding cord 2.
Use cord
4 to tie a clockwise
Half Hitch onto holding cord 3.
|
|
| |
|
| |
|
|
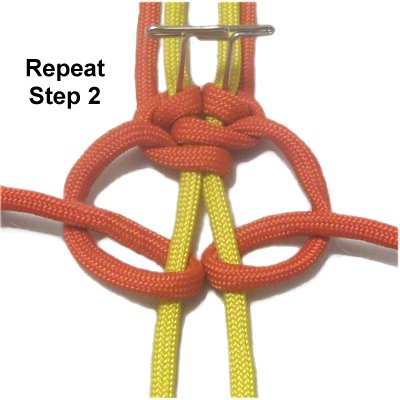
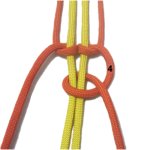
Step
3: Use
cord 4
to tie the next clockwise
Half Hitch around both
holding cords (2 and 3).
Tighten the knot firmly
and push it against the two knots made in
step 2. |
|
| |
|
| |

|
|
Step 4: Use
cord 1
next,
tying a counter-clockwise Half
Hitch around both
holding cords.
Half Hitch patterns look better when
the knots are close together, so push
this one against the others after
tightening.
|
|
| |
|
| |

|
|
Step 5: Repeat
step 2, tying a Half
Hitch with each working cord, onto
ONE holding cord.
|
|
| |
|
|
|
|
Step
6: Repeat
steps 3 - 5 several more times.
Make sure the Half Hitches are as close
together as possible, so you can't see the
holding cords.
|
|
|
| |
|
Designer's
Tip: Be
creative! Send me images of other
unique Half Hitch patterns you come up with on
your own.
I'll share them by putting the photos on our
Facebook page.
|
| |
|
|
|
|
By
using any text or images on Free Macrame
Patterns, you are agreeing to our Terms
of Use
|
|
|
|
|
Have
any comments about these Half Hitch Patterns?
Contact
Me.
|
|
|
|
|
|
| |
|