Description: The Basket Stitch
is a vintage knotting technique popular in the
early 1900's. This Macrame design is
related to other Half
Hitch Patterns that require a
holding cord.
What makes this knot unique is that you use
several holding cords, which makes the
alternating pattern much wider than other
sennits.
You could use this decorative knot in any
project that needs a wide band of knots, such as
a belt, purse strap, or a plant hanger.
Further down on this page is an interesting
variation called the Progressive Design. You can
make V and X shapes with the technique.
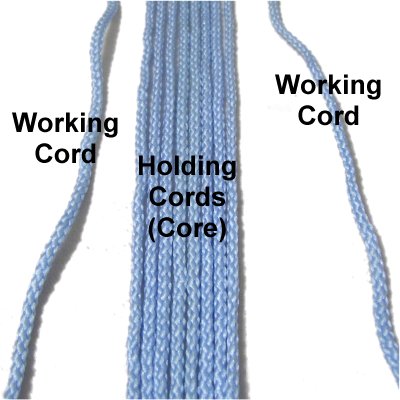
Step
1: To practice, fold three
or more 36-inch holding
cords in half. They are used to
form the core of the Basket Stitch.
Secure them at the top and bottom, making
sure each one is pulled taut.
Secure one end of a 36-inch working cord
to the right of the holding cords.
Do the same on the left.
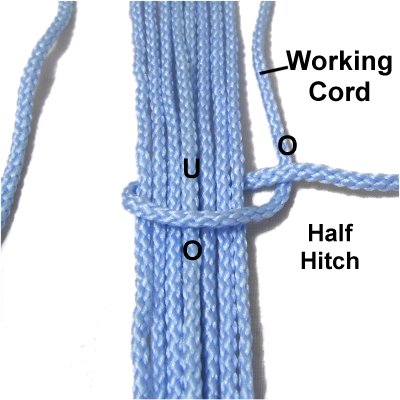
Step
2: Make a clockwise
Half Hitch with the right working cord,
passing it over
the front of all the holding cords, then under
them.
As you pull it to the right, pass over
the working cord.
Tighten it LOOSELY so the holding cords
don't overlap too much.
Designer's
Tip: The key to successfully making
the Basket Stitch is to keep it flat and
wide. So pay very close attention to the
arrangement of the holding cords, since they
determine the overall shape and size.
They will overlap somewhat, but try your best to
keep most of them resting next to each other.
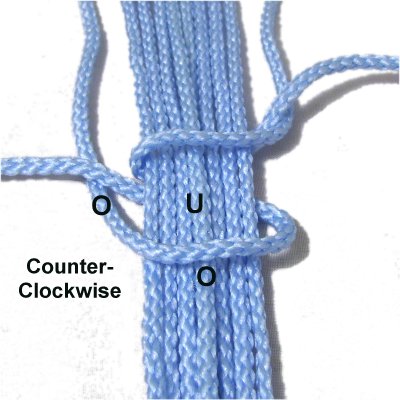
Step
3: Use the left working
cord to make the next Half Hitch in a counter-clockwise
direction.
Tighten the knot loosely.
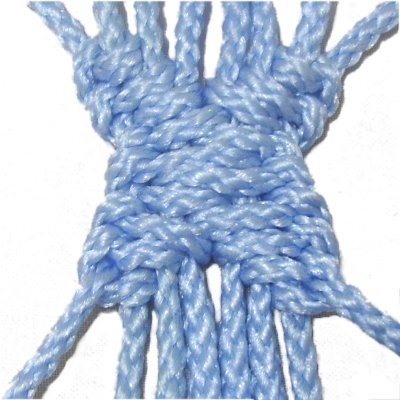
Step
4:Repeat
steps 2 and 3 several times to
complete the Basket Stitch.
Make sure the Half Hitches are close
together, but do
not overlap.
The loops along the edges should be the
same size.
Progressive Basket Stitch
The Progressive Basket Stitch is made by tying
the Half Hitches on increasing, then decreasing
numbers of holding cords. This results in an
X shaped design.
The Half Hitches will need to be tightened so the
knots are close together. Make sure the
holding cords don't overlap and remain straight.
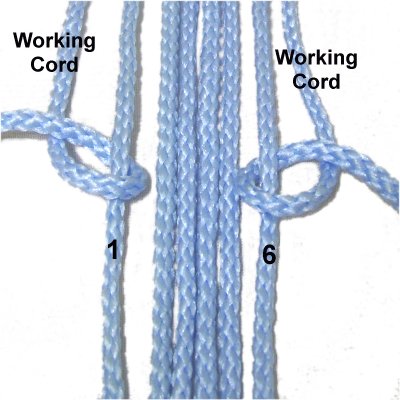
Step
1: Fold three 36-inch
holding cords in half, and secure them
vertically on your board. Place a pin at
the top and bottom, making sure they have
tension.
Mentally number them 1 - 6.
Secure one end of a 36-inch working cord
on each side of the holding cords.
Step
2: Tie a counter-clockwise
Half Hitch with the left working cord onto
holding cord 1.
Tie a clockwise
Half Hitch with the right working cord
onto holding cord 6.
Tighten the knots completely and secure
them when you are finished.
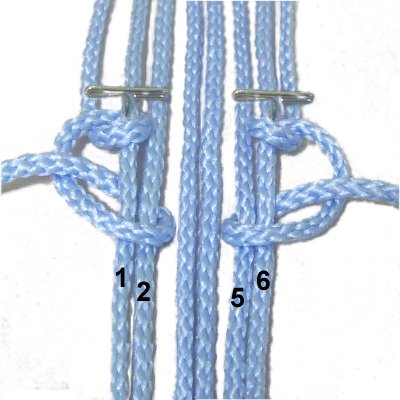
Step
3: Tie the next Half Hitch
with the left
working cord onto holding
cords 1 and 2.
Tie another Half Hitch with the right
working cord onto holding
cords 5 and 6.
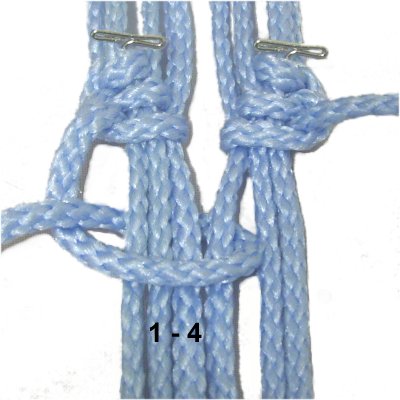
Step
4: Tie a Half Hitch with
the left working cord onto holding cords 1
- 3.
Tie a Half Hitch with the right working
cord onto holding cords 4 - 6.
Step
5: Tie a Half Hitch with
the left working cord onto holding cords 1
- 4.
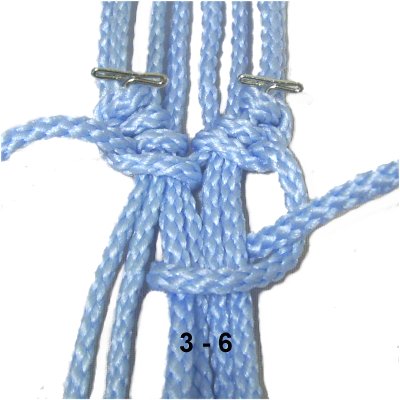
Step
6: Use the right working
cord to tie the next Half Hitch onto
holding cords 3 - 6.
Step
7: Tie a Half Hitch with
the left working cord onto ALL the holding
cords (1 - 6).
Do the same with the right working cord.
These knots should be tightened more
loosely than the others, so the center
area is as wide as possible.
Step
8: Repeat steps 6 - 2 (in
that order) to make the bottom half of the
X shape.
This image shows the number of holding
cords associated with each Half Hitch.
By
using any text or images on Free Macrame
Patterns, you are agreeing to ourTerms
of Use