|
|
| |
|
|
|
|
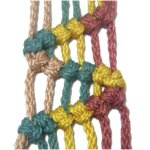
Description: The Vertical
Larks Head is a very popular variation of the
standard Larks Head knot. In some vintage
Macrame patterns, it is called the Buttonhole
Stitch.
The primary difference between a regular Larks
Head knot and this variation is that you tie the
two
loops separately.
Any time you use a Larks Head Knot within the body of
a pattern, you are likely to tie them as
described in the basic
design below.
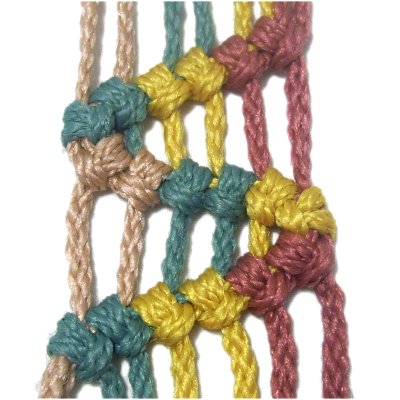
These knots are not always arranged
vertically. You can tie them in horizontal
and diagonal rows, and in opposite
directions. Included on this page is a
unique progressive
design that can be used to form
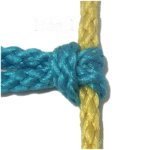
diagonal rows (shown above).
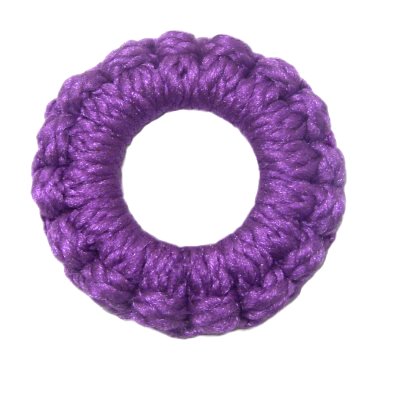
The rings in plant hangers and wall decorations
are often covered with Larks Head knots for
protection, or for decoration. The
instructions for covering
rings is also on this page.
|
| |
| |
|
|
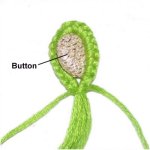
One of the
most common uses for this knot is to make
Buttonhole
Clasps for jewelry and
belts.
Click on the image or link to visit the
page. |
|
| |
| |
| |
|
|
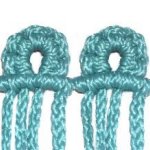
Buttonhole
Scallops were popular in
the late 1800's. They are used to decorate
the top or side edges of Macrame
projects.
Click on the image or link to see how they
are made.
|
|
|
| |
| |

|
| |
Basic Design
|
 |
| |
| |
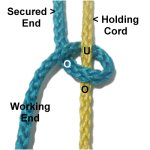
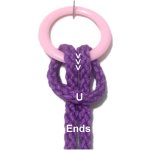
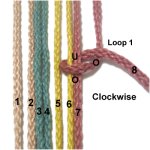
To practice
the basic Vertical Larks head design, secure one
holding cord vertically on your board (yellow in
images).
Secure one end of a working cord as well, to the
left of the holding cord. It can be arranged
in any direction, but it's best to place it
vertically.
Designer's
Tip: In a Macrame pattern, you may
not be told which direction to tie the Larks Head
knot. Just remember that the head of the
knot will face the same direction as where the
working cord is placed. |
|
|
| |
|
|
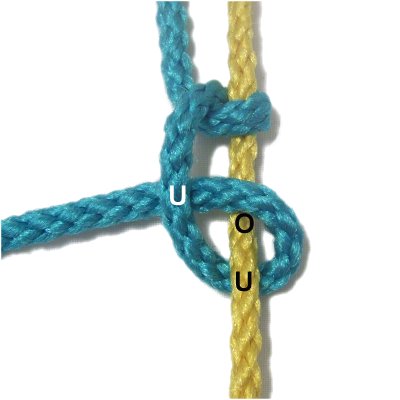
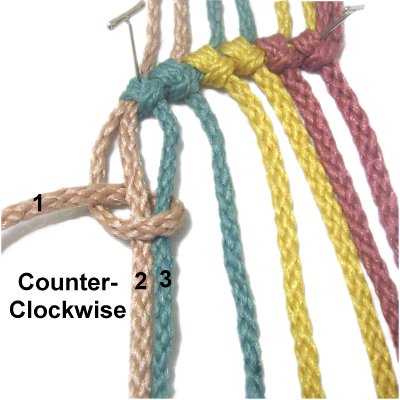
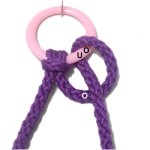
Step
1: Move the working cord over
- under
the
holding cord, rotating counter-clockwise.
As you pull it to the left, pass over
the secured end of the working cord
to complete the loop.
Tighten the first loop by pulling on
the working end.
|
|
| |
|
| |
|
|
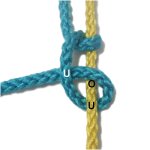
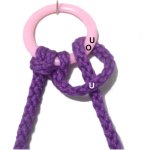
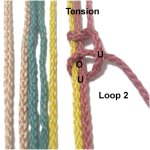
Step
2: To make the second loop, move
the working cord under
- over the holding cord.
As you pull it to the left, pass under
the working
cord.
Tighten the second loop.
|
|
| |
|
| |
|
|
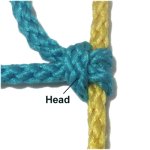
Since the working cord is on the left,
the head of the knot (vertical segment)
is facing left.
To make the knot facing right,
move the working cord to the right of
the holding cord, and tie the loops in a
clockwise
direction.
|
|
| |
|
|
|
|
|
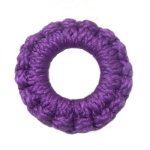
Covering
Rings
|
|
|
Covering rings with the Vertical Larks Head is
frequently done in Macrame projects that are hung
from hooks, such as plant hangers and wall
decorations. The material forms a protective
cover for the ring, and it looks nice, too.
You need one piece of cord material, at least 72
inches long. You will also need one 2-inch ring. |
|
|
|

|
|
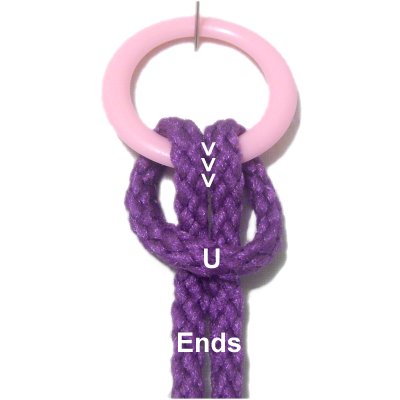
Step 1: Fold the cord
in half, and place it under
the lower portion of the ring.
The ends should be heading towards the
back of your board.
|
|
| |
|
|
|
|
Step 2: Bring both
halves
over
the ring, and down under the
folded area of the cord.
Pull firmly to tighten the Larks Head
knot.
|
|
|
|
|
Step
3: Make the first loop for
the vertical variation by moving the right half
over
- under the
ring, rotating counter-clockwise.
As you pull it towards you, pass over
the cord.
Tighten firmly. |
|
| |
|
| |
|
|
Step
4: Make the second loop by
moving the right half under
- over the ring.
Pass under
the cord as you pull it.
Tighten firmly.
|
|
| |
| |

|
|
Step
5: Repeat
steps 3 and 4 several times,
until the right side of the ring is
covered.
Use the left
half of the cord to cover the
left side of the ring. Rotate clockwise
when tying the knots.
|
|
|
|
Step 5,
continued: Push the knots close
together on both sides of the ring.
Tie as many knots onto the ring as possible, so
that there are no gaps.
|
|
|
|
|
|
|
Progressive Design
|
|
|
|
|
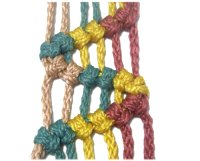
This progressive
design was found in a Macrame book
written in the early 1900's. So it's definitely
a vintage technique, and truly unique.
The progressive pattern is created by using
cords in
order. So each Vertical
Larks Head knot is made with a different
cord. Since the holding cords are
shared, the knots are connected and form a
diagonal row.
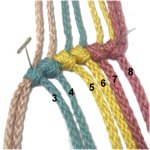
You need four cords, at least 45 inches
long. Using different colors is
optional. Fold each one in half and
secure them on your board vertically. Mentally
number them 1 - 8.
|
|
|
|
|
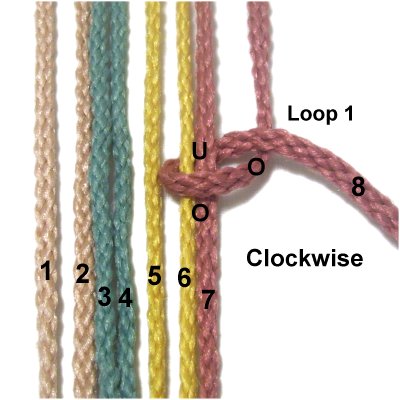
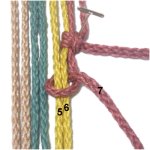
Step 1: Use cord
8 to tie a clockwise loop onto
cords 6 and 7, passing over
- under the holding
cords.
As you pull it right, pass over
cord 8.
Tighten the knot firmly.
|
|
|
|
|
|
|
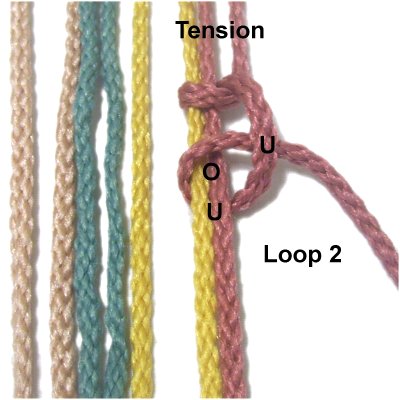
Step
2: Complete the Vertical
Larks head knot by tying the second loop under
- over the holding cord, and under
cord 8.
Tighten firmly, making sure the cords are
straight and have tension. Secure
the knot.
|
|
|
|
|
|
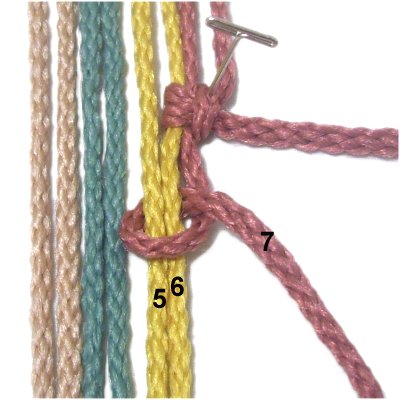
Step
3: Use cord
7 to tie the next knot, onto
cords 5 and 6.
The Larks Head knot should rest close to
the first knot.
|
|
|
|

|
|
Step
4: Cord
6 is the next working cord.
Tie the Larks Head knot onto cords 4 and
5. |
|
|
|
|
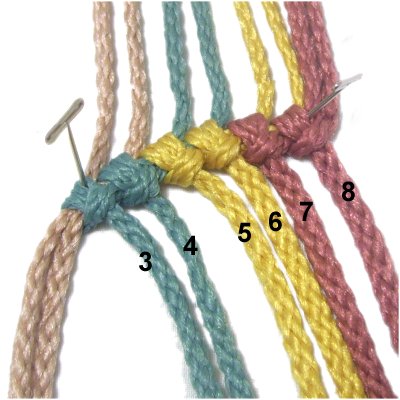
Step
5: Tie Larks Head knots
with cords
5 - 3 in the same manner.
The knots are tied onto the two cords next
to the one you are using.
Secure the last knot in the row (cord 3).
|
|
|
|
| |

|
|
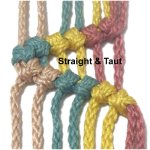
Step
6: Now you tie the second
row in the opposite direction (left to
right), using cords 1 - 6.
All the Larks Head knots are tied counter-clockwise.
Continued
below
|
|
|
|
|
|
Pull
each cord firmly as
you tighten each knot, so the
segment between the two rows are straight
and taut.
|
|
|
|
|
|
Repeat
steps 1 - 7 again, if you wish to
make a zigzag design with the Vertical
Larks Head knots. |
|
| |
|
| |
|
|
| By using any
text or images on Free Macrame Patterns, you are
agreeing to our Terms of Use |
|
|
|
| Have
any comments about the Vertical Larks Head? Contact Me.
|
|
|
|
|
|
|