|
|
| |
|
|
| |
Description:
These Interlaced Plaits are basic techniques you
can use when you need a long flat braided
design.
These woven patterns are seen in many works of
art. The ancient Egyptians were quite fond of
them, as were the Romans.
The first braid design shown is frequently
used in hairstyles, and is called the King
Solomon Plait.
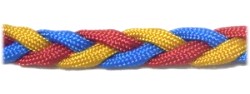
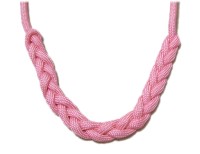
The second design is the Woven Plait,
which features multiple cords.
The third design on this page is called the Braid
Knot. It's made with a single cord.
|
| |
| |
|
 |
| |
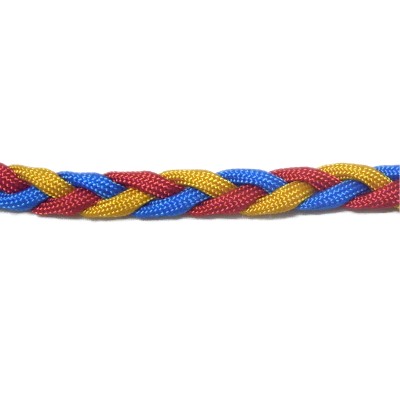
King Solomon Plait
|
|
|
| |
Description:
The easiest of the Interlaced Plaits, this
technique features crossing three cords in
alternate directions.
|
|
| |
| |

|
|
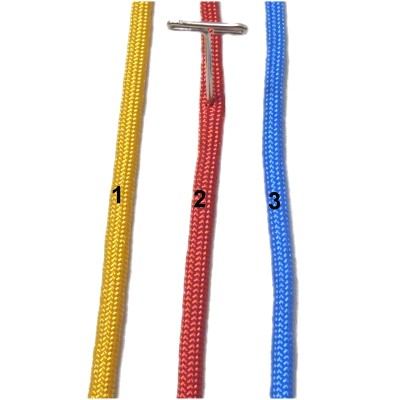
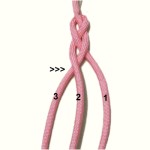
Step
1: Secure three cords
vertically on your board. They
should be at least 18 inches long.
Mentally number them 1 - 3.
Place a pin on cord 2 where you want to
start the braiding. |
|
| |

|
|
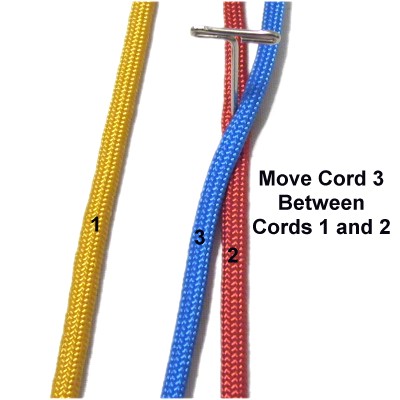
Step
2: Since Cord
3 is furthest to the RIGHT, move
it first, crossing over cord 2.
It should rest between cords 1 and 2. |
|
| |
|
| |
|
|
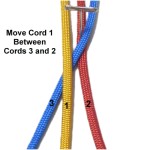
Step
3: The cord furthest to the
LEFT is Cord
1, which should be moved between
cords 3 and 2.
|
|
| |
|
|
Designer's
Tip: The concept for this design is
that you always move the cord furthest to the
right or left between the other two cords.
Alternate between
left and right when choosing which cord
to move.
|
|
|
| |
|
|
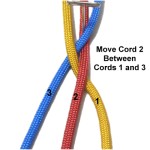
Step
4: The cord furthest to the
RIGHT is Cord
2, so move it between cords 1 and
3.
|
|
| |
|
| |
|
|
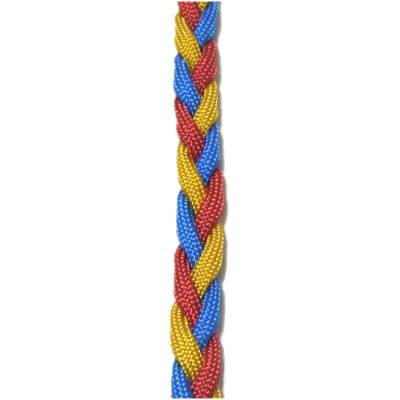
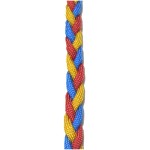
Step
5: Continue braiding the cords
in the same manner. Tighten as you
progress.
Cord
3 is the next one moved, since
it's furthest to the LEFT.
|
|
| |
|
|
|
|
|
Woven Plait
|

|
|
|
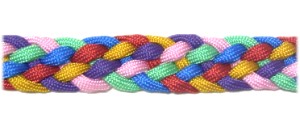
Description:
This type of braid is different than the other
Interlaced Plaits on this page. It
features weaving
several cords through each other moving in one direction.
Since you use a different cord each time, the
weaving alternates to form the design shown above.
Since you can make it any width, it's a great
option for simple belts and bracelet designs.
I recommend you use different colors when
practicing Interlaced Plaits for the first time. |
|
|
|
|
|
|
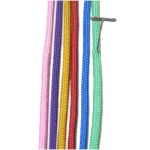
Step
1: Arrange 4 or more
cords to your board
vertically.
You can use as many cords as you'd
like, but there should be at least
four.
Place a pin on the cord furthest to the
right, at the place where you want to
start.
|
|
| |
|
|
|
|
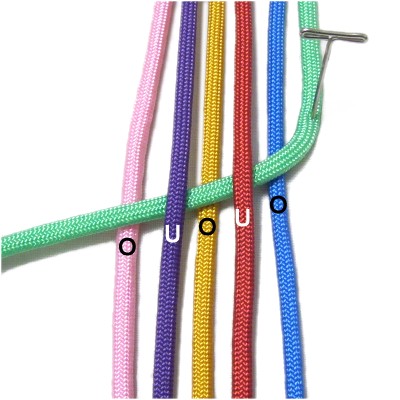
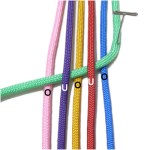
Step
2: Use the cord furthest to the
right, weaving it through the other cords.
Start by passing over
the cord closest to the one you are using,
then alternate under and over the others.
The working cord should be diagonal. |
|
|
|
|
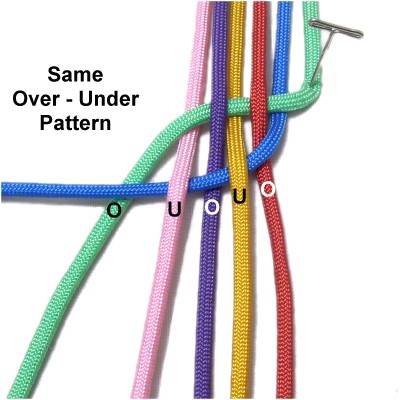
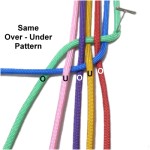
Step
3: Use the cord furthest to
the right again, and weave it through the
others.
The over
- under pattern should be the
same.
The last cord you pass it over or under
should be the cord used for the previous
row.
|
|
| |
|
| |
|
|
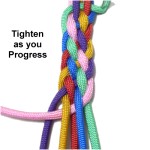
Step
4: Repeat
step 3 several more times.
Always use the cord furthest to the right,
and make sure the over - under pattern
remains the same.
Tighten the weaving as you progress, by
pulling each cord after the new row of
weaving is done.
|
|
| |
|
|
|
|
Braid Knot
|
|
|
|
Description:
The Braid knot is the most unique of the three
Interlaced Plaits. You will basically be
tying the King Solomon Plait using a loop rather
than three separate cords.
The ends of the cord come out at each end of the
braid, which means you can use this design for a
belt. To close it, you simply tie the
ends together.
"Braid Knot" is not the official name for this
technique. Please contact me if you know the
real name for it.
|
|
|
|
Preparation:
To practice, you need one cord, at least 60 inches
long.
When using this technique in a project, cut the
cord at least 4 x the finished length you plan to
make. |
|
|
|
|
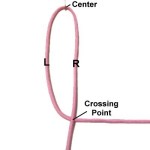
Step
1: Fold the cord at the
center and make a large loop, crossing right
over left.
The distance between the center and the
crossing point will be the finished size
of the Braid Knot. Adjust the size
so it's suitable for your project.
When practicing, make the loop 6 inches
long.
|
|
| |
|
|
|
|
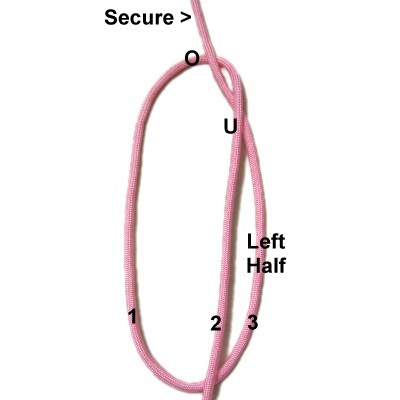
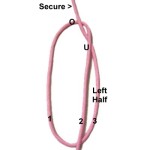
Step
2: Move the left half of
the cord along the right side of the
loop. Pass it under
- over the loop near the center
fold. Secure it to your board.
This gives you three segments to do the
braiding. Mentally number the
segments left to right.
|
|
|
|

|
|
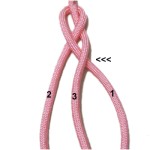
Step
3: Start the braiding by
moving segment
1, since it's furthest to the
LEFT.
Move it left, so it crosses over segment
2.
It should rest between segments 2 and 3
when you are finished. |
|
|
|
|
|
Step
4: Now you use segment
3, since it is furthest to the
RIGHT.
Move it left, crossing over segment
1, so it rests between segments 1
and 2. |
|
|
|
|
|
Step
5: Use segment
2 next, since it is furthest to
the LEFT.
Move it right, crossing over segment
3, so it rests between segments 3
and 1. |
|
|
| |
|
Designer's
Tip: All three Interlaced Plaits
have a specific concept for how they are
constructed.
The concept for this one is that you alternate
between the segment furthest to the right or
left. Move it between the other two
segments. |
|
|
|
|
|
Step
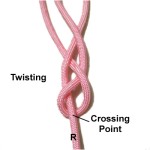
6: As you continue, there
will be unwanted twisting near the
crossing point of the large loop, forward
from where you are working.
Pull the right end of the cord out of the
loop and straighten the area. You
will need to do this regularly. |
|
|
|
|
|
|
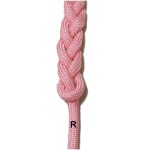
Step
7: Keep braiding until you
can't go any further.
You can tighten as you progress, but
chances are you will need to make
adjustments. The area most
likely to be loose is where you
finish.
Pull out the slack as needed and do a
complete tightening of the entire Braid
Knot. |
|
| |
| |
| |
|
|
| By using any
text or images on Free Macrame Patterns, you are
agreeing to our Terms of Use |
|
|
|
| Have
any comments about the Interlaced Plaits? Contact Me.
|
|
|
|
|
|
| |
|