The Cord Measurements you make for Macrame
include determining the number of cords you need,
their lengths, and the total amount of material to
purchase for your project.
This page describes the step-by-step process you
need to follow when:
You create a design on your own without a
written pattern.
You make any changes to a Macrame pattern.
Important:
You should make all the measurements and
calculations BEFORE cutting any
material. Write down the result for each
step in the process described on
this page.
Supplies
Needed:
Paper
Pencil (So you can erase mistakes)
Flexible measuring tape or ruler
Calculator
Math Conversions
Here are some basic math conversions you can use
for cord measurements, and to understand the
patterns on this site.
1 inch = 2.54 Centimeters
1 inch = 25.4 Millimeters
6mm material = approximately 1/4-inch (0.24
inches)
12 inches = 1 Foot
3 Feet = 1 Yard
36 inches = 1 Yard
1 Yard = 0.9 Meters (Often considered the
same size)
Circumference of Ring = 3.14 x the diameter
(across center)
Cord Measurements for Width
The information below describes the process you
must follow in determining the WIDTH of your
project when it's finished.
The cord measurements and details you get in steps
1 - 5 will determine the number
of cords to cut for your project.
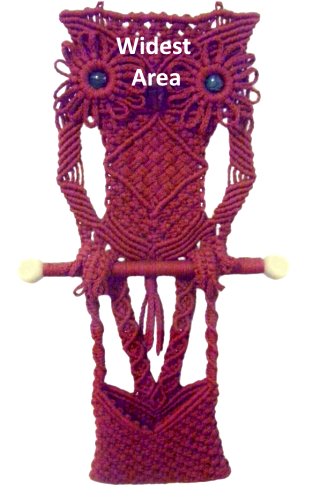
Step 1: Determine the Finished Width
You must start by calculating the
finished width (side to side) you are
aiming for, in the widest
area.
This
is the Owl
Pouch. The
widest area is at the top, where the
cords are mounted.
Use
a tape measure to decide the width
you want, then write that size on
paper (in inches).
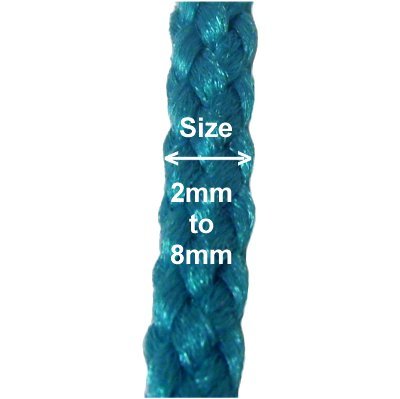
Step 2: Material Size
You MUST know the actual
size of the cord material in millimeters,
which is the width from edge to edge.
Youshould
always measure
the material before using it, since
labels can be inaccurate.
Important:
When making changes to a pattern by using a
different size material, the finished width
will increase or decrease.
You may need to change the number of cords, or
the overall design, to keep the size the same
as the original pattern.
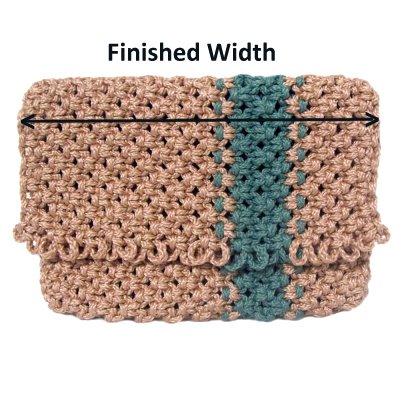
This is the Striped
Clutch, which is an old
pattern I decided to alter by changing
the material size from 6mm to
4mm.
I had to increase the number of cords
used in the design so the width stayed
the same.
Step 3: Make a Knotting Plan
You now need to create a written
plan and/or drawing showing the
following information, so you can make accurate
cord measurements:
The specific Macrame knots you plan to use
for your design, and how many cords are needed
to make them. Remember that you can add
(or subtract) cords if necessary.
Details about how the knots are constructed,
and how wide
they will be, especially if you are using
rings. (See examples below)
Details about the spacing between the knots,
whether they are close together or separated
by space. (For step 9)
Decide now if you plan to mount ALL the
cords at the beginning, or if you want to
start with a few, then add the rest later.
Determine if you need extra
cords for clasps, certain knots, or if you
will be adding more cords to widen an area.
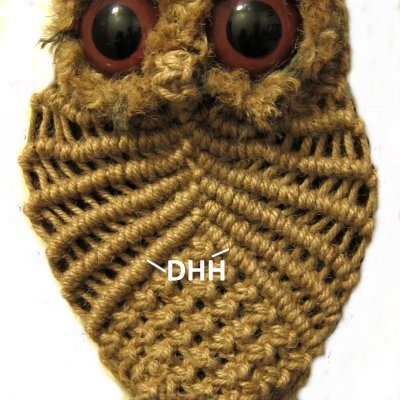
Example
1:
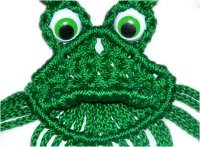
The All Natural
Owl's wings are made with
Double Half Hitches (DHH), which have two
loops that rest side-by-side.
When tied with 6mm size material, both
loops will measure 12mm, which is
approximately 1/2-inch.
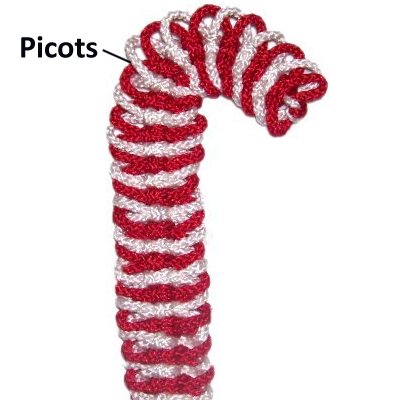
Example
2: This Candy
Cane was made with Square
Knot Picots, which are loops that stick
out on each side of the knots.
They can be made any
size, so you would need to write
down how wide you plan to make them.
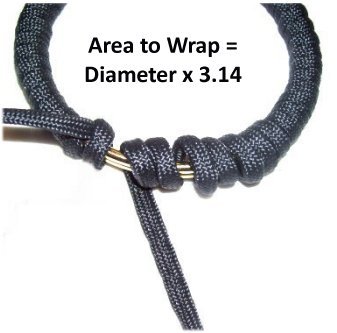
Step 4: Determine Ring Sizes
You need to know the circumference
of the rings you plan to use for the design, in
order to make these cord measurements as
accurate as possible.
Circumference
= Total area of the entire ring (in inches)
Diameter =
Measurement from edge to edge (in inches)
Measure across the center to get the
diameter.
Diameter
x 3.14 = circumference.
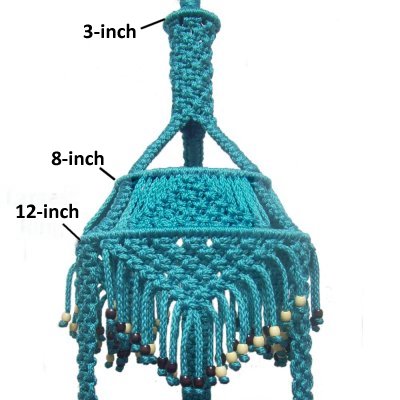
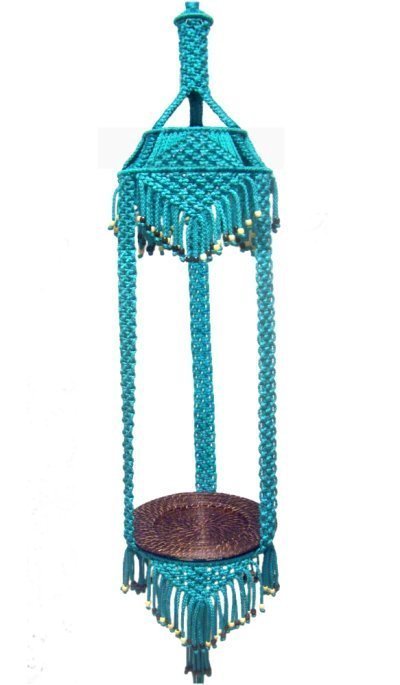
The Fringed Table has three rings at
the top in different sizes. In a
case like this, you need to know the
circumference of EACH
ring.
The main thing you need to consider when using
rings is that you can only tie a certain number of
knots onto a ring, before you run out of
space.
It's possible that you may need to add
cords to cover rings, especially if they
increase in size.
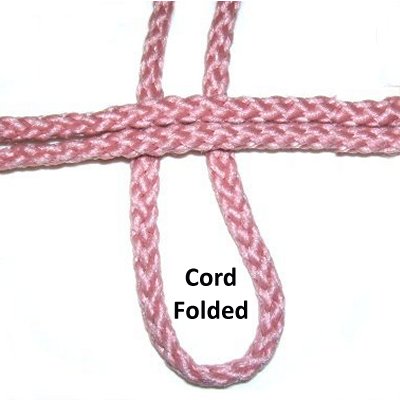
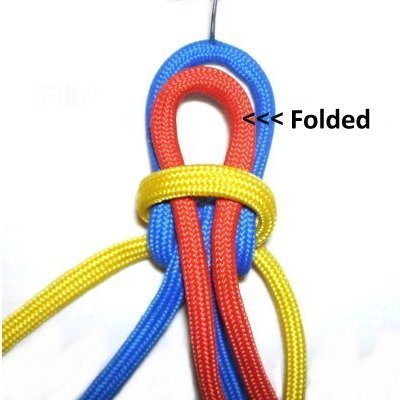
Step 5: Determine Mounting
Technique
Mounting the cords to a ring, dowel, or
other cord is done at the beginning of
the project.
You MUST know if the cords are to be folded,
since this will affect your cord
measurements for both width and length.
When making
Buttonhole clasps, you start out with the
cords straight, beginning the knots in the
center. Then you fold the knots to form
the clasp.
Folding at
any point in the design usually
means you need to cut fewer cords (1/2 the
amount).
Step 6: Primary Cords
Now it's finally time to determine how many cords
you need to cut, which is based on the cord
measurements and information from steps 1 -
5.
The PRIMARY cords are the ones that make up the
majority of the design.
Step 6A: Multiply
the Finished
Width (from step 1) by the number of
cords shown in the table below.
The quantity depends on whether they are folded
(see step 5).
Size
of Material
Folded
Not Folded
6mm
2 cords per inch
4 cords per inch
4mm
3 cords per inch
6 cords per inch
3mm
4 cords per inch
8 cords per inch
2mm
6 cords per inch
12 cords per inch
1mm
12 cords per inch
24 cords per inch
Example:
Finished Width = 10 inches.
For 6mm material, you choose 2 cords per
inch, since you want to fold the cords during
the mounting process.
Multiply 10 x 2 = 20 cords.
Step 6B:
Divide the total number of cords by the quantity
you need for the specific knots you plan to
use.
The result must be a whole
number (not a fraction). Make
adjustments to the quantity as needed.
Example:
Alternating Square Knots require 4 cords per
knot. In your design, there will be 40
cords to work with after mounting, since you
plan to fold them in half.
Divide 40 by 4 = 10 (whole number).
That means you have the correct amount of
cords to make Square Knots.
Step 6C
(optional): Now you need to
determine if the total number of cords will fit on
the rings, if you plan to use them. This is
based on the type of knot used to attach the cords
to each ring.
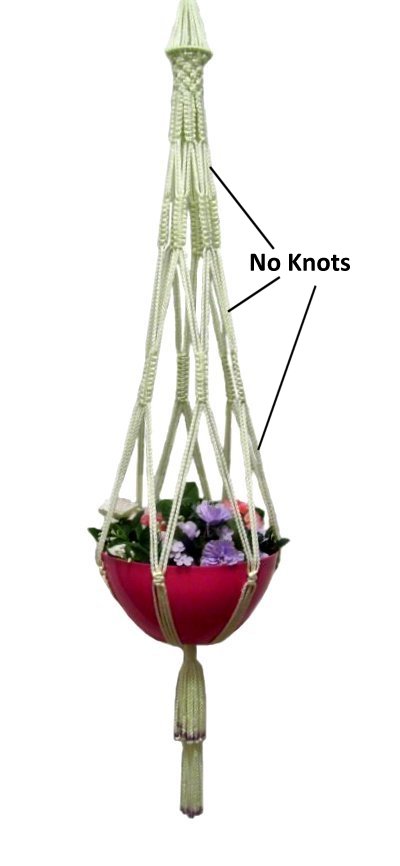
Important:
This step DOES NOT apply to a ring where you
simply fold
the cords without using knots, like at the top of
a plant hanger.
Designer's Tip: Sometimes you can fit
more knots on a ring if the material is flexible
and the knots are very tight. So don't be
afraid to try a smaller ring size than your cord
measurements suggest.
Example:
Ring diameter = 6 inches
Multiply by 3.14 = 18.84 in. (total area to
cover)
Double Half Hitches are used to attach the
cords to the ring. They are each made
with 2 loops. Using 6mm material, each
cord will produce a 12mm knot (1/2-inch).
Multiply 40 by 1/2-inch = 20
inches.
The result is close enough to the total area
on the ring that you should be able to get all
the cords on.
Keep in mind that flexible materials may
require you to add more knots and/or cords,
since they grip the ring more tightly.
Step 7:
Other Cords
Here are common situations where you need extra
cords. Be sure to write these all down on
paper separately,
since they are likely to have different cord
measurements than the primary cords.
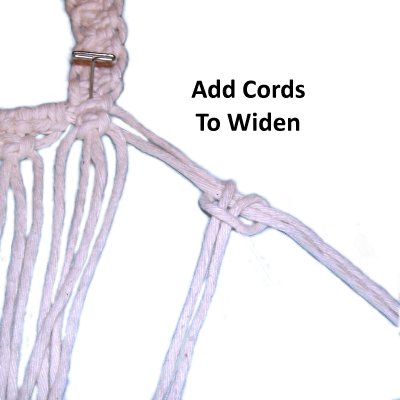
Widening:
Look at your design plan/drawing (step 3) to
see if you will be adding cords to widen an
area.
Rings:
When increasing
ring sizes, you may need to add more cords to
the larger ring. Also, you may need a
cord to wrap a ring, which will be a different
size than the others.
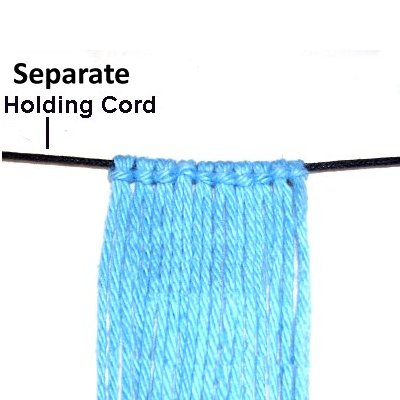
Holding
cords: Write down any SEPARATE
holding cords that you will need to add (not
primary cords used to hold knots).
Extra
cords for certain knots:Wrapped
Knots and Sliding Clasps
require cords that are shorter than the
others.
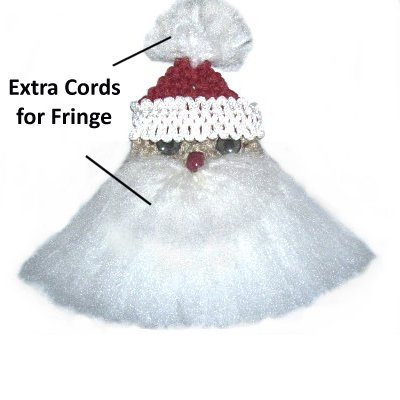
Fringe:
Certain types of fringe require separate
pieces of material, which you need to
determine. You may be able to use
scraps instead of cutting these from the roll,
if the fringe is short.
Cord Measurements for Length
Now it's time to determine the cord measurements
for LENGTH. You should have several groups
of cords written down, such as primary cords,
holding cords, extras, etc.
You need to make the calculations for each
group, keeping them separate from one
another.
These cord measurements include the finished
length, the length of the primary cords, and the
length of the remaining cords.
Step 8: Determine the Finished
Length
The finished length is the size you are
aiming for, from top to bottom (or end
to end).
When I made the Fringed
Table, I wanted the
finished length to be close to 72 inches
(183 cm) from the ring at the top to the
bottom of the fringe.
The finished length is used to
calculate how long you will cut the
primary cords for that project.
The following cord measurements should be made
with a flexible tape measure or ruler. Write
down the results on your paper.
The details shown below are for the most popular
types of Macrame projects, just to give you some
basic guidelines for length
measurements.
These guidelines
won't apply to every project. Just
do your best to determine what you want the item
to measure when it's finished.
When
making a plant hanger or hanging table:
Run your tape measure from the hook in
your ceiling down to where you want the
pot or table top to rest.
Make sure to include any fringe you plan
to make at the bottom.
When
making a Wall Decoration:
Measure the actual position on your wall
where the item will rest.
Be sure to include any rings, fringe, etc.
that will add to the overall length.
When
making a belt:
Measure the area where it will rest, near
your hips or waist. Add extra length
if you plan to make a tie to secure it,
like in this Window Belt.
When
making jewelry:
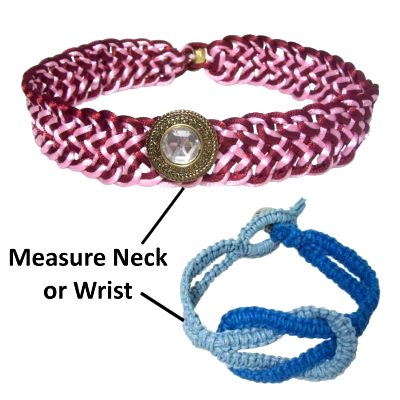
Measure all the way around your wrist if
you are making a bracelet.
Measure around your neck (closely) if you
are making a choker-style
necklace.
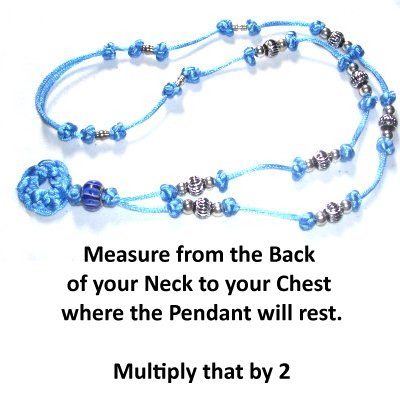
When
making a pendant necklace:
Measure from the back of your neck to the
area on your chestwhere the pendant will rest.
Multiply that by 2 to get the finished
length.
Step 9: Length of Primary Cords
Look at your knotting plan to determine if the
pattern will have an open weave,or if the knots are resting close
together.
Choose the most appropriate cord lengths,
described in Designs
A - C (below).
Design
A: Open Weave
An open weave is a design where the
knots are separated by more than 1-inch,
so there are areas without anyknots.
This also applies to projects that have
only a few rows of knots, followed by a
long fringe without knots.
Simple braiding is considered an open
weave because there are no actual knots,
the cords just cross and fold.
Multiply
the Finished Length by 2.5 if
the open weave is 50% or more of the
overall design, like
in this Lace
Planter.
Design B:
Partial Open Weave
This applies to Macrame designs where
there is up to 1-inch of space between the
rows.
Multiply
the finished length by 3 if the open
weave is 25% to 50% of the overall
design.
Design
C: Closed Weave
This
applies to designs where the knots
rest close together.
Multiply
the Finished Length by 4.
Step
9, continued: Complex Knots
Certain types of knots are complicated,
with many folds. Chinese
Button knots,
for example, require more material than
other knots.
Determine the number of complex knots in
the design, and multiply that by 5 inches.
Complex knots,
continued: Determine the length of
the cords based on the information for Design
C above (closed weave), then ADD what you
need for the number of complex knots.
For example: Wall hanging with button knots
30 inches of closed weave (30 x 4 = 120
inches)
Five button knots (5 x 5 inches = 25 inches)
Total length is 120 inches + 25 inches = 145
inches
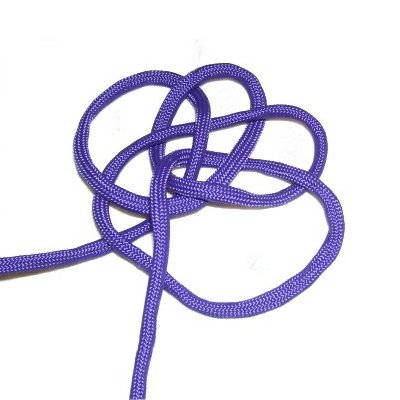
Step 9,
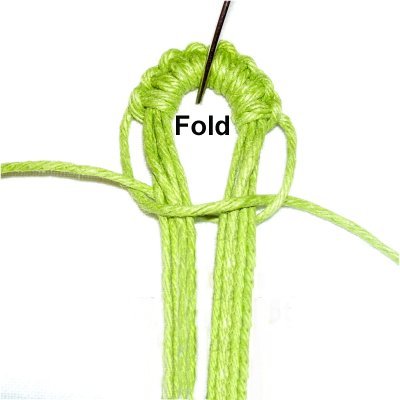
continued:
Cord are often
FOLDED to form loops.
Sometimes a knot begins by folding
one or more cords. This includes
picots, as shown in the next
image.
Your cord measurements MUST take
any folding into account, or they
won't be accurate.
Double
the lengthif the cords are folded at any
point in your design.
Step 10: Lengths for Other Cords
In step 7 you wrote down several types of added
and/or extra cords. The cord measurements
for each type needs to be calculated
individually, depending on where they are placed
and why they've been added.
The most common situations are described below.
Holding
cords that are NOT USED to tie
any knots should be at least the finished
length + 8 inches.
Double
the length if the cords are folded.
When holding cords are used to tie knots,
they should be the same length as the
primary cords (step 9).
The cord measurements that apply when
adding cords to widen
an area depend on where they are
placed.
Mentally divide your design into three
parts -- top, middle, and bottom.
Top Area:
Same length as primary cords.
Middle Area:
1/2 the length of the primary cords.
Bottom Area:
1/4 the length of the primary cords.
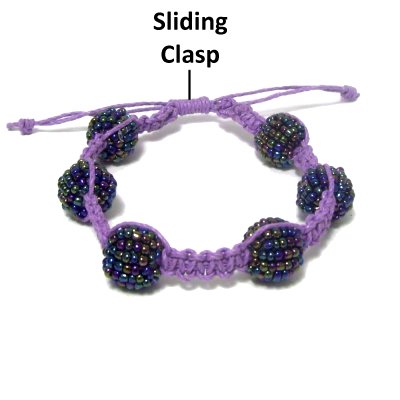
Sliding
Clasps made with knots
require at least 18 inches of material.
Saving scraps and remnants will provide
you with the short cords you need, so you
should always keep the longest pieces.
For Wrapped
Knots 1.5 inches tall, use
a 36-inch cord.
The cord should be 45 inches long if you
plan to make a 2-inch knot.
To wrap a
ring, multiply the diameter of the ring x
3.14 to get the circumference (total area
to be wrapped).
6mm material = Area x 4
4mm material = Area x 6
Fringe designs
that require extra cords can sometimes be
made with scraps. Cut material from the
roll if the scraps aren't long enough.
The cords should be at least the desired
length of the fringe + 4
inches. Double
the length if you are folding the cords in
half.
Total Amount to Purchase
Step 11:
The cord measurements from step 1 - 10 will now be
used to determine how much material to purchase:
Primary
Cords: Length x the total number you
need (in inches).
Other
Cords: For each type, do the
same thing. Multiply the length you
wrote down x the number of cords.
Add up
all the results.
Divide by 36 to get the YARDS you need to
purchase (or by 12 to get the feet).
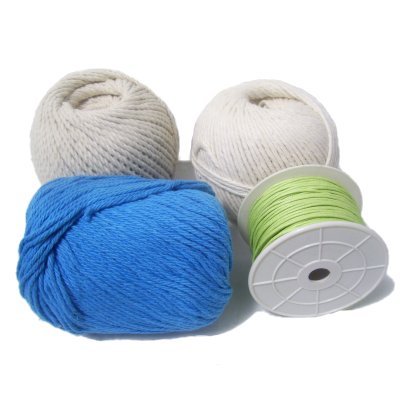
When
purchasing Natural
Materials like Cotton,
Jute, and Hemp, you may need to convert
yards to feet.
Metric
Conversion:
Meters and yards are so similar that you can just
use the yard measurement if you find material sold
by the meter.
Important:
Most of the time, the rolls you purchase will
contain more than you need. You can save the
remnants for other projects.
However, there are times when the amount in the
roll is very close to how much you
need. In that case, you may find the
last cord you try to cut is too short.
PURCHASE AN EXTRA ROLL. It's always better
to have more in case a cord breaks or is damaged.
By
using any text or images on Free Macrame
Patterns, you are agreeing to ourTerms
of Use