Sliding clasps are very popular closures for
bracelets. You can use these techniques
for necklace designs, but it's not a common
practice.
The first section of this pagecontains important
topics to show you the basic
concept. Read the information while you
practice making a Square knot clasp.
Below those instructions are examples of other
knots that can be used to make adjustable clasps
for Micro-Macrame bracelets.
Once you have practiced, try experimenting with
your favorite decorative knots to create your
own unique jewelry clasps.
General Design Tips
When practicing Sliding Clasps, I recommend you
create a simple bracelet so you can experiment
with all the designs on this page.
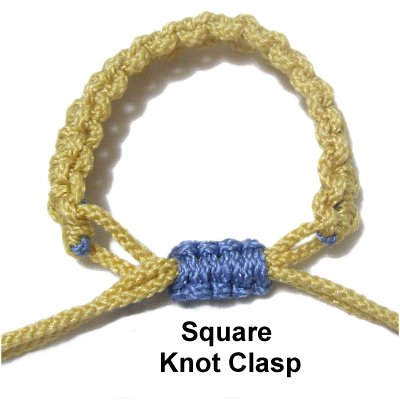
In the instructions below, a sliding clasp is made
using Square Knots,
to demonstrate some important points. The
same steps apply if you are using other knots.
Choose
the Right Knot
The decorative knot used to form the clasp
needs to be the type that can be attached
to one or more cords.
Choose a knot that's FLAT, so it's
comfortable. Round or bulky knots should
be avoided.
You will usually need to tie a short sennit of
the knot you select, so make sure that is
possible. A single large knot can
sometimes work, too.
Look through the list of knots in the Learn
Macrame section, and experiment
with several types until you find one you like
for your project.
Prepare the
Cords
When using this type of clasp in any jewelry
project, add
5 - 8 inches of material
when you cut the cords for the bracelet.
You will need to open the bracelet wide enough
to pass your hand through, so the extra material
is important.
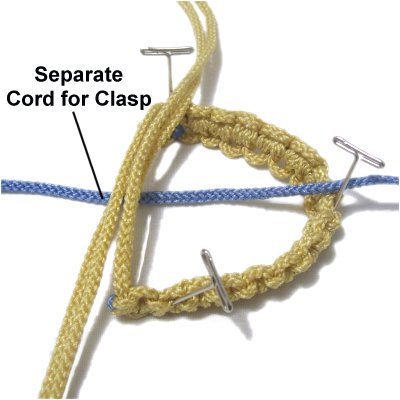
A separate
cord is cut for the clasp. Make
sure it's long enough to make the type of knot
you plan to use.
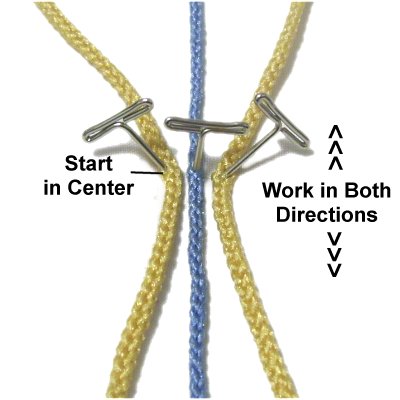
Make
the Bracelet
You should start the bracelet design in
the center,
and work in both directions.
This way the knots are balanced, and you
are left with ends that are close to the
same length.
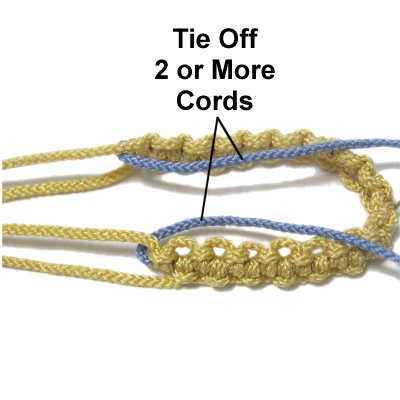
Finish
off some cords
Sliding Clasps work better if there are
no more than 4 cords passing through
them.
So select two cords from each end of
the bracelet, then finish off the
remainder.
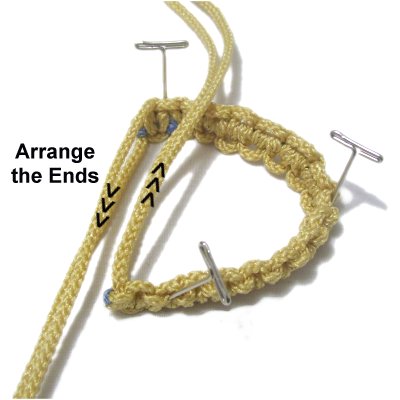
Arrangement
Sliding clasps are usually tied vertically,
so place the bracelet on the right as
shown in this image. It can either
rest on the edge, or be placed flat.
The bracelet cords should be arranged
vertically as shown. Do
not cross them.
Important
Update: The previous instructions
suggested you cross the bracelet cords, but it
actually works out much better if they rest next
to each other, as in the image above.
Placing them side-by-side will help them slide
through the clasp more easily.
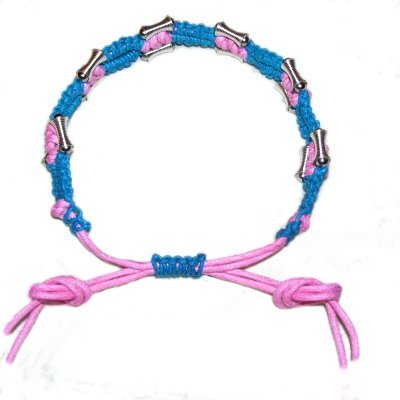
Clasp
Cord
Place the clasp cord under the bracelet
cords horizontally,
or in the most appropriate direction for
the knot you plan to tie.
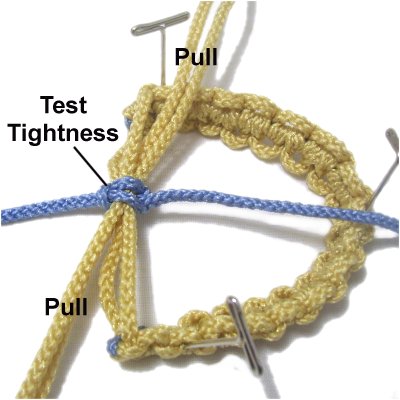
Test
the Tightness
Tie one Square knot with the clasp cord,
then check to be sure it's loose enough
for the bracelet cords to slide
through.
Tighten or loosen the knot as needed.
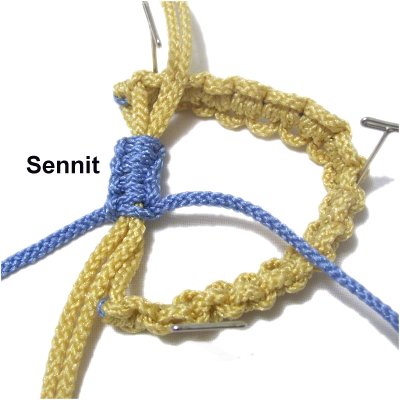
Create
the Sennit
Now you tie additional knots to make a
sennit. The clasp should be 1/2-inch
long, so tie enough knots to reach that
length.
They should be the same tightness as
the first knot, and rest close
together. Continued
Below
Important:
Open and close the bracelet several times, making
sure the clasp does not twist. The knots are
too loose if twisting occurs.
The bracelet cords should slide through with some
resistance. Make adjustments now, before
moving on.
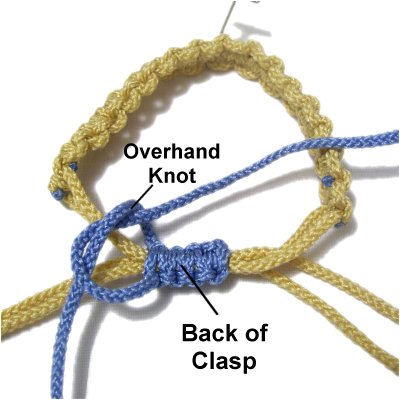
Identify the back and front of the clasp, in
preparation for the next step.
Make sure it rests in the BACK of the
clasp, and is as flat as
possible. Read
tip below
Designer's
Tip: You cannot use glue when
making sliding clasps. So most finishing
knots will have a tendency to loosen over time.
When you are working with a material that can be
melted, like Nylon, take advantage of that.
Since you are practicing, try cutting off the ends
of the clasp cord to see if applying a flame to
the stub will be enough to stop the knots from
loosening.
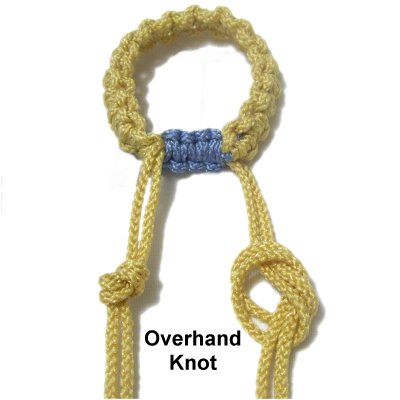
Finish
the Ends
You must now finish off the ends of the
bracelet cords, so they can't slide out
of the clasp.
The Overhand
knot is the easiest, but
other knots will work, too. Beads
can also be applied.
Finish
the Ends, continued: Make sure the
bracelet is in the closed
position.
Measure from the clasp down at least 1 - 2
inches. Tie the finishing knots loosely
at the point measured.
Open the bracelet all the way to the knots, and
see if it's wide enough for your hand to pass
through.
Change the placement of the knots if needed,
then tighten them.
Now that you've learned how to make sliding
clasps with the Square knot, it's time to learn
how to use other types of knots.
The Wrapped knot, the Half Hitch, and the Vertical
Larks Head knot are all described
below.
After you have practiced all three, EXPERIMENT
with other knots.
Wrapped Knot Clasp
Sliding clasps made
with the Wrapped Knot
have one important advantage:
The ends of the clasp cord can be cut off
completely after the knot is tightened, so you
won't need finishing knots. This technique
is a great option for slippery materials like
Nylon and Satin.
The down side is that this technique does not work
with very fine material less than 1mm thick.
The Wrapped knot will be too small.
It's better to use it with material 1mm to 2mm
thick.
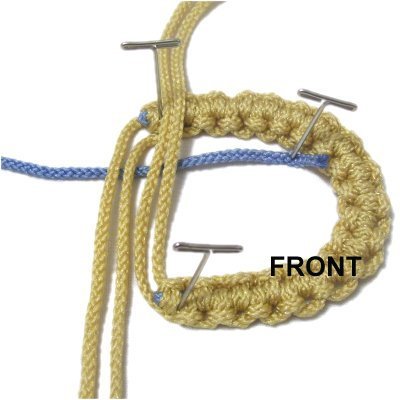
Arrange the
bracelet on the right side of your
board. Position the cords vertically
in opposite directions.
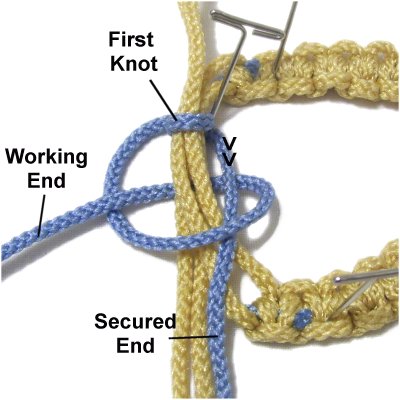
Tie an Overhand knot at one end of the
clasp cord. Secure the knot to the left of
the bracelet, with the cord arranged vertically
as shown.
Fold the cord by
moving the working end upward, towards the
secured portion.
Secure the folded area.
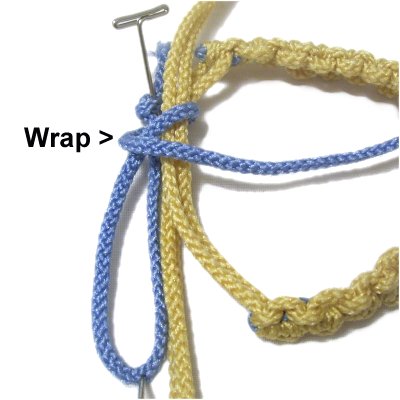
Wrap the working
end around the bracelet cords, as well as
the secured end of the clasp cord.
Wrap firmly but not
tightly, since the bracelet cords
need to slide through the knot. Wrap
for at least 1/2-inch.
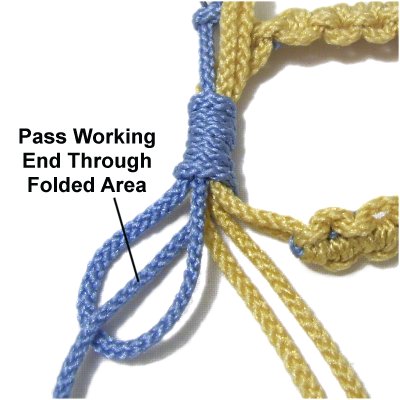
Pass the
working end of the clasp cord through the
folded area, which looks like a loop.
It's better to pass it through from the
bottom up.
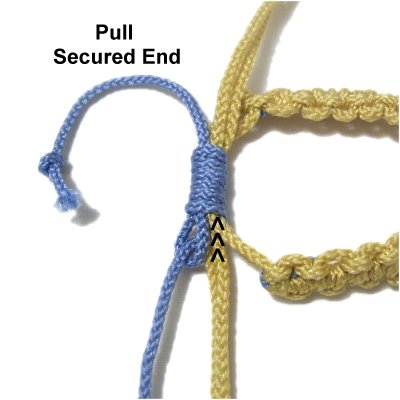
Pull the secured
end of the clasp cord. The loop and
working end will be pulled
inside the Wrapped Knot.
(indicated by arrows)
Make sure it's pulled about halfway
through the knot.
Pull the bracelet cords to be sure they
slide through the knot easily.
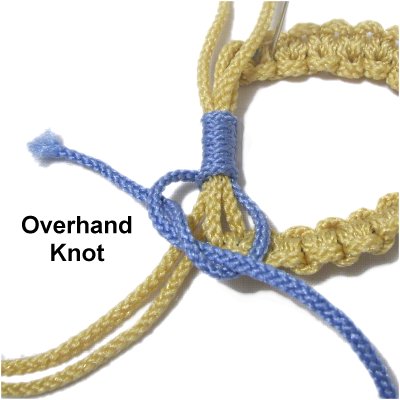
Finish the
clasp by cutting off both ends of the
clasp cord flush with the edge of the
knot.
Tuck the stub inside the wrapped portion
so it can't be seen.
Tie finishing knots with the bracelet
cords, at least one to two inches from the
clasp.
Half Hitch Clasp
Sliding Clasps can be
made with Half Hitches, which will create a ridge
on one side and a flat surface on the other.
It's important to arrange the bracelet in the
proper position so the flat side of the knots will
rest against the skin.
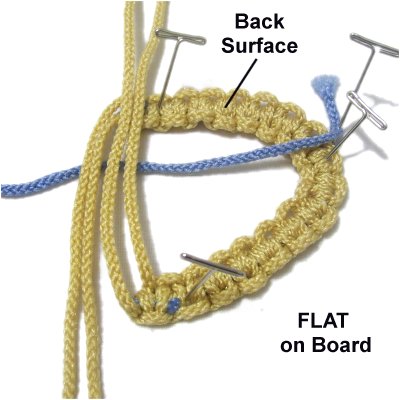
Arrange the
bracelet with the front
surface touching the board
(upside down).
The bracelet cords should be vertical.
Secure the clasp cord horizontallyunder
the bracelet cords.
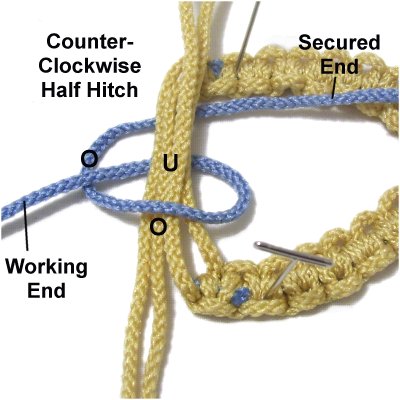
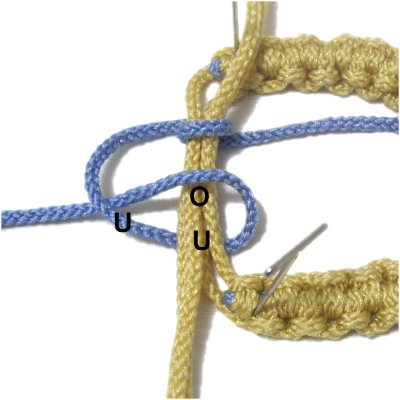
Make a counter-clockwise
Half Hitch with the working end of the
clasp cord:
Pass over
- under the bracelet cords.
As you pull the clasp cord to the left,
pass over
to complete the loop.
Secure the loop after tightening (see next
image).
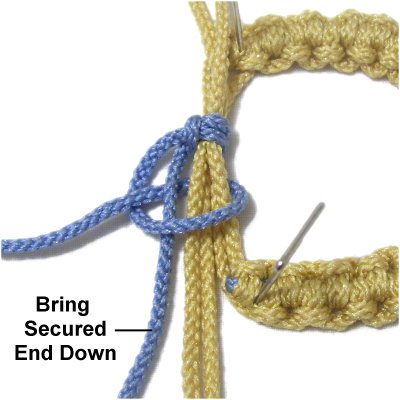
Move the
SECURED end down vertically, resting to
the right of the bracelet cords.
Tie the next Half Hitch around the
bracelet cords and
the secured end.
Tie several
more Half Hitches, until the clasp is
close to 1/2-inch long.
Be very careful not to over-tighten the
knots, so the bracelet cords can still
slide.
Sliding Clasps
should always be tested, so do that now by
opening and closing the bracelet.
Make adjustments to the knots if needed.
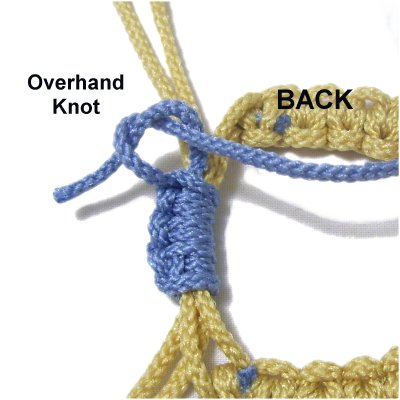
Tie off the two ends of the clasp cord
with an Overhand or Barrel knot.
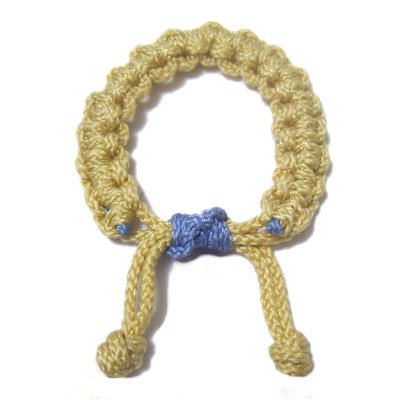
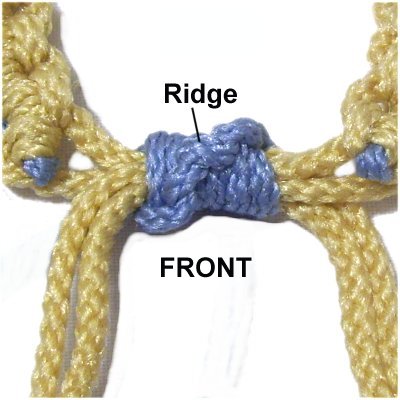
This is a
close up view of the FRONT of the clasp,
which will have a ridge.
Tie the finishing knots on the bracelet
cords 1 - 2 inches from the clasp (in
closed position).