|
|
|
|
|
 |
|
|
|
|
|
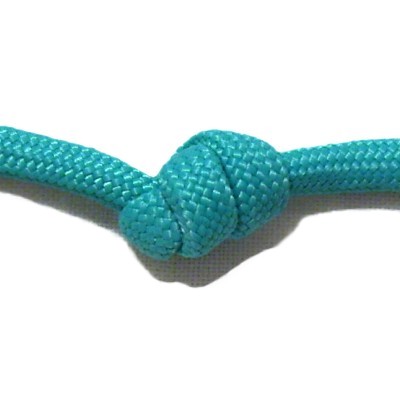
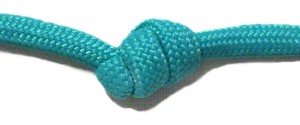
Description: The Barrel Knot
is used frequently in Macrame projects.
Its primarily used as a finishing knot at the
ends of cords, to secure them or prevent them
from unraveling. You can also use it any time
you need a firm knot that doesn't come untied
easily.
This decorative knot is sometimes called the Coil
Knot in vintage patterns. You may
also see it called the Blood
Knot.
Also on this page are instructions for four
variations you can use in your craft
projects. Each one has its own
special features. Beginners should practice all
the variations and the basic design on this
page.
|
|
|
|
|
|
|
|
|
|

|
|
|
|
Basic Design
|
|
|
|
|
|
|
|
|
|
Description:
This is the standard Barrel Knot most frequently
used in Macrame projects.
To practice, you need one cord at least 15 inches
long. |
|
|
|
|
|
|
|
|
|
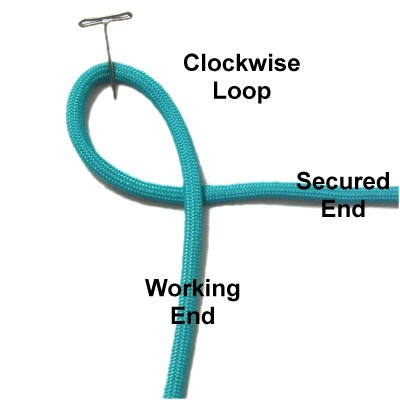
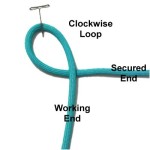
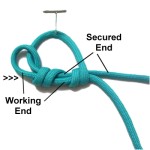
Step 1: Secure the
cord to your board on your right.
Make a clockwise
loop with the working end.
Arrange the working end vertically when
you are done.
|
|
|
|
|
|
|
|
|
|
|
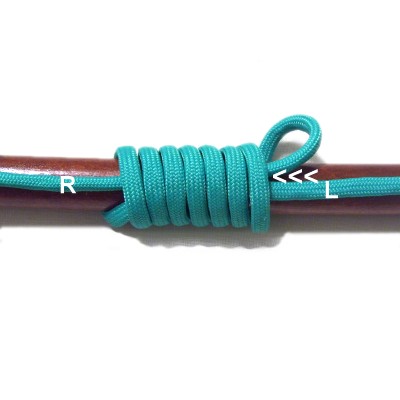
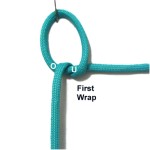
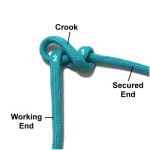
Step 2: Wrap
the working end around the secured
portion under
- over.
This takes place to the left
of the crossing point.
|
|
|
|
|
|
|
|
|
|
|
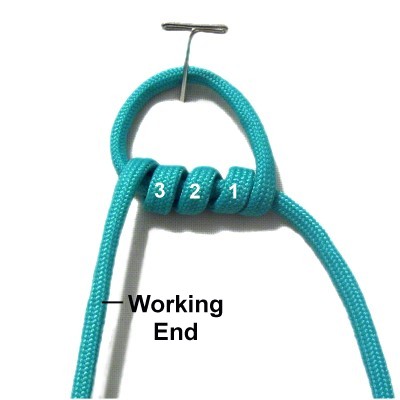
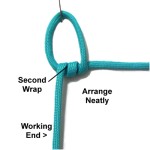
Step 3: Wrap the
working end around the secured portion a
second time, placing it to the left
of the first.
Make sure both wraps are arranged
neatly without overlapping.
|
|
|
|
|
|
|
|
|
|
|
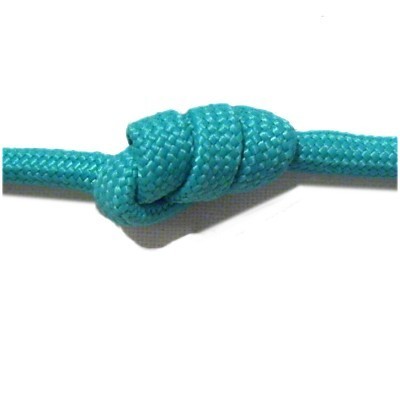
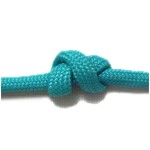
Tighten the
Barrel knot slowly, making sure it doesn't
twist and is firm.
The best method is to remove the slack
from the wraps first, then pull the
secured end to tighten the loop. |
|
|
|
|
|
|
|
|
|
|
|
|
|
|
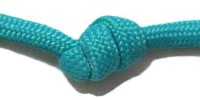
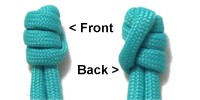
Extended Barrel Knot
|
|
|
|
|
<
Front
Back
>
|
|
|
|
|
|
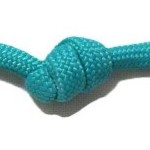
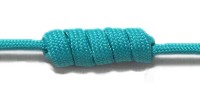
Description:
This knot can be made longer by adding
extra wraps. In the example shown, three
wraps were made.
I recommend you practice this variation with three
wraps, then try four or five.
|
|
|
|
|
|
|
|

|
|
Step
1: Repeat
steps 1 - 3 from the basic design
described previously.
Wrap at least one more time, placing it to
the left of the others.
|
|
|
|
|
|
|

|
|
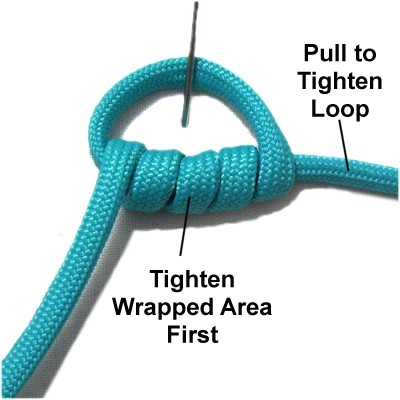
Step
2: Tighten the wrapped area
first, then pull the secured end to
tighten the loop. |
|
|
|
|
|
|
|
|
|
|
|
|
Strangle Knot
|
|
|
|

|
|
|
|
|
|
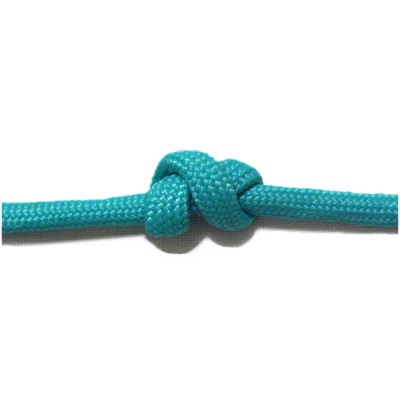
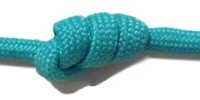
Description: This variation is
called the Strangle
Knot. Like the regular Barrel knot,
it is strong and difficult to untie.
So it's great for slippery material like Satin and
Nylon. |
|
|
|
|
|
|
|
|
|
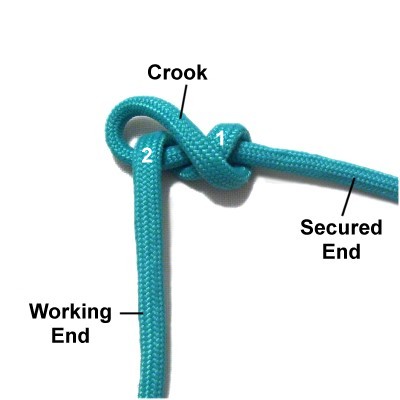
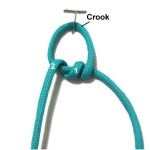
Step
1: Repeat
steps 1 - 3 of the basic
design.
Mentally label the two segments shown in
this image. Segment 2 leads to the working
end.
The top of the loop is called the crook.
|
|
|
|
|
|
|
|
|
|
|
Step 2:
Move the top of the loop (crook) toward
you, so it rests between segments 1 and 2
diagonally.
Push segment 1 to the right if necessary,
forming a figure 8 shape. |
|
|
|
|
|
|
|
|
|
|
Tighten the
knot by pulling on both ends gradually.
Make sure you hold
the knot to keep the figure 8
shape as you tighten. |
|
|
|
|
|
|
|
|
|
|
|
|
|
|
Barrel Bead
|
|
|
|
|
|
|
|
|
|
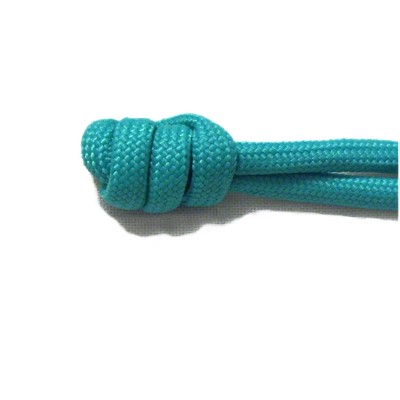
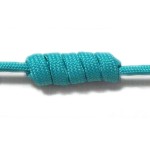
Description:
This variation is often used when you want the two
ends to exit the knot horizontally. To
distinguish it from the regular Barrel knot, I
call it the Barrel Bead, since it resembles a tube
shaped bead.
It can be used to decorate a long segment of
material, such as when you are making a
fringe. |
|
|
|
|
|
|
|
|
I found
this design in "Decorative
Fusion Knots".
Click on
the link or image to see the Fusion
Knots website, which has a video gallery
with tutorials for a variety of unique
decorative knots.
|
|

|
|
|
|
|
|
|
|
|
|
|
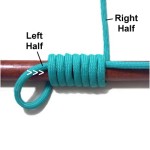
Preparation:
You need once cord to practice, at least 30 inches
long.
You can make this knot around a dowel as shown, or
around your fingers. |
|
|
|
|
|

|
|
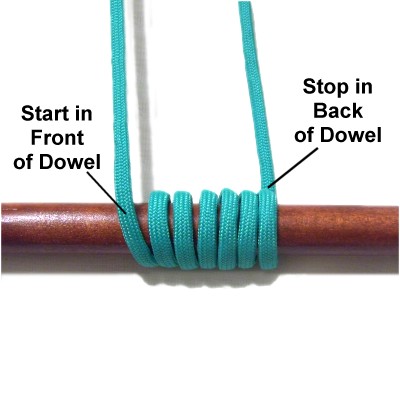
Step 1:
Place one end of the cord in front
of the dowel to your left. You can
secure it if you wish.
Wrap it around the dowel several times,
moving right.
Make sure you stop with the cord resting
in back
of the dowel. |
|
|
|
|
|
|
|
|
|
|
Step
2: Pass the left
half of the cord through the
wrapped areas, moving left
to right.
Move it down slightly, closer to the
bottom of the dowel where it rests on your
work surface. |
|
|
|
|
|
|
|
|

|
|
Step
3: Pass the right
half through the wrapped area,
moving right to
left.
It should rest above the other half of the
cord, closer to the top of the
dowel. |
|
|
|
|
|
|
|
|
|
|
Step 4: Tighten the
knot as much as possible on the dowel,
then slide it off and tighten it until
firm.
You may need to help by pushing the
wraps close together.
|
|
|
|
|
|
|
|
|
|
|
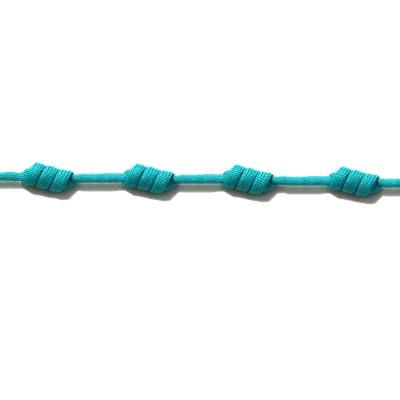
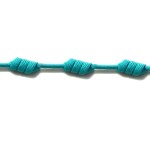
Step
5 (Optional): Tie at least
one more Barrel knot with the same cord to
gain experience.
When you pass the ends through the wraps,
bring the previous knots through,
too.
Try to tighten so there is equal space
between each knot. |
|
|
|
|
|
|
|
|
|
|
|
|
Barrel Tuck
|
|
|
|
 |
|
|
|
|
|
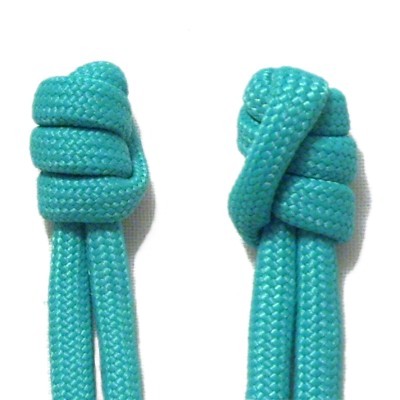
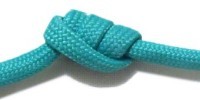
Description:
For want of a better name, I call this variation
the Barrel Tuck.
The advantage to using it is that both ends come
out of the knot next to each other, rather than
one on each side. |
|
|
|
|
|
|
|
|
|

|
|
Step 1: Create
an extended Barrel knot as described in
the second set of instructions above,
making at least 3 wraps.
Don't tighten it yet.
|
|
|
|
|
|
|
|
|
|
|
Step 2: Pass
the working end through the wrapped
area, moving left to right.
It should rest in front of the secured
end of the cord.
|
|
|
|
|
|
|
|
|

|
|
Step
3: Pull on the working end to
tighten the wrapped portion.
Then pull the secured end to tighten the
loop. |
|
|
|
|
|
|
|
|
|
|
|
|
By
using any text or images on Free Macrame
Patterns, you are agreeing to our Terms
of Use
|
|
|
|
|
|
|
|
Have
any comments about the Barrel Knot? Contact
Me.
|
|
|
|
|
|
|
|
|
|
|
|
|
|
|