|
|
|
Chinese Button Knot with 5 Loops
|
|
|
|
|
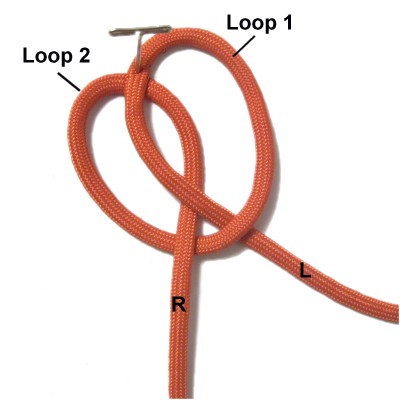
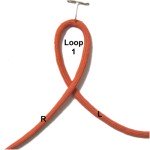
Step
1: Secure the center of a
60-inch cord to your board.
Cross the right
half over
the left to make
loop 1.
|
|
|
|
|
|
|
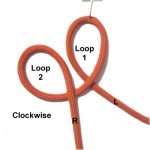
Step
2: Move the right
half of the cord clockwise
to make loop
2.
It should rest to the left
of loop 1. |
|
|
|
|

|
|
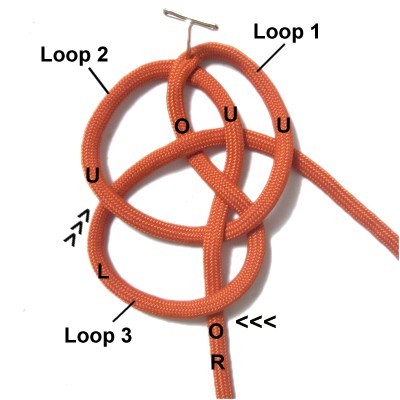
Step
3: Move loop
2 to the right, placing it under
the left side of Loop 1, creating three
spaces.
Secure the
right half
of the cord to your board.
|
|
|
|

|
|
Step
4: Move the left
half of the cord to the left,
passing it over
the right half.
Weave it under
- over - under - under
loops 1 and 2, moving left to right. |
|
|
|
|

|
|
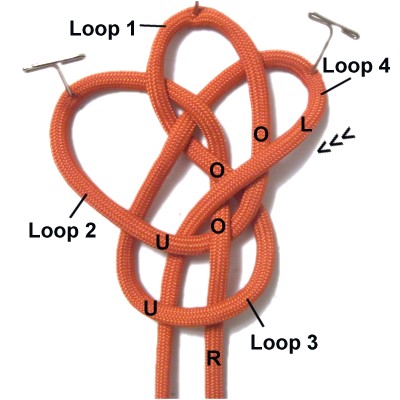
Step
5: Move the left
half of the cord diagonally to the
left, passing it over
three segments: Both parts of loop 1
and the right half of the cord.
Bring it under
the last two segments, which are part of
loops 2 and 3. Make sure it rests to
the left
of the right half, then secure it. |
|
|
|
|
|
|
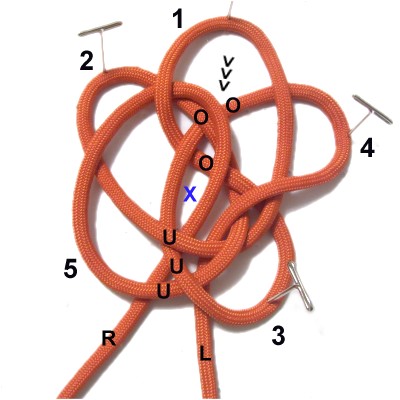
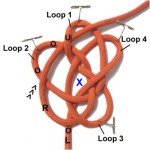
Step
6: Move the right
half of the cord to the left,
passing it over
the left half, then over
both sides of loop 2.
Pass it under
the left side of loop 1.
The X in this image is at the center of the
knot.
|
|
|
|

|
|
Step
7: To make loop
5, move the right
half of the cord forward, passing over
the first three segments it comes to (part
of loops 1, 2, 4).
Pass it through the center (X)
so it rests under
the last three segments (part of loops 2, 3,
5).
|
|
| |
|
|
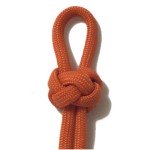
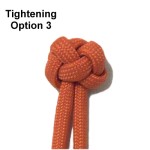
You have two options for tightening the Chinese
Button Knot:
Step 8 shows
you how to tighten it completely in a typical ball
shape.
Step 9 shows
you how to tighten it with one loop remaining loose
at the top. |
|
|
|
|
|
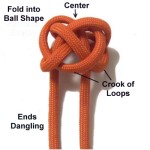
Step 8: Hold the knot upright in
one hand so the
ends
are dangling.
Fold the knot so the center space where the
ends pass through is at the top (see
blue X
in step 6). The crook of the loops should be
at the bottom. |
|
|
|
|
|
|
Slowly remove the
slack from each loop. Start at one end
and work all the way through the knot to the
other end.
|
|
|
|
|
|
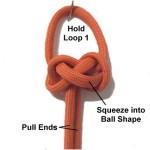
Step
9: Loose Loop
Pick
up the knot by holding
loop 1, letting the ends dangle.
Pull both ends to tighten the knot slightly.
Squeeze the other loops so they surround
loop 1 and are in a ball shape.
|
|
|
|
|
|
Adjust the size of loop 1, then tighten the
remaining loops until firm. |
|
|
|
|
|

|
|
Chinese Button Knot with 4 Loops
|
|
|
|
|
Since the Chinese Button can be made with four
loops, I've included the directions for tying it.
This technique is the best option if you want a
small button, or if you want the design to remain
flat as shown above.
|
|
|
|
|
|
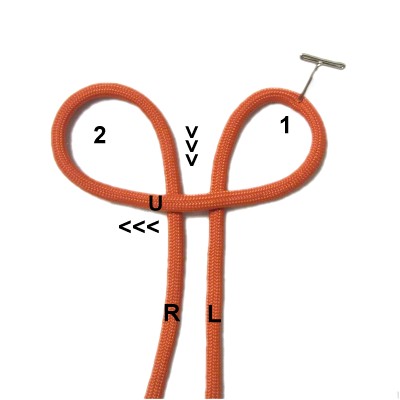
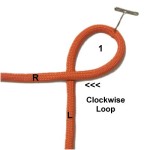
Step
1: Place a 60-inch cord on
your board vertically. Make a clockwise
loop near the center of the cord.
Mentally label it as loop 1.
The vertical segment is considered the left
half of the cord, and the horizontal portion
is the right half.
|
|
|
|
|

|
|
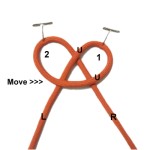
Step
2: Make another clockwise
loop with the right
half of the cord, passing under
the horizontal segment to complete the loop.
It should rest to the left
of loop 1. Mentally label it loop 2.
|
|
|
|
|
|
Step
3: Move loop
2 to the right, so it rests under
a portion of loop 1.
It should look like a pretzel shape with
three spaces. The right half of the
cord should be on the right.
|
|
|
|

|
|
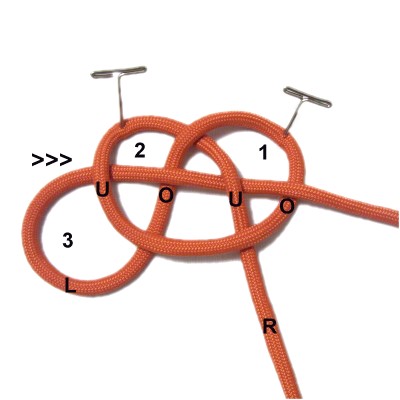
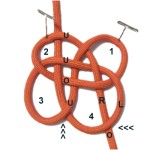
Step
4: Use the left
half of the cord to make the next clockwise
loop, mentally labeling it loop 3.
Weave it under
- over - under - over loops 2 and 1
horizontally, heading right.
|
|
|
|
|
|
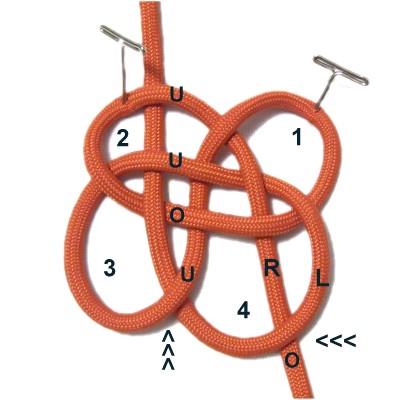
Step
5: Make the final clockwise
loop with the left
half of the cord. Start by
moving it over
the right half of the cord, heading left.
Then weave it under
- over - under - under loops 3 and
2, heading backward vertically. |
|
|
|
|

|
|
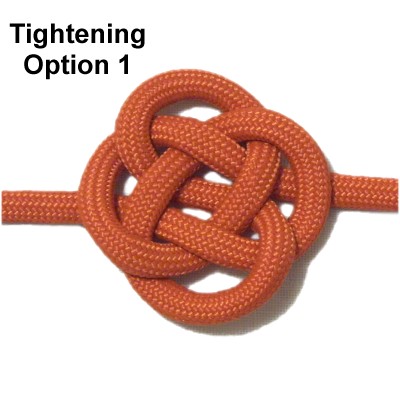
As with the
traditional Chinese Button Knot, you have
options when tightening.
You can leave the knot flat and tighten it
only part of the way, so there are spaces
between the loops. |
|
|
|
|
|
|
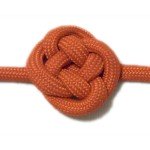
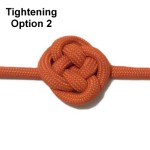
Another option is
to tighten it completely, so the inside
center area is shaped like a square. |
|
|
|
|
|
|
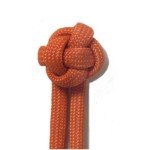
The final option
is to squeeze the knot into a traditional
ball shape.
One segment will have a tendency to sink
under the others. Pull it up with
tweezers so it's even with the other
segments. |
|
|
|
|
|
By
using any text or images on Free Macrame
Patterns, you are agreeing to our Terms
of Use
|
|
|
|
|
Have
any comments about the Chinese Button Knot? Contact
Me.
|
|
|
|
|
|
|
| |