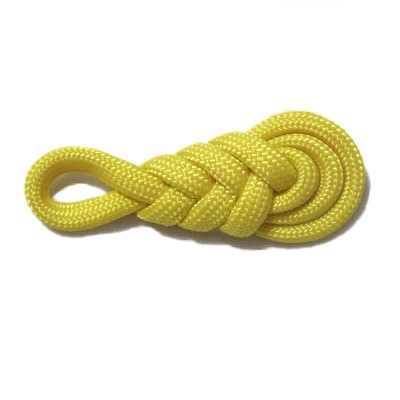
Pipa Knot
Description: The Pipa Knot is
a unique Chinese Macrame knot that is based on
the Figure 8 shape. This historical knot
has been around for a long time.
It's been seen frequently on ancient Oriental
clothing as a clasp and for decoration.
The Pipa is a Chinese musical instrument similar
to a Lute, which is pear shaped like this knot.
This decorative knot makes a great pendant for
jewelry, and can also be used to make very
unique earrings.
Try it as a clasp by making the knot first,
then use the remaining material to make the
bracelet or belt. At the other end, tie a
button knot.
I searched for years to find the
instructions to make this historic knot.
I finally found it in Decorative
Fusion Knots .
Be sure to click on the link or image
to visit the Fusion Knots site. The
video gallery contain tutorials for many
unusual knots.
Step 1: You
will need one cord at least 36 inches long to make
the Pipa Knot.right
half is 12
inches longer than the left half.
Secure it vertically to your board.add 12 - 15 inches
of material to the length you need for the
project.
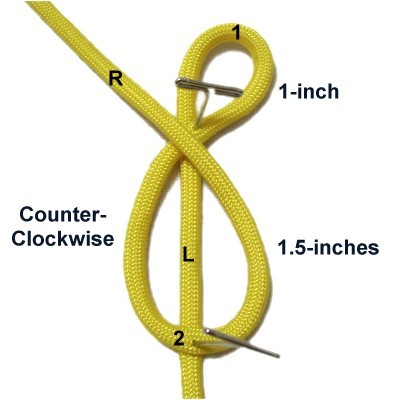
Use the right half
to make a clockwise
loop. 1-inch
in size, if you are using 4mm material
like the Paracord shown.
Step 2: Bring the
right half of the cord toward you
(forward), then make a counter-clockwise
loop.
It should rest on
top of the left half. Secure it
at the crook .
Loop 2 should be 1.5
inches long if you are using
4mm material.
Designer's
Tip: The size of the loops is
determined by the width of the material you are
using.
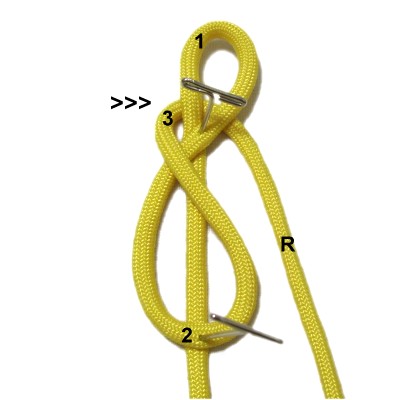
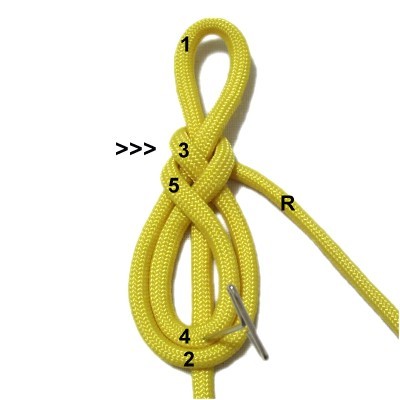
Step 3: Bring the
right half of the cord under
loop 1 at the crossing point, moving
left to right.
Mentally label it loop 3.
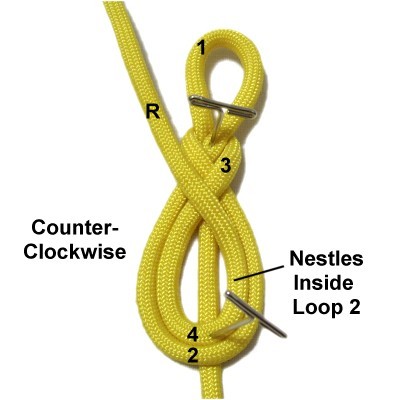
Step 4: Make another counter-clockwise
loop with the right half of the cord.
inside
Loop 2.
Make sure Loop 3 is wrapped snugly
around loop 1, then secure the crook of
loop 4 (move the pin).
Step 5: Move the right
half of the cord under
loop 3 , heading left to right.
Arrange loop 5 so it's in front of loop
3 on the left.
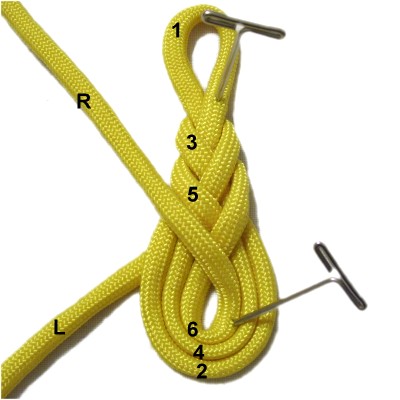
Step 6: Make
another counter-clockwise
loop with the right half of the cord.
Position it inside
Loop 4, then secure it after making sure
loop 5 is snug.
Move the left
half of the cord to the side
before completing the next step.
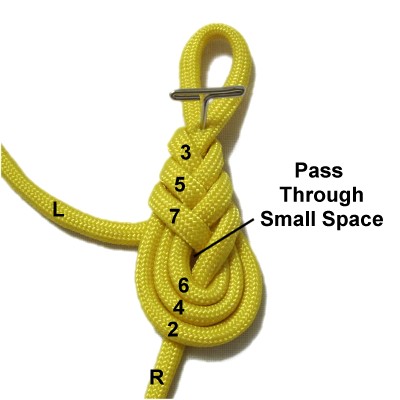
Step 7: Move the right
half of the cord under
loop
5 , heading left to right.
Arrange loop 7 in front of loop 5 on
the left.
Move the left
half of the cord to the left of
the Pipa Knot.
Step
8: Pass the right half of the
cord through the small
space inside loop
6 .
Pull it firmly so loop 7 is snug.
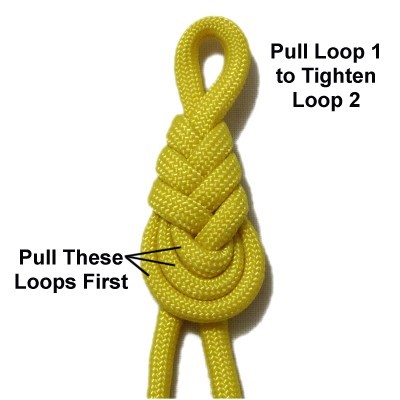
Step 9: Pull on loops 2, 4,
and 6 (bottom) to tighten loops
3, 5, and 7.
Make sure ALL the loops are as
flat as possible when you are done.
Then pull loop 1 to tighten loop
2. You probably won't need to
tighten loops 4 and 6.
Reduce the size of loop 1 by pulling on
the left
half of the cord.
Step
9, continued: You can either
finish off the ends by securing them to the back
of the knot with glue, or you can use them for
other knots.
By
using any text or images on Free Macrame
Patterns, you are agreeing to our Terms
of Use
Have
any comments about the Pipa Knot? Contact
Me.