Description:
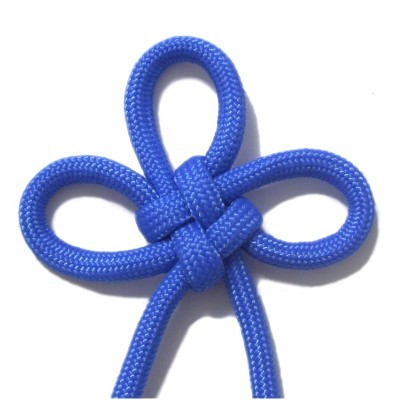
The Cloverleaf knot is the most common
design used in Chinese Macrame. It's a very
important knot, so you must know how to tie it if
you want to create combinations using Chinese
knots.
On this page I not only describe the traditional
3-loop variation in both directions, but also show
you how to tie it with 4 loops and with 2
loops.
Practice tying each variation several
times, so
you are as comfortable tying this knot as you are
all the others you have learned.
Left Cloverleaf Knot
The Cloverleaf knot can be tied with either half
of the cord. In the instructions below, you
will learn how to tie it with the working end on
the LEFT. The loops are made in a clockwise
direction.
Be sure to practice more than once, until you can
tie it without the instructions.
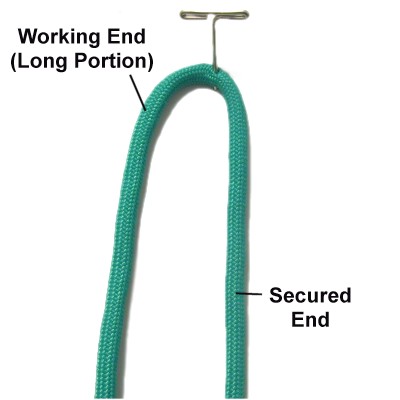
Step
1: Fold a 60-inch cord in
half. Adjust it so the left
portion is 15 inches longer than
the right, since it will be the working
end.
Secure the cord vertically at the fold,
which will be called fold
1 in the instructions.
Secure the right portion, too.
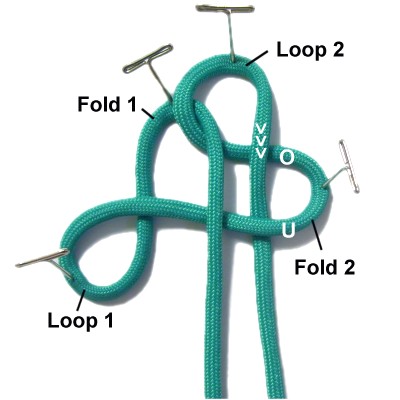
Step
2: Make a clockwise
loop with the working end,
securing it on your left. Mentally
label it as loop
1.
Pass it through fold
1over
- under, arranged horizontally.
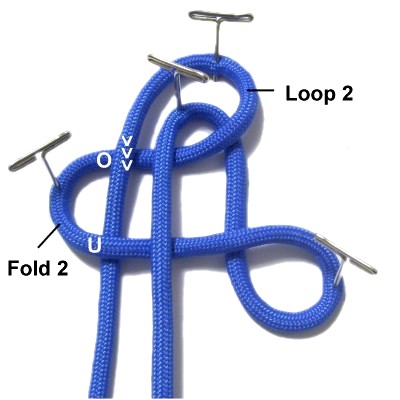
Step
3: Fold the working end
and move it to the left,
forming fold
2.
Pass it through fold 1 under
- over.
Designer's
Tip: The Cloverleaf is made by
alternating between folds and loops. After making
a loop, the working end passes through the
previous fold to make a new one.
Try to see this concept as you complete the next
two steps.
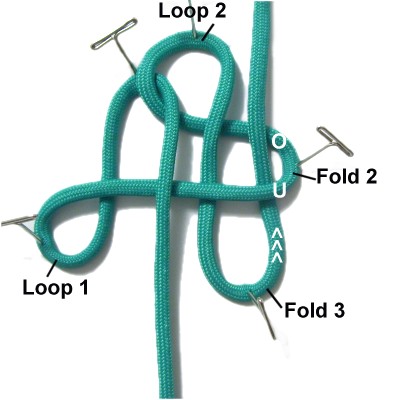
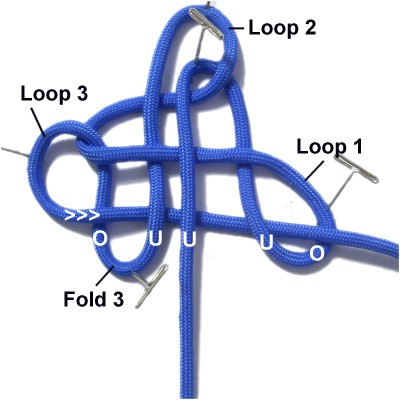
Step
4: Bring the working end
around fold
1 in a clockwise
direction to create loop
2.
Move the working end forward vertically,
passing it through fold
2 over
- under.
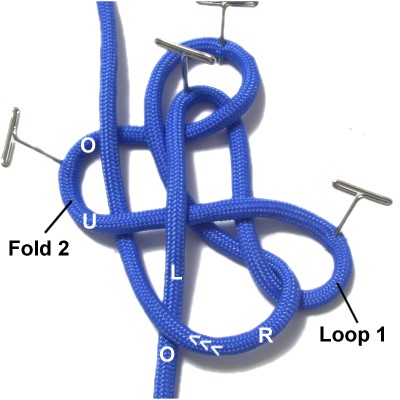
Step
5: Move the working end
backward, passing it through fold
2under
- over.
Mentally label it fold
3.
Designer's
Tip: In the next two steps
you make the final loop, then connect
loops 1 and 3 with another fold.
Make sure you can clearly see all areas of the
knot before you move on.
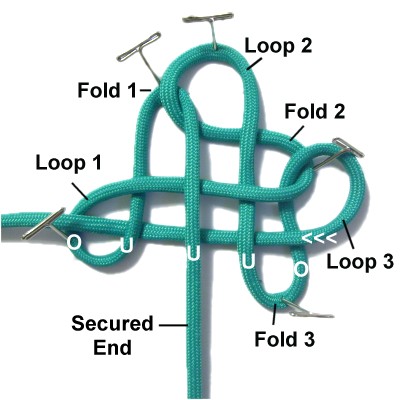
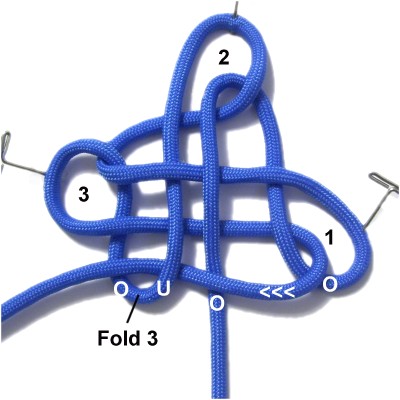
Step
6: Rotate the working end
clockwise
to form loop
3.
Move it to the left horizontally,
passing it through fold
3over
- under.
Bring it under
the secured
end and throughloop 1under
- over.
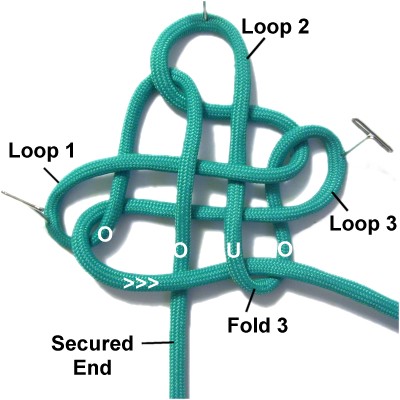
Step
7: Move the working end to
the right,
passing it over
the secured
end.
Pass itthrough
fold
3under
- over.
Remove the pins from the folds, but keep
them on the loops.
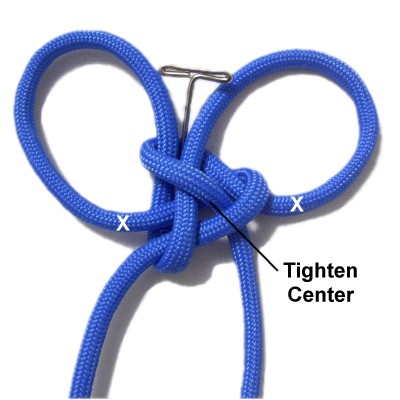
Step
8: Tighten the foldsin
the center of the Cloverleaf knot first,
by pulling
loops 1 and 3 as well as bothends
of the cord.
Try to avoid pulling loop 2, since it's
harder remove the slack from it compared
to the others.
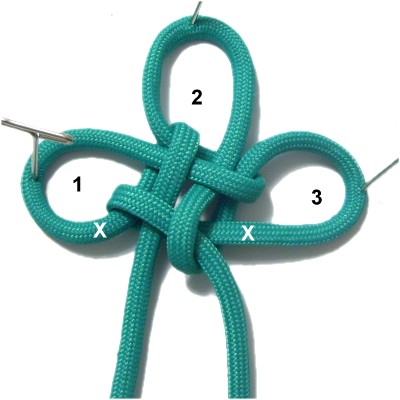
Step
9: Tighten loop
2 first by working the slack out
from one side of it, then the other.
Remove the slack from loops 1 and 3 by
pulling the segments marked
with X in the previous
image. Those segments lead to the
ends.
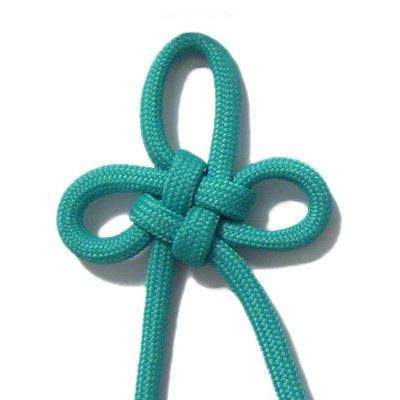
Right Cloverleaf Knot
The right Cloverleaf Knot is like the first
design, but the working end is on the right and
the loops are made counter-clockwise.
It's important to know how to make this knot in
both directions because other Chinese knots are
often based on this one, and may require you to
turn it around.
Remember to practice more than once, until you can
make it without the instructions.
Step
1: Fold a 60-inch cord in
half. Adjust it so the right
portion is 15 inches longer than
the left.
Secure the left portion as well as the
fold, mentally labeling it fold
1.
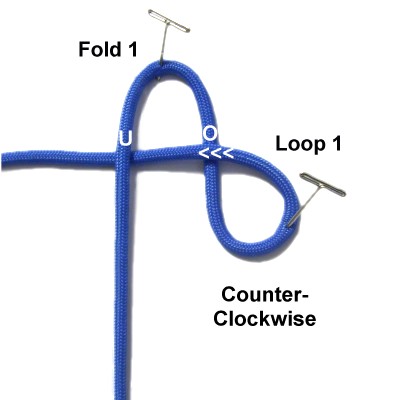
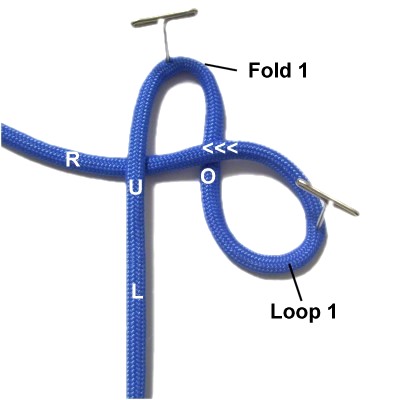
Step
2: Make loop
1 in a counter-clockwise
direction.
Pass the working end through fold
1over
- under, heading left horizontally.
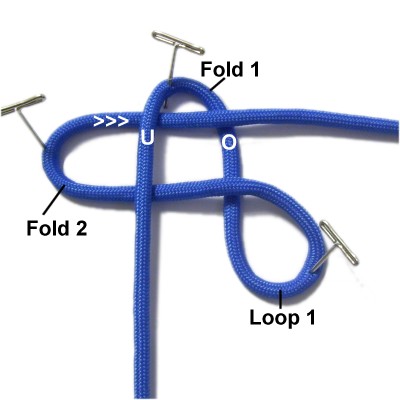
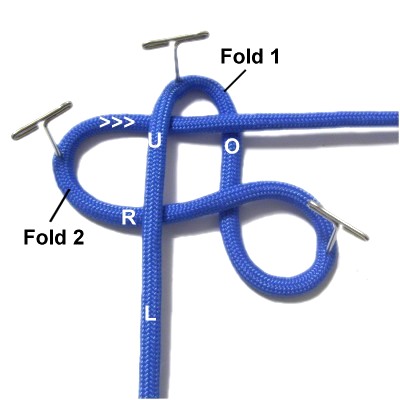
Step
3: Make fold
2 by moving the working end to
the right, passing it through fold 1 under
- over.
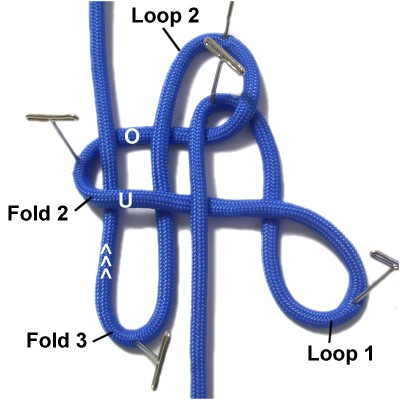
Step
4: Move the working end counter-clockwise
around fold 1 to make loop
2.
Move it forward
vertically, then pass it through
fold
2 over
- under.
Step
5: To complete fold
3, move the working end backward,
passing it through fold 2 under
- over.
Step
6: Move the working end counter-clockwise
to make loop 3.
Pass it over
- underfold
3 as you move it
to the right.
Pass it under
the secured end of the cord, then through
loop
1under
- over.
Step
7: Move the working end to
the left, passing it over
the secured end of the cord.
Pass it through fold
3under
- over.
Remove the pins except for those on the
three loops.
Tighten the
Cloverleaf Knot as you did in the previous
design (center, loop 2, then loops 1 and
3).
Cloverleaf Knot with 4 Loops
The advantage to
making a Cloverleaf knot with four loops is that
the ends are heading in opposite
directions. So this is a great
focal knot for items like bracelets or
belts.
The traditional three loop variation is better for
items that dangle,
such as earrings and pendants.
You need to tie additional knots with the working
end to stabilize it so loop 4 will remain in
place. Be careful not to pull the
working end during tightening, until you are ready
to remove the slack from loop 4.
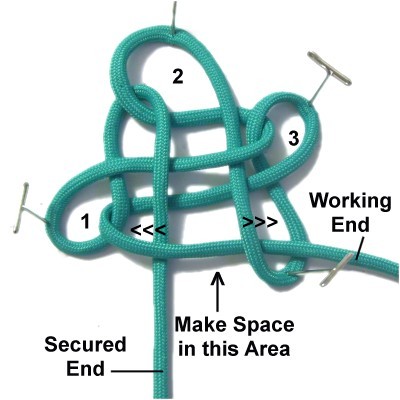
Step
1: Make a LEFT Cloverleaf
knot following the first set of
instructions on this page. Do not
tighten it.
Make some space in the center of the knot
by pushing the secured
end to the left and fold
3 to the right.
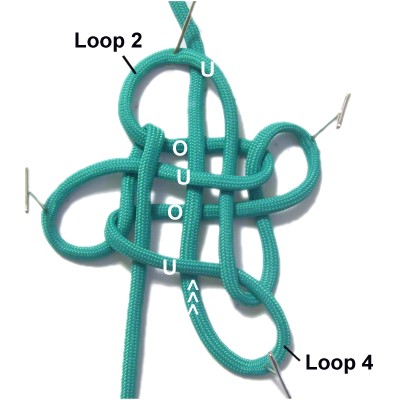
Step
2: Rotate the workingend clockwise
to make loop
4.
Weave it through the center of the knot vertically,
passing it under
- over - under - over the four
segments.
Pass it under
the crook of loop 2.
Step
3: Tighten the knot as
follows:
First, pull loops 1 and 3 and the secured
end to tighten the center.
Then reduce the size of loop 2, followed
by loops 1 and 3.
Pull on the working end to reduce the size
of loop 4.
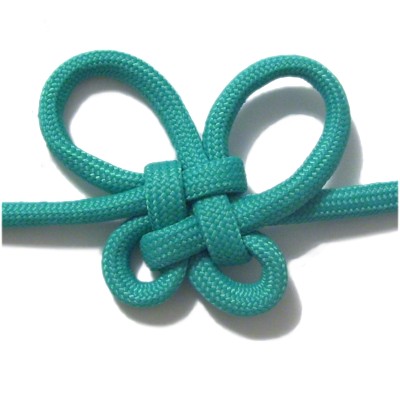
In most cases,
the 4-loop Cloverleaf knot looks best with
all 4 loops the same
size.
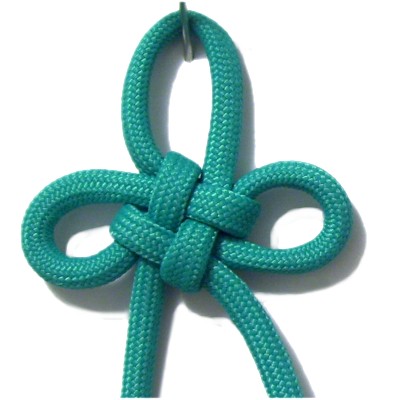
This butterfly was made simply by making
two loops larger than the others.
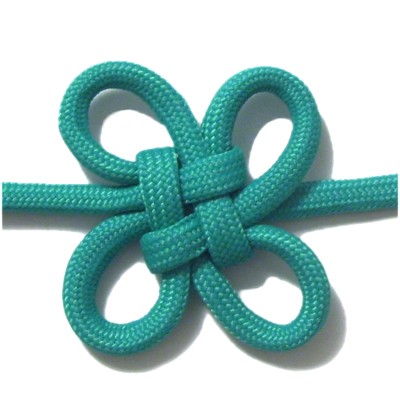
Cloverleaf Knot with 2 Loops
This variation has two
loops rather than three. The tightened
portion in the center has a triangular shape
rather than a square.
The two loops can be made any size and will still
be balanced. It's easier to tighten
than other variations, so is often used to connect
two or more Cloverleaf knots to one another.
The instructions below show you how to make it
with the right
half of the cord. Practice
reversing it so you can tie it with the left half,
too.
Step
1: Fold a 36-inch cord in
half and secure the left half.
Mentally label it fold
1.
Make Loop
1 in a counter-clockwise
direction using the right
half of the cord.
Pass it over
- under the two vertical
segments, heading left.
Step
2: Complete fold
2 by moving the right half of the
cord through fold 1 under
- over, heading right.
Step
3: Move the right half of
the cord in a counter-clockwise
direction around fold 1 to make loop
2.
Move it forward vertically, then pass it
through fold
2 over
- under.
Step
4: Here is where the 2-loop
variation differs from the traditional
Cloverleaf knot:
Move the right half of the cord under
the left half, then through loop
1under
- over, heading right.
Step
5: Move the right half of
the cord over
the left half moving right to left.
Pass it through fold
2under
- over.
Step
6: Tighten the center of
the Cloverleaf Knot by pulling on both
loops as well as both ends.
To remove the slack from the loops and
reduce their size, pull the areas
indicated with X in this image.
Those segments lead to the ends of the
cord.
By
using any text or images on Free Macrame
Patterns, you are agreeing to ourTerms
of Use