Description:
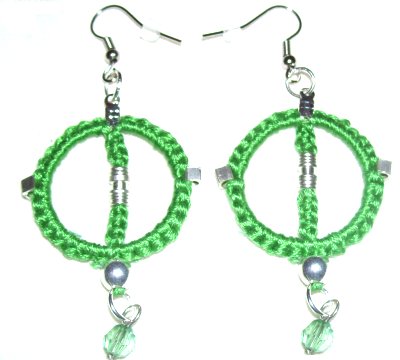
These Charm Earrings are hoop earrings
that feature a small charm at the bottom, and a
chain of knots running through the center.
This Micro-Macrame earring design can be changed
in a variety of ways. Other decorative knots
can be used in all areas, and beads can be applied
where you want them.
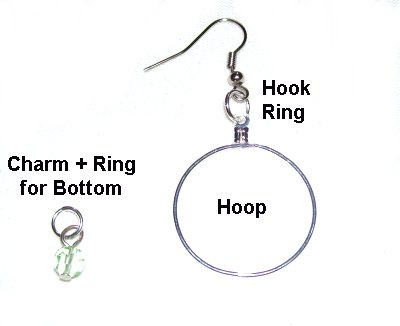
I recommend you use jump or split rings on the
hook as well as the charm, so the earrings move
more easily. Make sure you choose beads that have
holes around 4mm in size. Smaller beads can
be applied on the hoop (2mm holes).
Since you are working with fine cord, make sure
you know how to tie all the knots listed.
Below step 2 is a list of knots you can use for
the center as well as below the hoop.
Choose one you like and practice
ahead of time.
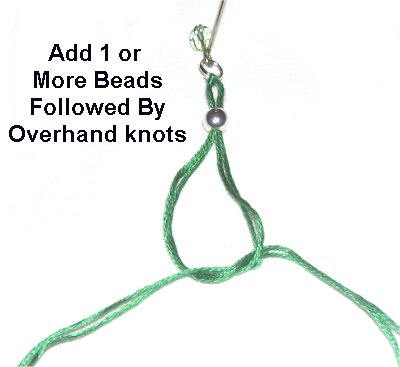
Step 3: Place
the hoop over the design you just made, so the top
of it is near
the charm.
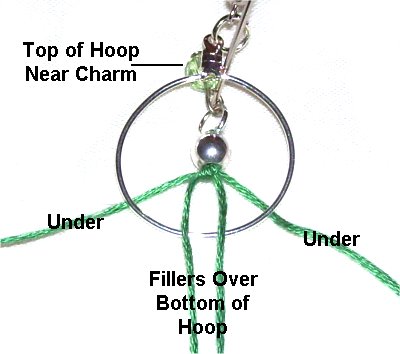
This way it's not in your way as you attach the
cords to it. You
will flip it over later.
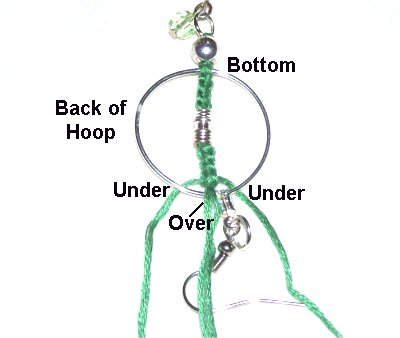
Separate the cords. The two in the
middle are fillers,
and they should pass overthe
bottomof
the hoop.
The other two are working
cords and rest underit.
Step
4: Tie a Square knot with the
two working cords, around the
fillers.
Before you tighten the first half of it,
move the bottom of the hoop against the
last knot tied in the design you made
previously.
Step 4,
continued: Tighten the first half
of the SK firmly,
and then tie the second half.
Step
5: Flip
the ring the other
direction so you cansee the area within the hoop.
Tie the knot you selected, adding beads if
you wish.
Make sure the last knot you tie is close
to the top
edge of the hoop, when the knots
are pulled taut. The
center portion will bend if you tie too
many knots.
Design
Tip: You can flip the hook back
the way it started if it interferes with your
ability to tie the knots in the center section of
the Charm Earrings.
Step
6: Attach the cords the
same as in step
3.
The fillers go over
the top of the hoop and the working cords
go
under.
Tie a tight
Square Knot to secure the cords.
Design
Tip: The next step is to cover the
hoop for the Charm Earrings. Larks Head
knots are the best, but you can use other
knots. Here are some suggestions:
Step
7: Separate the cords so two
head right and the other 2 go
left. Use two cords working
together.
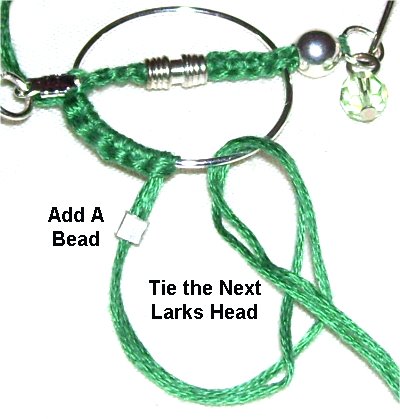
The first half of the Larks Head is tied
by passing the cord through the ring over
- under, and over
the cords.
The second
half of the Larks Head knot is tied by
passing the cords through the ring from below,
which is under
- over.
Pass it under
the cords when you bring it down.
Step
8:
Repeat step 7 several
times, until the first half of the hoop is
covered.
You can add beads anywhere you want.
Make sure the beads are small and the hole
big enough for both
cords.
Step
9:Repeat
steps 7 and 8 to cover the other half of
the hoop, using the other set of 2 cords.
Step
10: To finish the Charm Earrings,
flip the hoop over so you work on the back.
Take one cord from each side and tie a very
tight Overhand knot. Apply a small
amount of glue and tie another one.
Do the same with the other two cords. These
knots will be next to the bead, which will make
them hard to see. When the glue
is dry, cut off the extra material.
By
using any text or images on Free Macrame
Patterns, you are agreeing to ourTerms
of Use