|
|
| |
| |
|
|
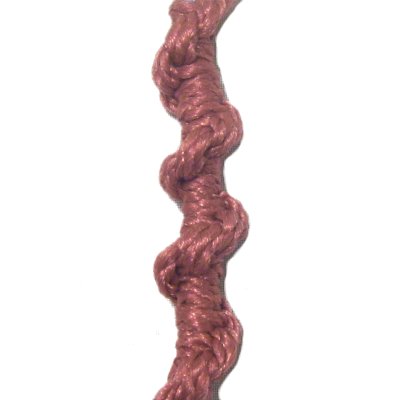
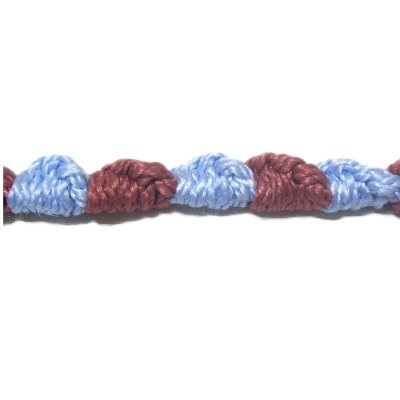
Description: The Half
Hitch Spiral is used often in Macrame
patterns, and is a popular decorative
knot for Micro-Macrame jewelry.
You can use it any time you need an
interesting sennit, particularly a long
one. So this design is suitable
for items like plant hangers and hanging
tables.
The Scallop Spiral and the Picot Spiral
are also described on this page.
Both are vintage knots, popular in the
late 1800's.
|
|
| |
|
|
|
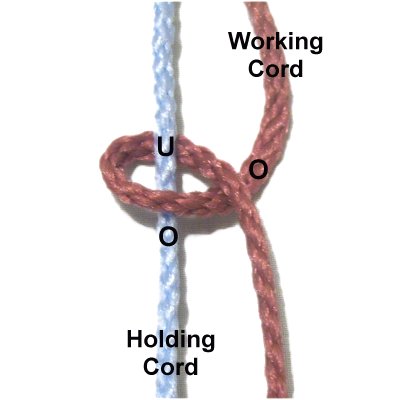
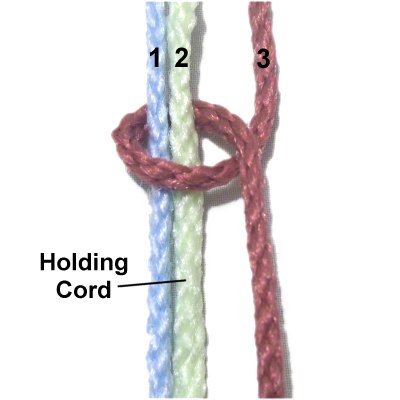
Step 1: Secure two cords
vertically on your board, to practice the Half
Hitch Spiral.
The working cord (wine) should be longer than
the holding cord (blue), and should be placed on
the right.
|
| |
|
| |

|
|
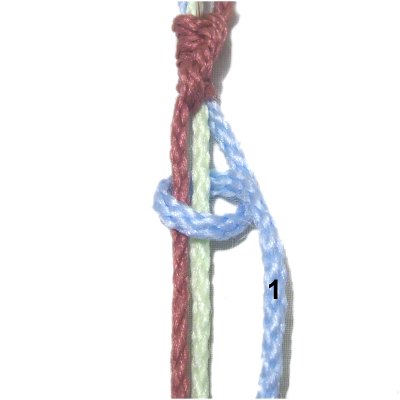
Tie a Half Hitch with the working
cord, by making a clockwise
loop over
-under the holding cord.
As you pull the end right, pass it over
the working cord. |
|
| |
|
| |
|
|
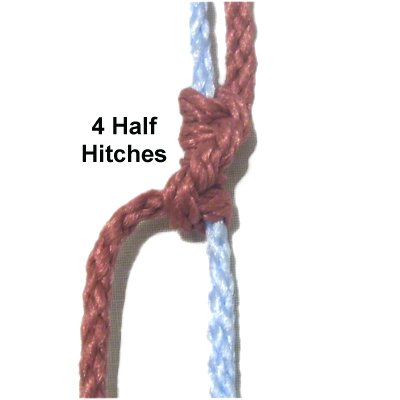
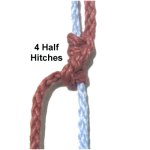
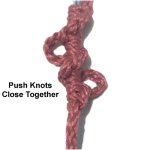
Step 2: Tie three more
Half Hitches (total of 4).
Push the knots close together, and
allow them to spiral to the left.
|
|
| |
|
| |
|
|
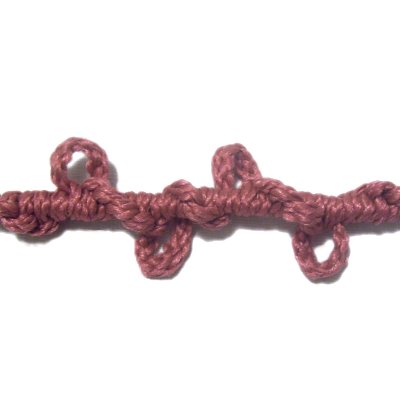
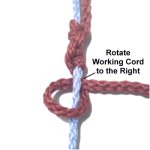
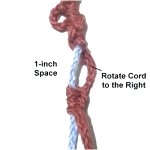
Step
3: Rotate the working cord
to the right, passing under
the holding cord.
Continue by tying 5 more clockwise
Half Hitches.
|
|
| |
| |
|
|
|
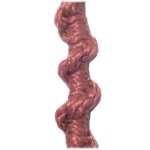
Step
4: Repeat
step 3 several more times to
complete the Half Hitch Spiral. |
|
|
|
|
| |
 |
| |
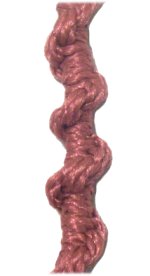
Picot Spiral
|
|
|
|
| |
This unique vintage
technique adds an interesting touch to the
standard spiral design. You add space
between knots to create small picot loops.
You can arrange the picots any way you wish.
In the example shown, I alternated back and forth
between the two sides of the sennit.
Step 1:
Secure two cords
to your board vertically. Place
the working cord to the right of the holding cord.
The working cord should be at
least 36 inches long. |
| |
| |
| |
|
|
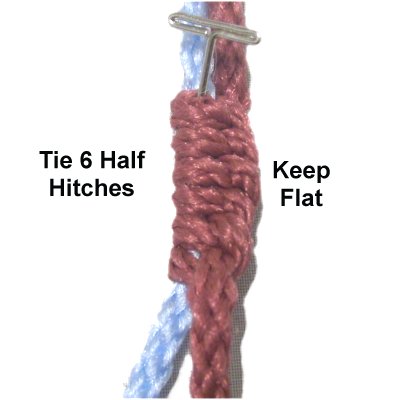
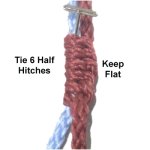
Tie 6 clockwise
Half Hitches with the working cord, onto
the holding cord.
Keep
the knots as flat as possible.
|
|
| |
|
| |
|
|
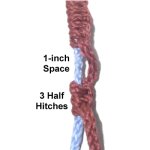
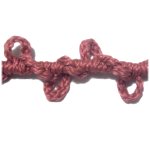
Step 2:
Leave a 1-inch space, then tie 3 more Half
Hitches. |
|
| |
|
| |
Designer's
Tip: You can tie an Overhand knot to
make a picot. You still need to leave a
little space before tying it, so it stands out.
This is done often in vintage designs, to give the
Half Hitch Spiral some detail. |
| |
|
|
|
|
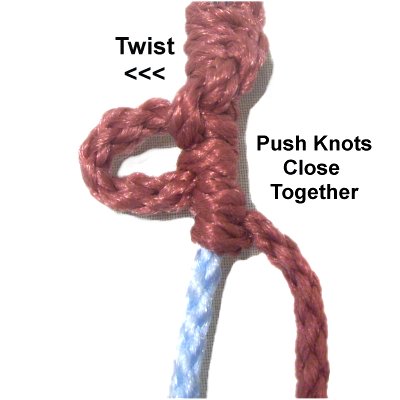
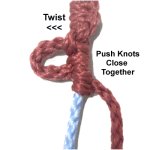
Step
3: Twist
the first 6 Half Hitches to the
left, to form the spiral design.
Push the knots close together to form the
picot, which will rest on the left.
The working cord should be on the right
when you are through. |
|
|
|
| |
|
|
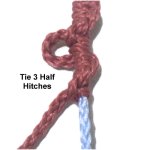
Step 4:
Tie the next 3 Half Hitches, allowing them
to spiral towards the left.
Designer's
Tip: By tying only a few
knots at a time, you will have better
control over the shape of the Half Hitch
Spiral. |
|
| |
| |
|
|
|
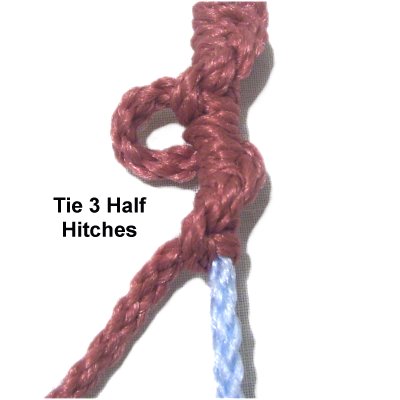
Step
5: Rotate the working cord
to the right, passing it under
the holding cord.
Tie the next three Half Hitches, after
leaving a 1-inch space. |
|
|
|
|
|
|
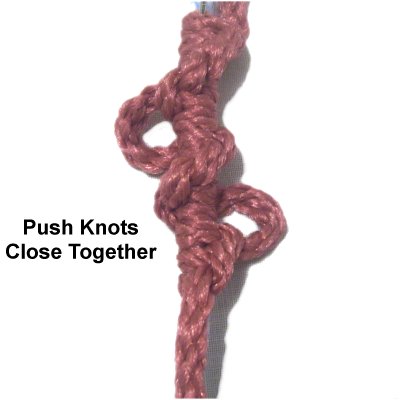
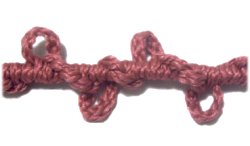
Step
6: Push the knots close
together to form the picot, which will
rest on the right
side of the sennit.
Tie the next 3 Half Hitches to continue. |
|
|
|
|
|
|
Step
7: Repeat
steps 5 and 6 at least 1 more
time, to make another picot loop. |
|
|
|
| |
|
|
Scallop Spiral
|
| |
|
| |
| |
|
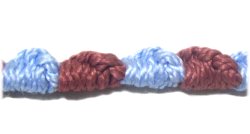
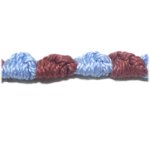
This unusual Half Hitch Spiral technique was
found in a book written in the late
1800's. It's sometimes referred to as the
"Shell Spiral".
It forms a beautiful scalloped chain of knots
that are suitable for purse handles, bracelets,
and more.
The concept behind the Scallop Spiral is that
the pattern is interrupted
due to the fact that you switch
working cords.
By working with the material, you can eliminate
the twisting so the knots are curved to look
like shells.
|
| |
| |
| |
|
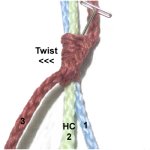
Step 1: You'll need 2 working
cords (different colors), at least 36 inches
long. You also need one holding cord.
Place the holding cord between the two working
cords. Mentally number the cords.
|
| |
|
| |

|
|
Step
1: Use working
cord 3 to tie five clockwise
Half Hitches onto cords 1 and 2.
|
|
| |
|
| |
|
|
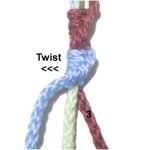
Step 2: Twist
the Half
Hitches so working
cord 3 is on the left.
Working cord 1 should be on the right.
|
|
| |
|
| |
|
|
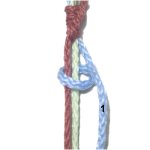
Step
3: Use working
cord 1 to tie five clockwise
Half Hitches onto cords 2 and 3. |
|
| |
|
| |
|
|
Step 4: Twist the
knots, so working cord 3
is on the right again.
Now it's ready for the next scallop.
|
|
| |
|
| |
|
|
Step 5:
Repeat
steps 1 - 4 to continue making
this variation of the Half Hitch Spiral. |
|
| |
|
|
|
|
By
using any text or images on Free Macrame
Patterns, you are agreeing to our Terms
of Use
|
|
|
|
|
Have
any comments about the Half Hitch Spiral? Contact
Me.
|
|
|
|
|
|
| |
|