Finishing Techniques are specific decorative
knots and procedures that are used to produce a
neat appearance in the final steps of Macrame
projects.
The term TIE
OFFis
frequently used to describe this process.
I refer to these techniques in the free
patterns in this site, and youll find them in
most Macrame books as well.
I recommend you learn to tie all thefinishing
knots in the Learn Macramesection of this site.
Finishing Knots
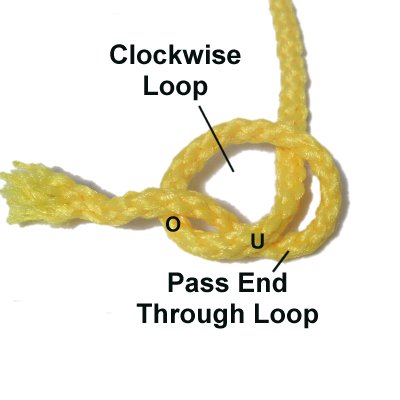
TheOverhand
knot is used frequently
in the final steps of many Macrame
patterns.
You will be tying this finishing knot with
two cords most of the time.
On occasion, you
may need to tie an Overhand knot with just
one cord.
You make a clockwise loop, then pass the
end through it from
below (under - over).
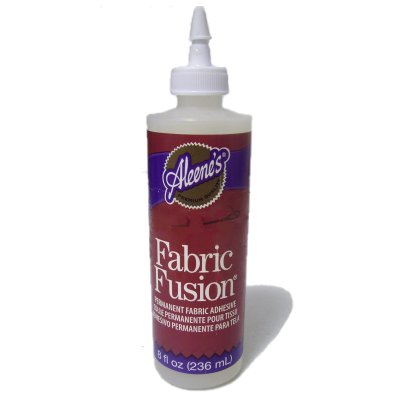
Glue is often used
with finishing knots, so they remain
tight.
Fabric
glue is the best type to use, but
household glue also works well. Just
make sure it dries CLEAR.
The best place to apply glue is INSIDE the
knot just before tightening it all the
way.
When you use
finishing knots in a project, try to place
them where they won't show.
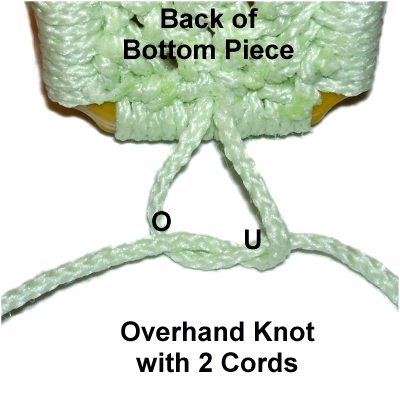
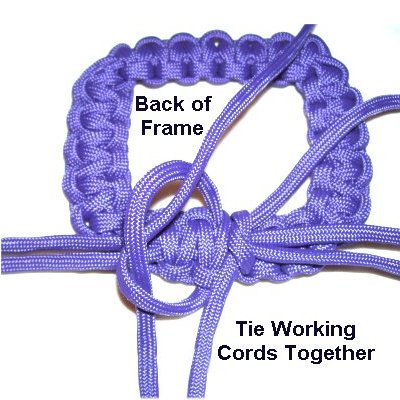
In this image of the Square Knot
Frame, I used the Overhand
knot to tie off two
cords in the back of the
frame.
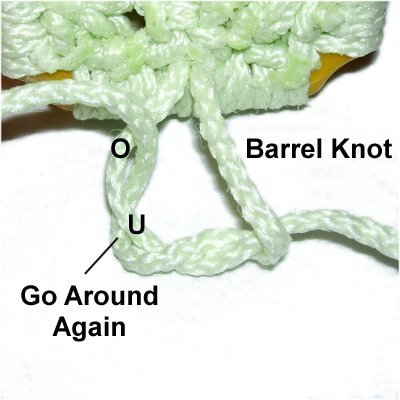
The Barrel
Knot is another popular
finishing knot. It's less likely to
loosen over time, so you may not need to
add glue.
This shows the knot tied with 2
cords. It looks different with one
cord, but the instructions are the same
(below).
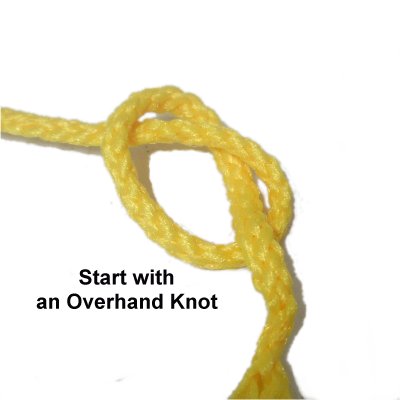
<<
Start the Barrel Knot by making an
Overhand knot.
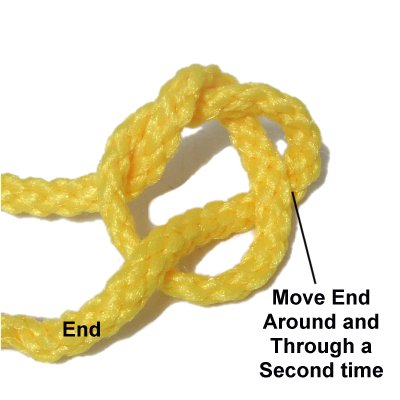
Move the
end around and through the loop a second
time. >>
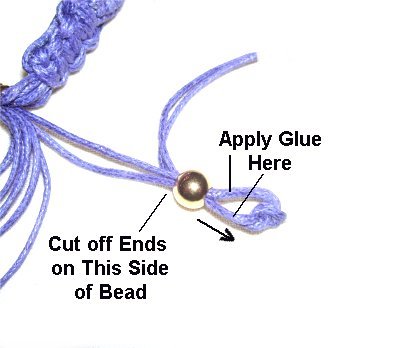
The best way to create a neatly finished look at
the end of a cord is to add a bead before the
finishing knot is tied.
This technique works the best when using Micro-Macrame
beads and cord materials.
In this Oval
Bracelet, the ends were
passed through a bead. An Overhand
knot was tied, and then the ends were
passed through again, the opposite
direction.
Glue was applied next to the knot and the
bead was moved on top of it. Once it
was dry, the ends were cut off close to
the bead.
Folding Techniques
Simple folding methods, like the ones shown
below, are excellent finishing techniques for many
Macrame projects.
The method you choose depends on the type of cord
material you are working with, and how flexible it
is.
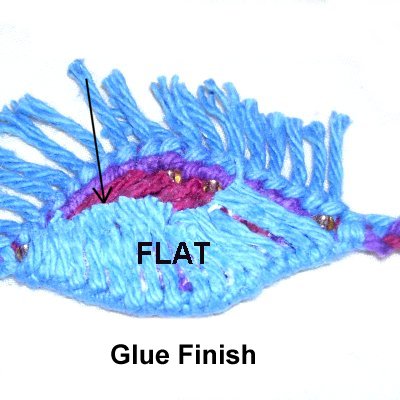
Flexible materials
like cotton may allow you to simply fold
the ends flat against the back surface of
the item you are making.
Then you add glue under
the ends to hold them in place, pressing
them flat while it dries.
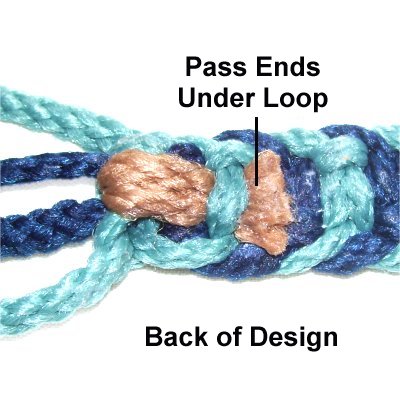
Using less flexible materials may
require an extra step:
Fold the cords to the back, then pass
them under
a loop from one or more knots.
Apply glue and allow it to dry before
cutting off the excess material.
When passing the
ends under loops, you may need to use fine
tip pliers, surgical clamps, or tweezers.
You pass the tool under the loop from one
knot, grab hold of the end, then pull it
through.
You can also WEAVE the ends through spaces in
the design, but only if the knots are lying close together.
Trim the ends to neaten them as much as
possible, before
weaving.Then use pliers or tweezers to weave
each end over and under
several spaces in the general
area.
You should not be able to see the ends if the
knots are close to one another. Use one of
the other finishing techniques if they don't
blend in.
Finishing with Fringe
Making a fringe is one of the most popular
finishing techniques in Macrame.
The term Macrame comes from the Arabic word
Miqrama" which can be translated to mean
ornamental fringe.
You have two options: You can make a
Brushed Fringe or a Beaded Fringe.
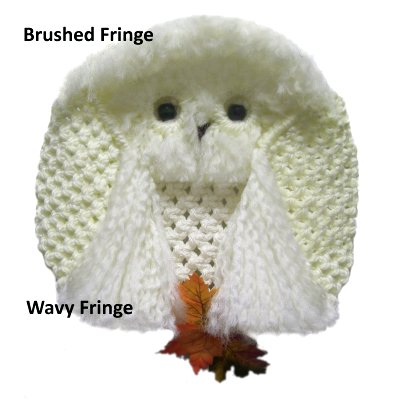
Brushed fringe
is often used in Macrame animals, like
this Snow Owl.
You can brush each fiber completely
smooth, like you see in this image (top of
the head).
Another option is to unravel the cords and
let the fibers stay wavy, as in the wing
feathers shown here.
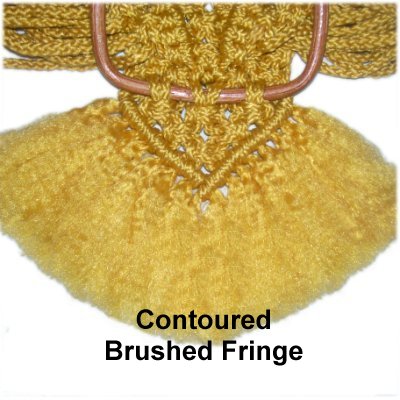
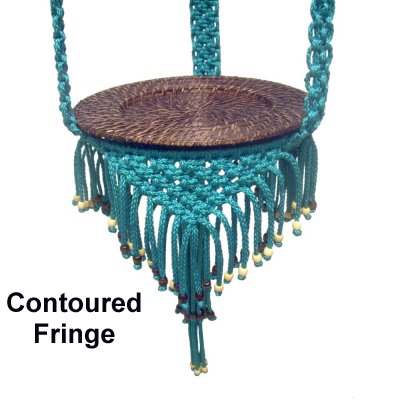
In some cases,
you may be asked to make a contoured
brushed fringe, so it follows the angle of
the knots the cords come from.
This image shows the tail feathers for the
Owl Holder,
which are cut on an angle.
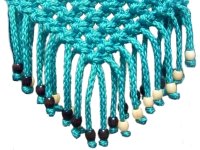
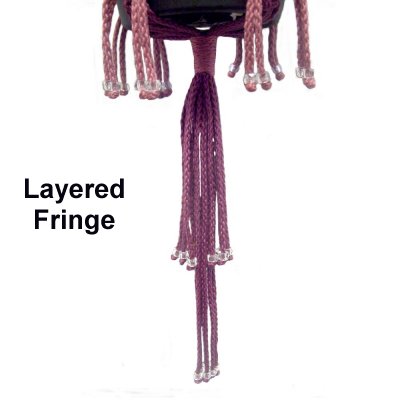
One of my favorite finishing techniques is
Beaded Fringe. The key to making it look
good is to divide the cords into two or more
groups.
Then you can make the fringe at different levels,
which is less bulky and more attractive.
This Royal
Hanger looks great with a
layered beaded fringe.
The long fringe is made with a few cords
coming from the inside of the bundle.
Then you make the shorter fringe with the
remaining cords, which surround the others
(outside cords).
For 3mm
-4mm
size material, you can use 9mm
glass crow rollers, as shown in this Two
Tone Planter.
For 5mm
-6mm
material, 12mm wood barrel beads
(5mm holes) are suitable.