Description:
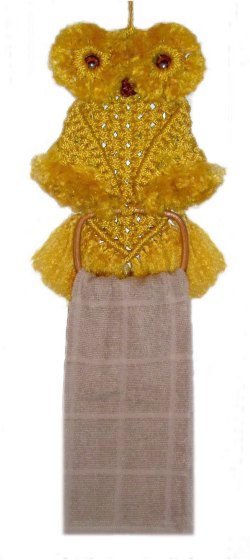
The Owl Holder is unique in the fact that
the head is rounded rather than the more
typical V-shape. The wings are
folded inward, and there is a soft fringe
around the eyes, tail, and wings.
A ring or square is added to make this
Macrame Owl a towel holder. You can
add a branch if you don't want a
ring. Try to use plastic eyes rather
than beads.
This Macrame project is rated Easy,
suitable for beginners. Make sure
you know how to tie all the knots listed
below.
The finished size is 18 inches tall
(includes hanger).
Supplies
Needed:
6mm cord material
Two 1.5-inch rings
Two Eyes
One ring or square 5 - 7 inches (or 8-inch
branch)
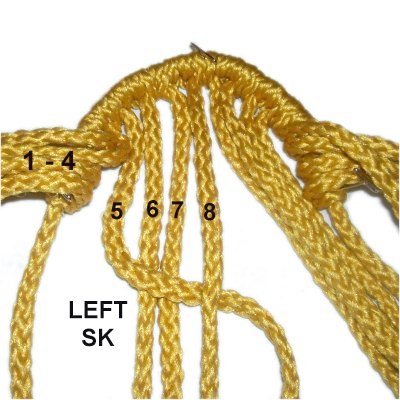
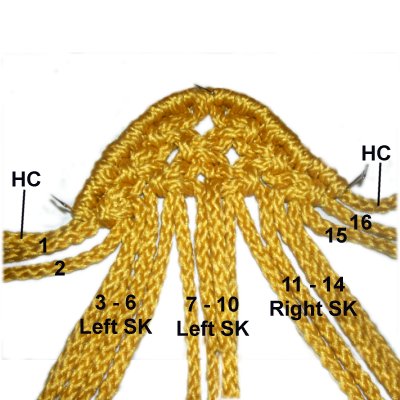
Step 17:
Tie the 13th row of ASK:
LEFT SK: Cords 11 - 14, 15 - 18, 19
- 22.
RIGHT
SK: Cords 23 - 26, 27 - 30, 31 - 34
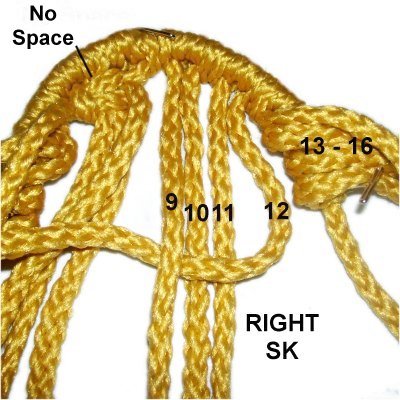
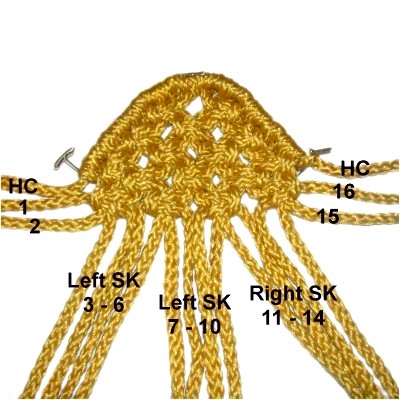
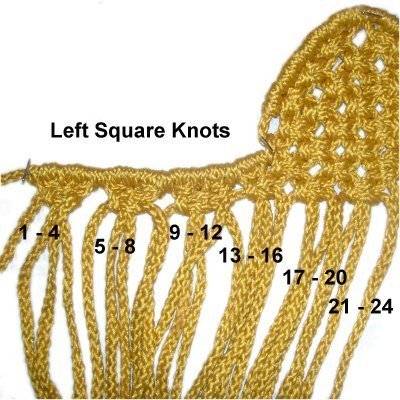
Step 18:
Tie the 14th row of ASK:
LEFT
SK: Cords 13 - 16, 17 - 20,
21 - 24.
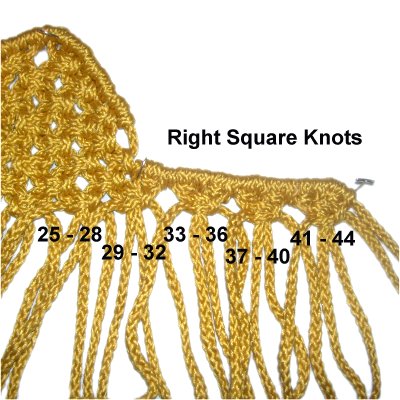
RIGHT
SK: Cords 25 - 28, 29 - 32.
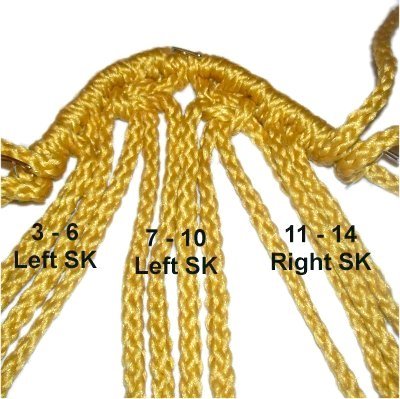
Step 19:
Tie the 15th row of ASK:
LEFT
SK: 15 - 18, 19 - 22.
RIGHT
SK: Cords 23 - 26, 27 - 30.
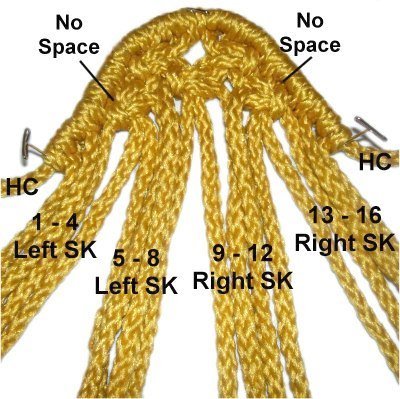
Step 20:
Rows 16 and 17 are tied with the body
cords only, so mentally number them 1 -
16. Make sure you don't include any wing
cords, which are shorter.
Row 16: LEFT
SK with cords 3 - 6, and 7 -
10. RIGHT
SK with cords 11 - 14.
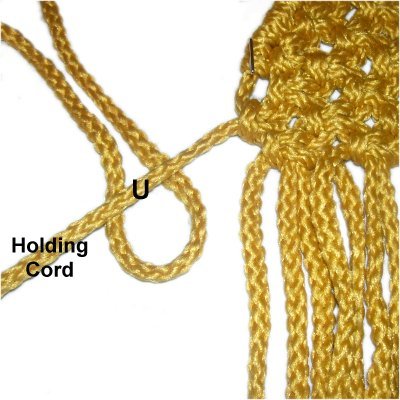
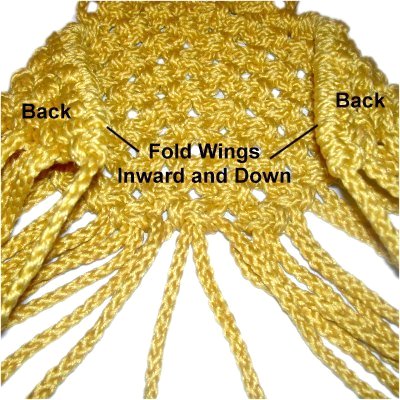
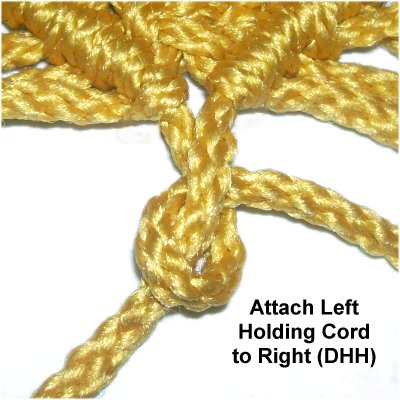
Step
21: Fold the wings inward and
down, so the back
of them is face up. They should be
triangular.
Bring them to the center of the body,
where they will be attached.
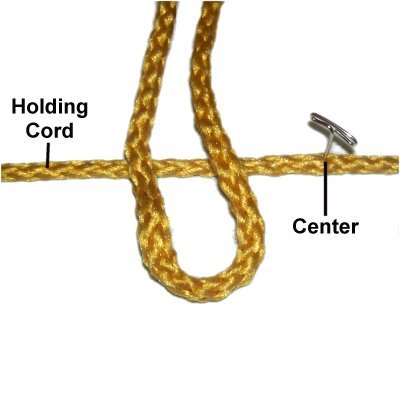
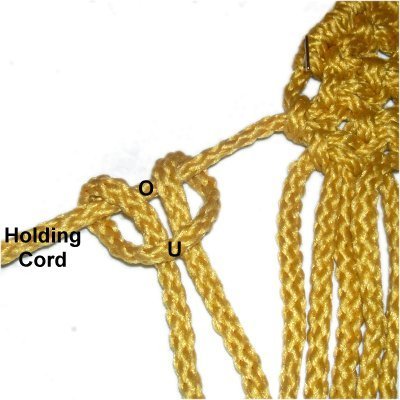
Slide the
holding cord from the left
wingunder
cord 8, then attach it with a clockwise
Double Half Hitch
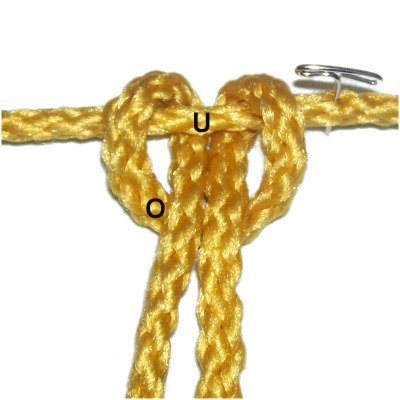
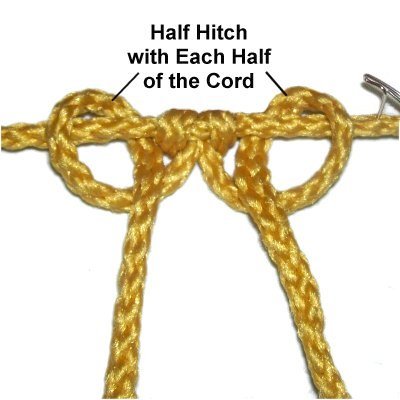
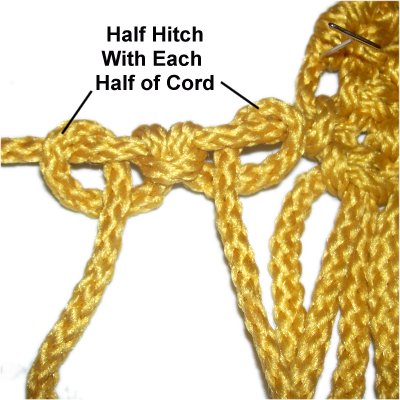
A single Half Hitch is shown in this
image, and the one below.
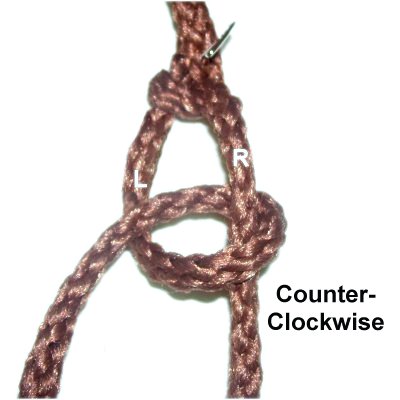
Slide the
holding cord forthe right
wingunder
cord 9, then attach it with a counter-clockwise
DHH.
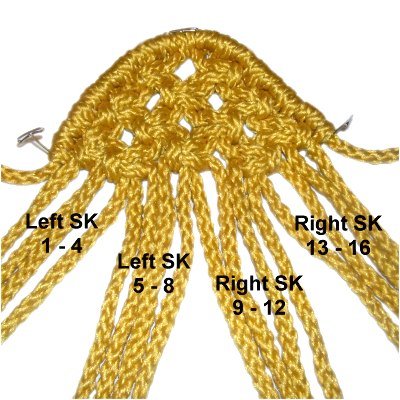
Step 22:
Tie row 17, which completes the body of the Owl
Holder.
LEFT
SK with cords 1 - 4 and 5 - 8.
RIGHT
SK with cords 9 - 12 and 13 - 16.
The Tail and Feathers
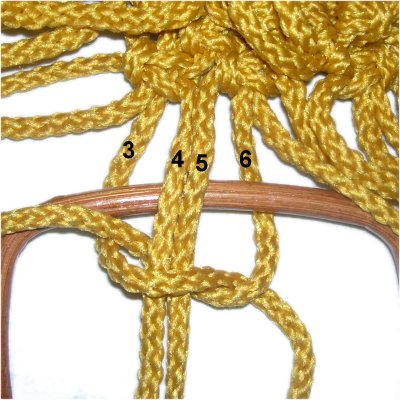
Step
23: Place filler cords 4 and 5 over
the large ring. Working cords 3 and
6 should be under
it.
Use the 4 cords to tie a LEFT SK, below
the ring.
Step 24: Repeat
step 23 with the other cords for a new
row of ASK:
LEFT
SK with cords 7 - 10 (8 and 9 over
ring, 7 and 10 under
ring).
RIGHT
SK with cords 11 - 14 (12 and 13 over
ring, 11 and 14 under
ring).
Step 25:
Tie another row of ASK to make the tail of the Owl
Holder:
LEFT
SK with cords 5 - 8. RIGHT
SK with cords 9 - 12.
Step 26:
The final row is tied using cords 7 - 10 (LEFT
SK)
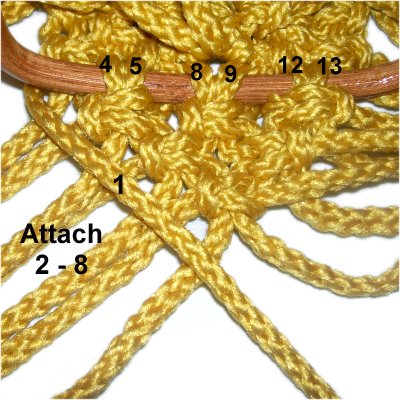
Step
27: Move cord 1 along the
left diagonal edge of the ASK.
Secure it with tension.
Attach cords 2 - 8 to it with counter-clockwise
DHH.
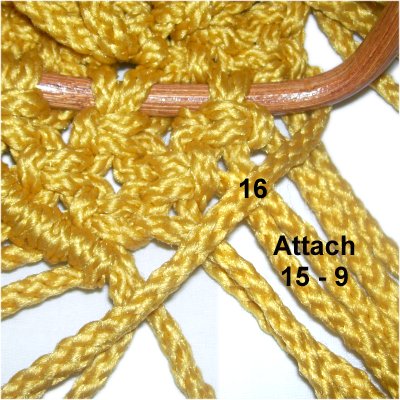
Step
28: Move cord 16 down the
right edge of the ASK.
Attach cords 15 - 9 to it with clockwise
DHH, in that order.
Step
29: Attach the holding cord
on the left to the one on the right with a
clockwise
DHH.
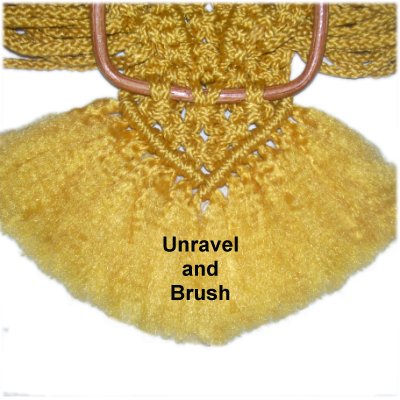
Step
30: Trim the cords so they
are 6 - 12 inches long. Unravel and
brush if you want fluffy tail feathers for
your Owl Holder.
You also have the option of adding beads
and/or other knots.
Eyes and Beak
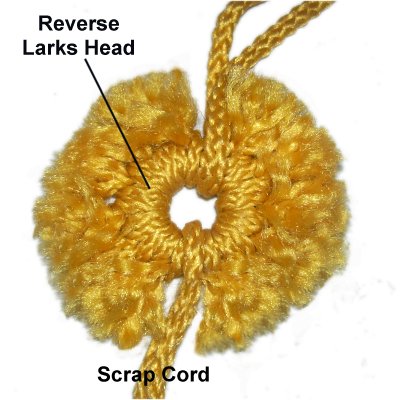
Step 31: Cut
10 pieces of material, each 5 inches long (or use
scrap cord).
Mount
each to a 1.5-inch ring with a Reverse
Larks Head knot. Unravel and brush
the fibers. Trim the feathers to
around 1 inch long.
Place 2 pieces of scrap cord around the
ring between the other cords. These
are used to attach the ring to the face of
the Owl Holder.
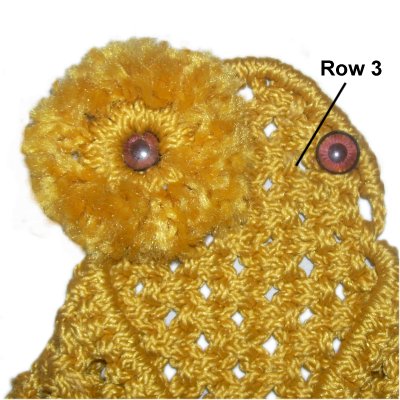
Step 31,
continued: Attach the eyes close to
the right and left edges of the head, through
spaces in row
3. (See image below)
Apply glue or secure in the most appropriate
manner (such as washers).
Step
32: Place the eye feathers over
the left eye. Secure them by passing one
end of a scrap cord through an opening in
the face, front to back.
The best place is above the eye near the
mounting knots.
Place the other end of the same cord
through a different
opening nearby.
Step 32,
continued: In the back
of the Owl Holder, tie the two ends together with
an Overhand knot. Apply glue while
tightening, and cut off the excess material when
it's dry.
When using Bonnie Braid, you can heat the tips to
melt the material.
Step 33:Repeat
step 32 with the second scrap cord (same
ring), placing it through two spaces lower down on
the left side of the face.
Step 34:Repeat
steps 31 - 33 to make and attach the
second ring of eye feathers on the right side of
the face.
Step
35: Unless you can find a
bead shaped like a beak, you will need to
make one for your Owl Holder.
Cut two pieces of dark material, each 25
inches long.
Move down 8 inches and secure the
cords. Use the right cord to tie a clockwise
Half Hitch onto the left.
Tie a counter-clockwise
Half Hitch with the left cord, onto the
right.
Alternate between the right and left
cords, tying a total of 8 - 10 knots.
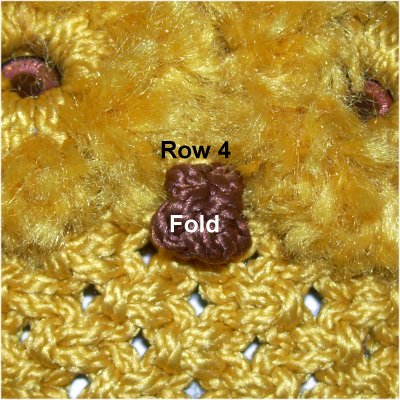
Step
36: Place 2 ends of the
beak through a space just below Row 4 (in
the center). Place the other two
through a different space.
Tie two ends together with an Overhand
knot. Apply glue. Do the same
with the other two ends. Cut off the
excess material when the glue is dry.
Step 37:
Unravel and brush the wing cords, and trim them to
1.5 - 2 inches in length.
There's an opening at the top of the head in the
center of the Owl Holder. Place a piece of
scrap cord through it, then tie the ends together
to form a hanger.
By
using any text or images on Free Macrame
Patterns, you are agreeing to ourTerms
of Use