Step
1: Cut 18 cords each 3
yards long. Prepare the
ends with tape
to prevent unraveling.
Cut 17 cords, each 8
inches long, for the
head feathers (no preparation).
Mount the 3-yard cords to the top of the large
ring, using Larks Head Knots. Since you fold
them in half, you will have 36 cords to make the
body of the Snow Owl.
Mount the 8-inch cords for the head feathers, between
each of the 3-yard cords. Flip them out of
the way while you complete the next few steps.
Step 2:
Mentally number
the cords for the body 1 - 36.
Using
only the
3-yard cords,
tie 5 rows of Alternating Square Knots, in the
groups shown below. Each knot should be
tied using 2 working cords and 2 fillers.
Rows 1, 3, 5:
Use 1 - 4, 5 - 8, 9 - 12, 13 -
16, 17 - 20, 21 - 24,
25 - 28, 29 - 32, and 33 - 36
Rows 2 , 4:
Use 3 - 6, 7 - 10, 11 - 14, 15
- 18, 19 - 22, 23 - 26,
27 - 30, and 31 - 34
The first row
should rest against
the Larks Head knots from the previous step, and
will follow the curve of the ring.
Tighten all the knots firmly, so the rows in
the body of the Snow Owl are close together.
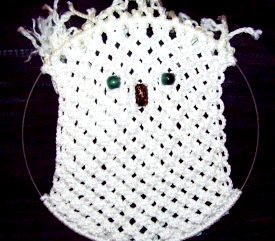
Row 6: Slide one
of the beads for the eyes
onto cords 12 - 13. Slide another one onto
cords 24 - 25.
Tie the ASK using cords 3 - 6, 7 - 10, 11 - 14,
15 - 18,
19 - 22, 23 - 26, 27 - 30, and 31 - 34
When you reach the beads, make sure the knots
are resting against
the bottom of them.
Row 7:
Slide the 22mm bead for the beak onto cords 18 -
19.
Tie the ASK with cords 1 - 4, 5 - 8, 9 -
12, 13 - 16, 21 - 24,
25 - 28, 29 - 32, and 33 - 36. Do
not use cords 17 - 20.
Step 3: Continue the
Alternating Square Knots (rows
8 - 20):
Even Numbered
Rows: Use 1 - 4, 5 - 8, 9 - 12,
13 - 16, 17 - 20,
21 - 24, 25 - 28, 29 - 32, and
33 - 36
Odd Numbered
Rows: Use 3 - 6, 7 - 10, 11 - 14,
15 - 18, 19 - 22,
23 - 26, 27 - 30, and 31 - 34
Row 21: Attach cords
1, 2, 35, 36 to the bottom left and
right areas of the ring, with Double Half
Hitches.
Be sure to stretch
the Snow Owl body taut as you attach the cords
to the ring.
Complete the row of ASK with the remaining
cords. Since it's an odd
numbered
row, use cords 3 - 34 (see step 3).
Row 22:
Attach cords 3, 4, 33 and 34 to the ring with
DHH. Use cords 5 - 32 to complete the row.
(see step 3 - even)
Row 23:
Attach cords 5, 6, 31, and 32 to the ring with
DHH. Use cords 7 - 30 to complete the row.
(see step 3 - odd)
Row 24:
Attach cords 7, 8, 29, and 30 to the ring
with DHH. Use cords 9 - 28 to complete the
row. (see step 3 - even)
Step 4: Attach all of the
remaining cords to the ring with DHH.
|
|
Step 8: Cut 20 cords, each
72 inches long. Prepare the ends with
tape
to prevent unraveling while you work.
Mount the cords to the
right area of the ring, with Larks
Head Knots. These cords should fit in the
exposed area of the ring, between the upper and
lower body.
The heads of the knots should be face up,
same as the knots for the body of the Snow Owl.
Step 9: Mentally number the
wing cords 1 - 40. Tie 2 rows of Alternating
Square Knots.
For row 1, use cords 1 - 40. For row 2,
use cords 3 - 38.
Step 10: For Rows 3 - 9,
drop
(don't use) the first and last 2 cords. Tie the
row with the remaining cords:
Row 3:
Drop cords 3, 4, 37, 38. Tie the ASK with
5 - 36.
Row 4:
Drop cords 5, 6, 35, 36. Tie the ASK with
7 - 34.
Row 5:
Drop cords 7, 8, 33, 34. Tie the ASK with
9 - 32.
Row 6:
Drop cords 9, 10, 31, 32. Tie the ASK with
11 - 30.
Row 7:
Drop cords 11, 12, 29, 30. Tie the ASK
with 13 - 28.
Row 8:
Drop cords 13, 14, 27, 28. Tie the ASK
with 15 - 26.
Row 9:
Drop cords 15, 16, 25, 26. Tie the ASK
with 17 - 24.
Step 11: Organize the dropped
cords along the edges of the wing.
Locate cord
1, to be used as a holding cord. It
should follow the angle of the Square knots on
the left. Attach cords
2 - 20 to it with DHH.
Locate cord
40, and place it over the remaining
cords on the right. Attach cords
39 - 21 to it with DHH, in
that order.
Step 12: Pass the two holding
cords (1 and 40) through the body via openings
near the edges. The wings of the Snow Owl
should bulge
outward slightly.
In the back
of the Snow Owl, tie an Overhand knot with each
cord to secure the wing. Apply glue and cut off
any remainder.
Step 13: Trim cords
2 - 11 to 2 inches, and work them into
the back of the wing, weaving through the back
of the knots to hold them in place.
Do the same with cords
30 - 39.
Trim the remaining ends, so they rest close to
the bottom of the large ring. Unravel each
cord, but
do not brush.
The Snow Owl looks best with a wavy fringe.
Step 14: Repeat
steps 8 - 13 to make the left wing.
|