Description:
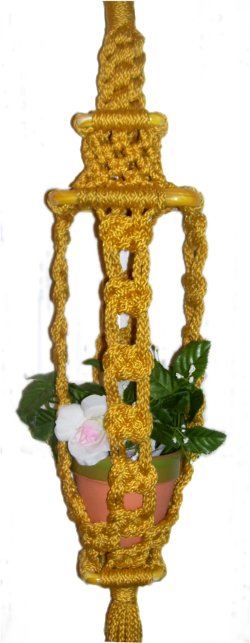
The Diamond Planter features three
uncommon knots. The Diamond Stitch,
Sailors Knot, and Crown knot are vintage
decorative knots rarely seen together in
one design.
There is a short cradle at the bottom to
help hold the pot in place. It's
suitable for 4-inch pots, but can be made
wider.
Either squares or rings can be used in
this project, but keep in mind that they
are not completely covered.
The finished size of the Plant Hanger
will be approximately 32 inches tall,
which includes the fringe.
Cut
8 cords, each 6 yards long.Cut 2
cords, 1 yard in length.
Prepare the ends of the 6-yard cords to prevent
unraveling.
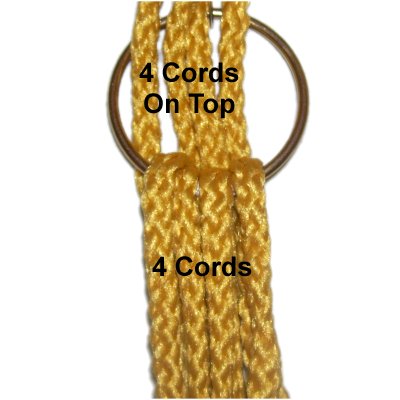
Step
1: Pass 4 cords through the
2-inch ring, folded over the bottom.
Arrange the other four cords on
top of the first four.
Match the ends so all the cords are
balanced.
The image shows the top four cords before
they were folded on top of the others.
Wrapped Knot Instructions
Since the Diamond Planter is a beginner's
project, I've included instructions for most of
the knots.
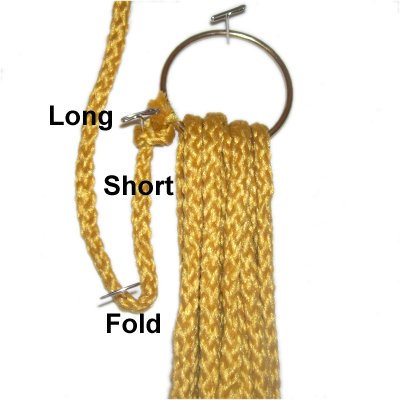
Here are the steps to making a Wrapped Knot:
Step
2: Tie an Overhand knot at
one end of a 1-yard cord. Secure it
to the left of the bundle of cords.
Bring it down 3 inches, fold it, then
bring it back up. The long portion
should be on the left. Secure it at
the fold.
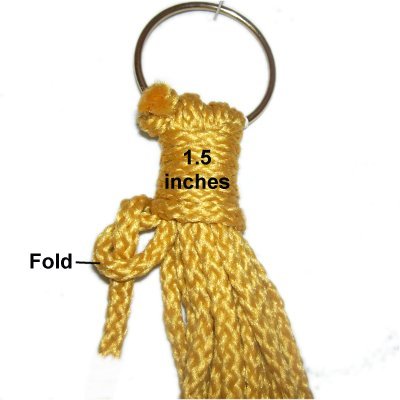
Wrap the long
portion around the bundle of cords.
Make sure it goes around the short
portion, too.
Continue to
wrap firmly several times, until the
Wrapped knot is 1.5
inches long.
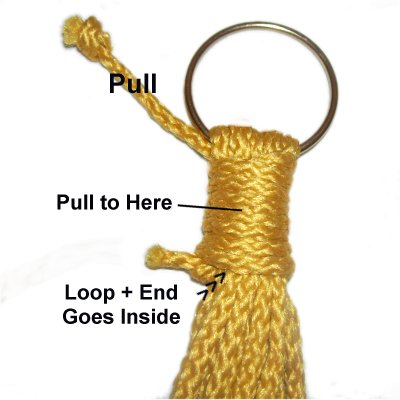
Pass the end through the area where the
cord was folded, which now looks like a
loop.
Pull the end
with the Overhand knot gradually.
The loop and other end will go inside the
knot. Continue to pull until the
loop is at the middle of the Wrapped Knot.
Trim both ends close to the top and bottom
of the knot. Push the stubs inside
the wrapped area so they don't show.
Apply glue to hold them in place.
Step 2,
continued: Pull down on each half
of the 6-yard cords, so they grip firmly around
the ring.
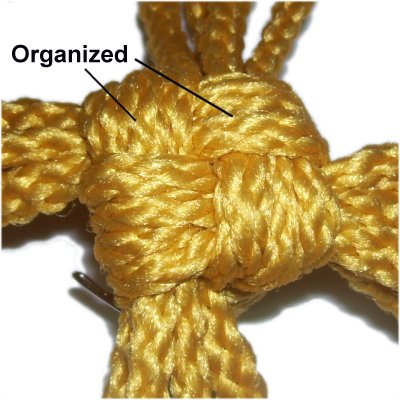
Crown Knot Instructions
Now you will make a Crown Knot near the top of
your Diamond Planter.
The most important aspect of this knot is
NEATNESS. Keep the four cords in each group
as organized as possible, while you construct the
knot.
Step
3: Divide the cords into 4
groups of four. Make a bundle
with each group, and secure it with a
rubber band.
Place the ring on the surface of you
board, or on your lap, so the Wrapped Knot
is upright.
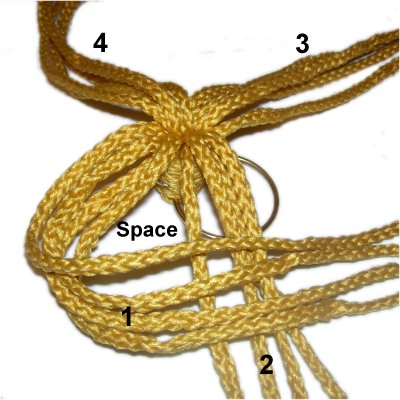
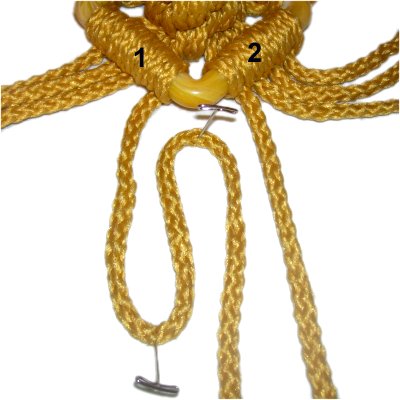
Mentally number the groups as shown, with
group 1 on the lower left.
<<
Move group
1 to the right, placing it on top
of group 2.
Leave a space for the 4th group.
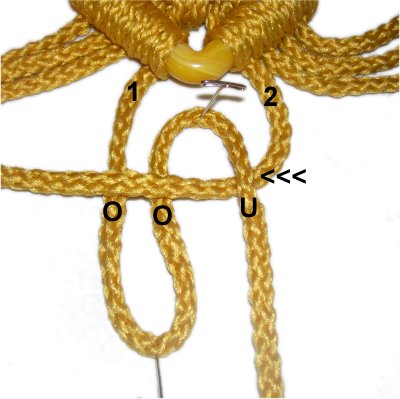
Move group
2 vertically,
placing it on top of group 3. >>
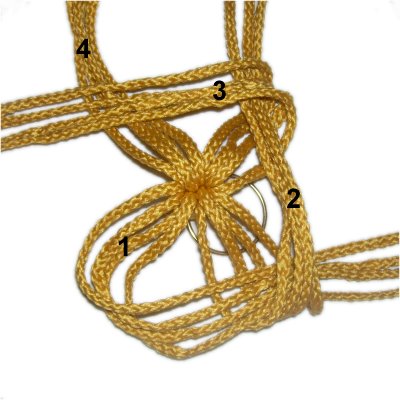
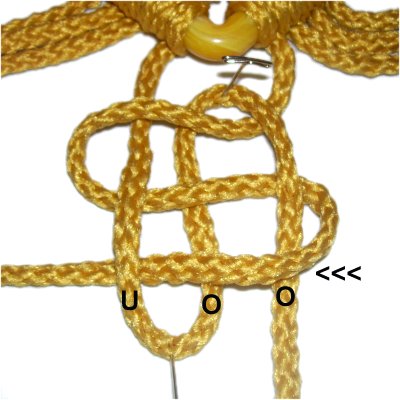
<<
Move group
3 to the left, placing it on top
of group 4.
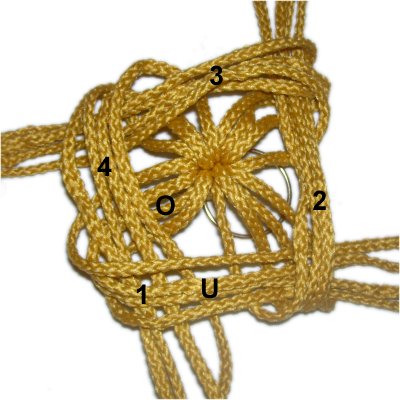
Move group
4 forward, passing it through
the space (group 1) from the top (over -
under). >>
Tighten the
Crown Knot slowly by pulling on each
group. Move the cords as
needed so they are organized and overlap
as little as possible.
Step 4:Repeat
step 3 several more times, until
the Crown knot sennit is 3.5 inches long.
Step
6: Place a 3-inch square
over the Crown knot, so it's resting in
the center. One group of cords
should be arranged under
each side.
Attach all the cords to it with Double
Half Hitches. Pull each cord firmly
before tightening.
Diamond Stitch Instructions
The Diamond Planter gets it's name from the
Diamond Stitch, which was very popular in Macrame
patterns of the early 1900's.
Should this knot prove too challenging for you,
the Triangle knot
is a good substitute. Click on the link to
see the instructions.
Step
7: Select one cord from two
sides of the square. They should be
the ones closest to the
corner. Mentally number them 1
and 2 as shown.
Use cord
1 to make two vertical bights,
securing each one at the fold. The
result is three segments.
Move cord
2under
- over - over the three vertical
segments, moving right
to left.
Move cord 2 under
- over - under the three vertical
segments, moving left
to right.
Move cord 2 over
- over - under the three vertical
segments, moving right
to left.
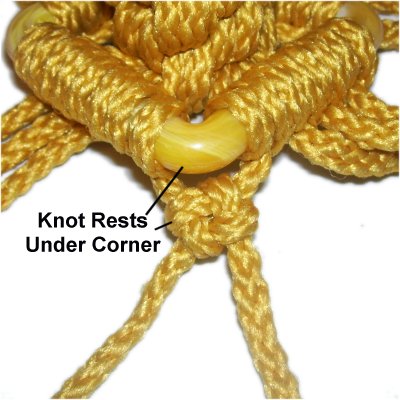
Tighten each
area gradually, until the knot is as close
to the square as possible. It will
rest under the corner.
Step 8:Repeat
step 7 at the other three
corners, then tie the knots with the
remaining cords (center area of each
side).
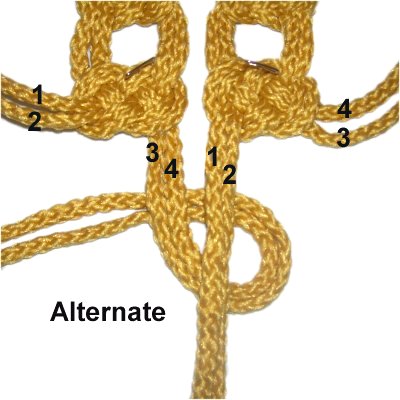
For the
remaining rows in this area of the Diamond
Planter, you need to alternate
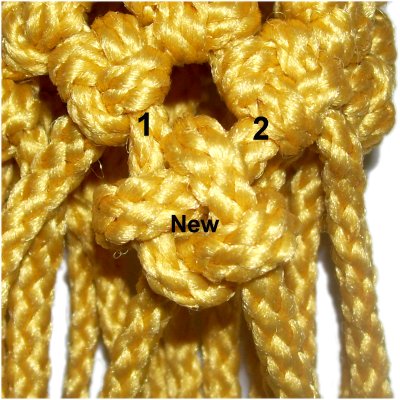
the cords.
That means you select one cord from two
knots resting next to each other. Use
those two cords to create a new Diamond
Stitch knot.
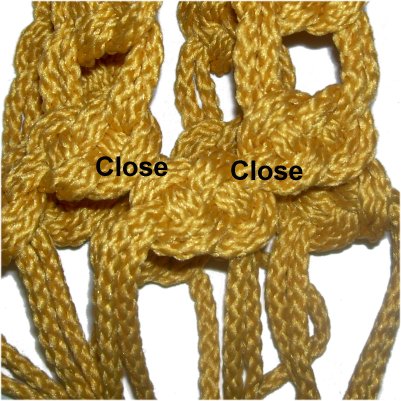
The new knot in this image is loose so you
can see it clearly (see information
below).
It's important
to remove all the slack as you tighten, so
the knots are as close together as
possible.
The neatness of the Diamond Planter
depends on careful tightening in this
area, so take your time.
Step 9:Repeat
steps 7 - 8 four times, for a total of
five rows.
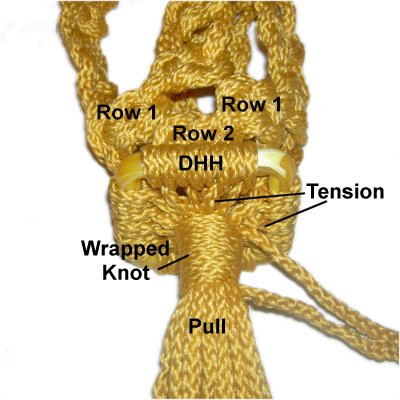
Step
10: Attach the cords to the
5-inch square with TRIPLE Half Hitches
(one DHH + a single Half Hitch).
There should be 4 cords per side -- two
from a knot at the center area, and one
from a knot at each corner.
Stretch the knots as much as you can, so
there is tension
at the corners.
Sailor Knot Instructions
This is another area of the Diamond Planter
where neatness is important. Make sure each
pair of cords rest side-by-side.
You will now be making the Sailor Knot, which is a
variation of the Josephine Knot. Each one is made
with 4 cords coming from one side of the square.
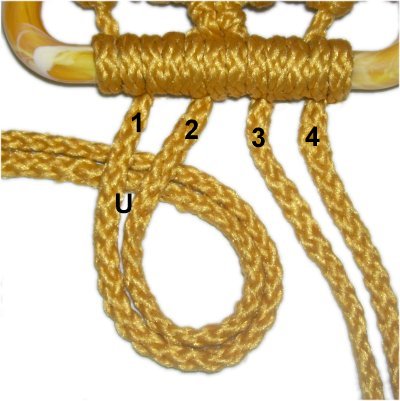
Step
11: Mentally number the
four cords on one side of the square.
Make a counter-clockwise
loop with cords
1 - 2, passing the ends under
to make the crossing point.
Begin a clockwise
loop with cords
3 - 4, passing them over
the first loop. Allow them to rest
on top of it.
Bring them under
the ends of cords 1 - 2, to the left of
the first loop.
Move cords
3 - 4over
cords 1 - 2 in the area just below the
square.
Weave it through the first loop, over
- under - over the three
segments.
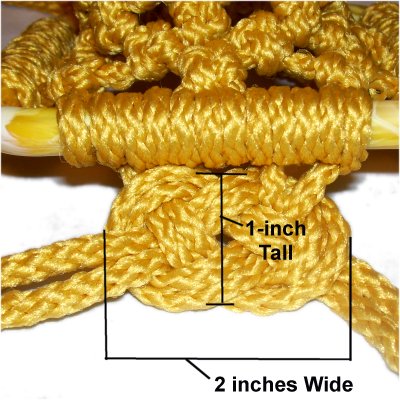
Tighten and
balance the Sailor Knot so both loops are
the same size, and the cords are neatly
arranged.
The overall size of the knot should be
1-inch tall and 2-inches wide.
It should be as close to the square as you
can get it.
Step
12:
Repeat step 11 four more times,
for a total of five Sailor Knots.
There should be 1-inch
of space between the bottom of
one knot and the top of the next.
Step 13: Repeat
steps 11 and 12 with the cords coming
from the other three sides of the square.
Measure each
strap to be certain they are all the same
length.
The Diamond Planter has been changed from the
original pattern in this next area.
You will be creating a small cradle, which helps
to hold the pot in place. Two rows of
alternating
Sailor Knots are tied prior to attaching the last
square.
Step
14: Secure two straps on
your board, making sure they are not
twisted. Mentally number
the cords coming from the 5th knot in each
strap.
Use cords 3 - 4 from the left knot,
combined with cords 1 - 2 from the right
knot. Tie a new Sailor knot,
which connects the two straps.
You have a
decision to make. By tightening the
alternated Sailor knots so they are close
to the 5th knot in the straps, the cradle
will be only large enough for a 4-inch
pot.
You can make it looser by adding 1/2 to
1-inch of space between the 5th knot in
each strap and the alternated knots.
Step 15:Repeat
step 14 with the remaining cords coming
from each strap. This is considered row 1 of
the cradle.
Step 16:
Alternate the cords again, and tie another row of
Sailor Knots. These should line up with the
knots in the strap.
Make sure you add enough space between the knots
to fit the pots you want to use in the Diamond
Planter.
The last square is optional, but it gives the pot
something to rest on that's more sturdy than just
cord material.
Step
17: Attach the cords to the
3-inch square with DHH (four cords per
side).
The Sailor Knots in the second row of the
Cradle should be touching
the Square.
Place your pot in the cradle to see if it
fits. Make adjustments if
necessary.
Step 17,
continued: Gather all the cords
together in the center of the square.
Repeat
step 2, tying a Wrapped Knot around
them.
After it's tightened, pull each cord firmly so
there is tension in the bottom of the
square. Finish off the ends of the cord used
to make the Wrapped Knot.
Step 18: To
create the fringe at the bottom of the Diamond
Planter, trim the ends of all the cords so they
are even.
You can apply beads, then tie Barrel
knots just below them. Another
option is to unravel and brush the fibers to
form a wavy fringe.
When using materials like Bonnie Braid
(polypropylene), you can leave the cords
intact. Apply a flame to the tips, so the
material melts. This gives the Diamond
Planter a nicely finished appearance.
By
using any text or images on Free Macrame
Patterns, you are agreeing to ourTerms
of Use