|
|
| |
|
|
|
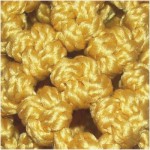
Description:
The Diamond Stitch resembles both the Cross
Knot and the Crown knot.
It's sometimes called the Box Knot, especially in
vintage Macrame books.
Unlike the Cross Knot, it does not have a loop and
is tied with two separate cords. So it can
be made after other knots have been tied.
When you make a Crown Knot, each knot rests on top
of the previous one, which results in a
stack. In this design, the knots rest
next to each other without stacking. So it
can be tied in a sennit and in alternating row. |
| |
| |
|
|
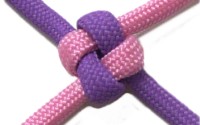
Usually the
knot will rest in a diamond shape, like
the image at the top of the page.
This image shows how the knot is square if
the ends are vertical and
horizontal. That's why it's called
the Square Stitch or Box Knot in vintage
Macrame books.
|
|
| |
|
|
|
|
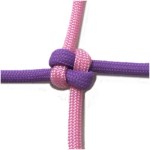
This is an image
of an alternating pattern that was used to
make one area of the Diamond
Planter.
After you make one row, you simply choose
one cord from two different knots to make
the next row.
Click on
the image or link to view the page. |
|
|
|
|
|
Instructions
|
|
| |

|
|
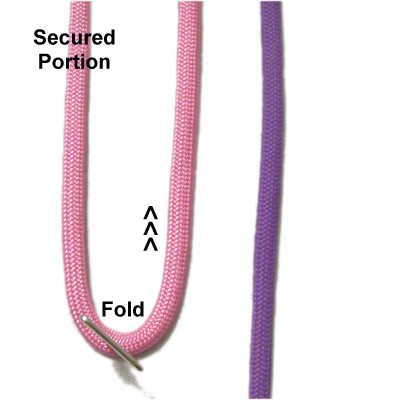
Step
1: To practice the Diamond
Stitch, secure two cords vertically on
your board.
Fold the left
cord so the end of it is heading
backward (away from you).
Secure the folded area.
|
|
| |
|
| |
|
|
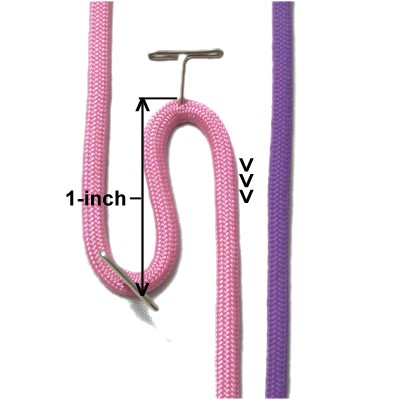
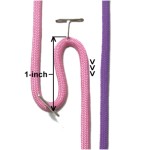
Step
2: Place a pin on the left
cord 1-inch from the pin at the
first fold.
Then fold it at the pin, moving it forward
(toward you).
|
|
| |
|
|
Designer's
Tip: The distance between the pins
can be increased or decreased, depending on the
thickness of the material. You will quickly
be able to determine the best placement after you
make a few knots.
Once you are familiar with this knot, try making
it without pins. |
|
|
| |

|
|
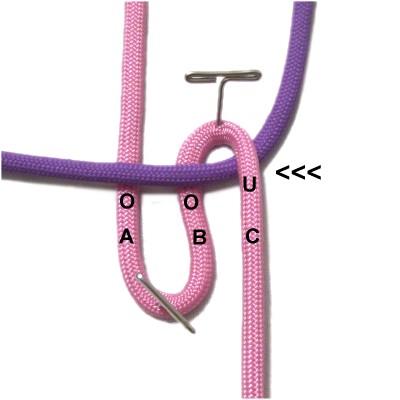
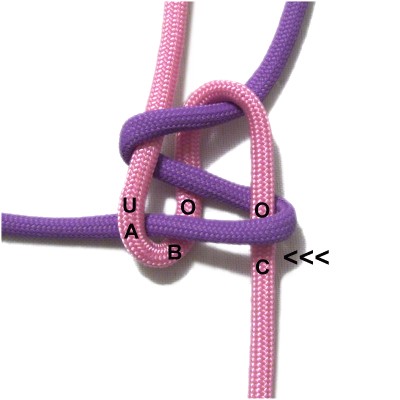
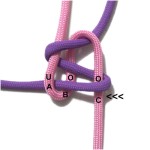
Step
3: Mentally label the
three segments of the left
cord A - C as shown.
Move the right
cord under
segment C and over
segments B and A, heading left
horizontally.
|
|
| |
|
|

|
|
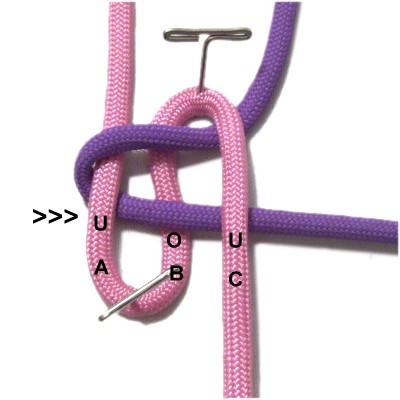
Step
4: Move the right
cord to the right, passing it under
segment A, over
B, and under
C.
|
|
| |
|
|
|
|
Step
5: Move the right cord to
the left, passing over
segments C and B, and under
segment A.
Tighten the knot gradually by pulling on
the ends.
|
|
|
| |

|
|
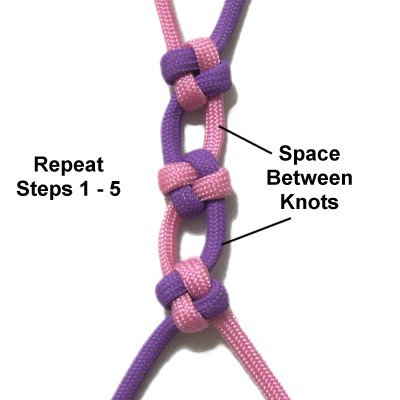
Step
6: Repeat
steps 1 - 5 at least 2 more times
if you are practicing
the Diamond Stitch.
Leave some space between the knots so they
are more obvious.
|
|
| |
| |
| |
|
|
| By using any
text or images on Free Macrame Patterns, you are
agreeing to our Terms of Use |
|
|
|
| Have
any comments about the Diamond Stitch?
Contact Me. |
|
|
|

|
|
|
|