|
| |
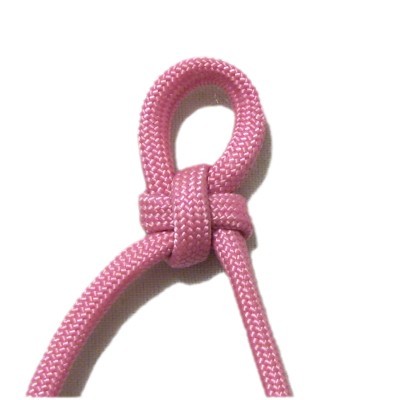
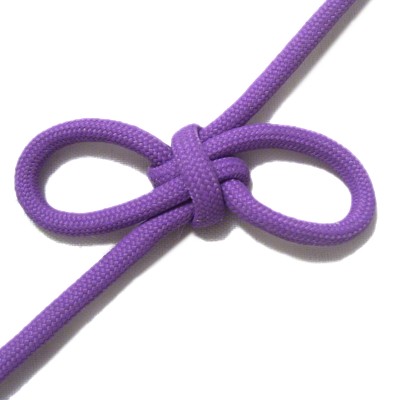
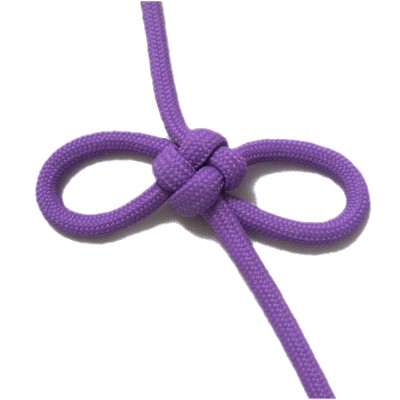
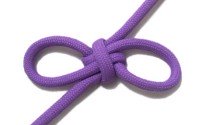
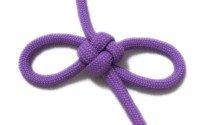
Winged Cross
|
| |
|
< Front
Back >
|
|
|
| |
| |
Description: The
Winged Cross is a unique variation seldom seen in
Chinese Macrame. The difference is that this
design has two loops, which can be used as
attachment points for other cords.
When the wings are horizontal, the ends of the cord
are diagonal. It's the opposite if the ends
are horizontal. Take that into
consideration if you plan to use it in a Macrame
project.
As you create this knot, you will be looking at the
BACK. |
| |
|
| |
|
|
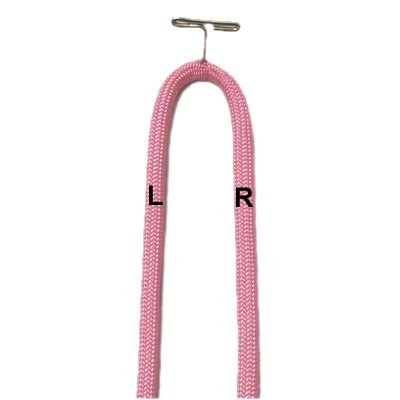
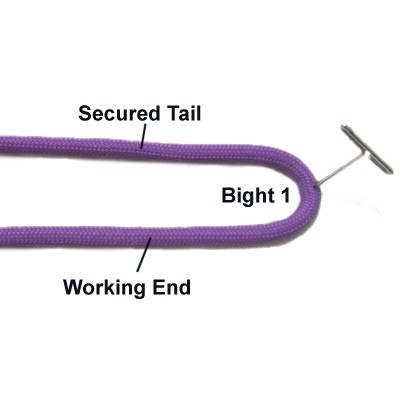
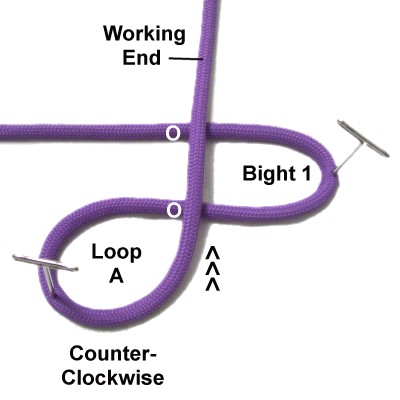
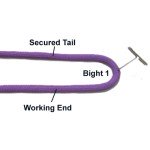
Step 1:
Secure one end of a 45-inch cord to your
board horizontally (tail).
Fold the working end to form Bight
1. Arrange it so the fold is
on the right,
with the working end in the forward
position. |
|
| |
|
| |

|
|
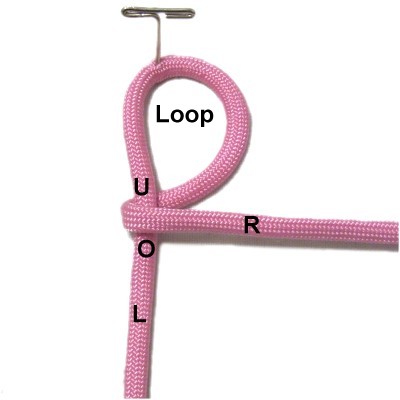
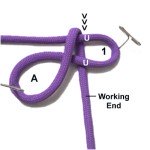
Step 2: Make Loop
A with the working cord, rotating
counter-clockwise.
Move the working end backward, passing over
Bight 1.
|
|
| |
|
|
|
|
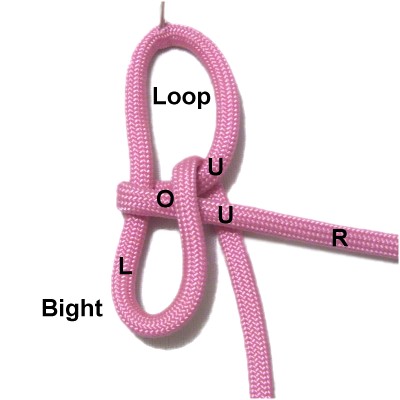
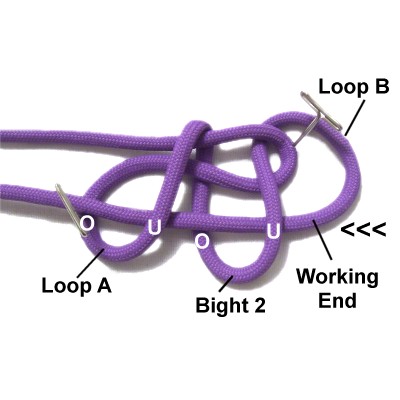
Step
3: Pass the working end under
Bight 1 as you bring it toward you
(forward).
|
|
|
| |
|
|
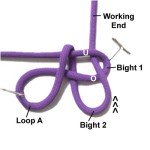
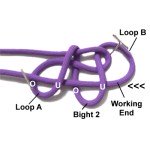
Step 4: Make Bight
2 by moving the working end
backward vertically.
Pass it through Bight 1 over
- under.
|
|
| |
|
| |
|
|
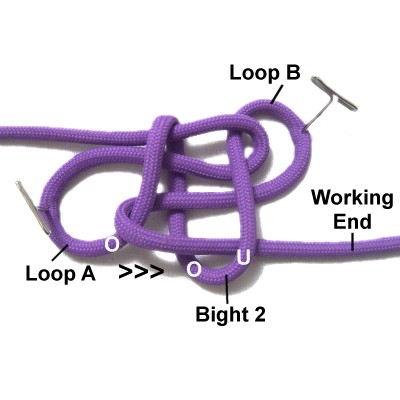
Step 5: Rotate the
working end clockwise
to make
Loop B in the upper right area of
the Winged Cross Knot.
Move it under
- over
Bight 2
heading left. Do the same with Loop
A.
|
|
| |
|
| |

|
|
Step 6: Fold the working
end to the right, passing it over
the right side of Loop
A.
Pass it through Bight
2 over
- under.
|
|
| |
|
| |
|
|
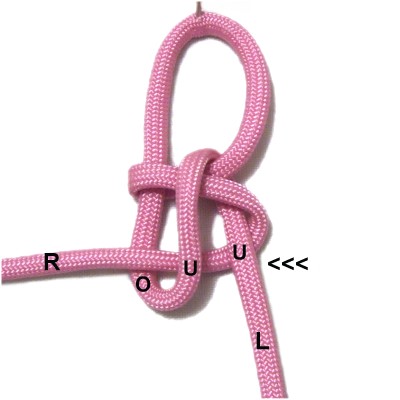
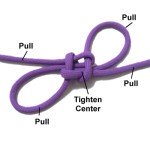
Step
7: Tighten the center
of the Winged Cross Knot by pulling both
loops and the two ends of the cord.
In this image, the center area is slightly
loose. Be sure to tighten the area
completely.
Turn the knot over so you are looking at the
front (next image).
|
|
| |
| |
|
|
|
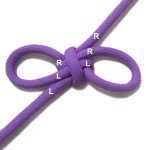
Step
8: Reduce the size of the
wings by pulling each loop close to the
center area, then where it folds around the
opposite loop. Pull the end of the
cord last.
In this image, the three points for both the
right wing (R) and the left wing (L) are
labeled. |
|
|
|
|
|
By
using any text or images on Free Macrame
Patterns, you are agreeing to our Terms
of Use
|
|
|
| |
|
Have
any comments about the Cross Knot? Contact
Me.
|
|
|
|
|
|
|
| |