Adding cords in the body of
a project is a Macrame technique seldom
described in books devoted to this craft.
For someone with experience, increasing the
number of cords at any point in the pattern is
no problem at all.
But a beginner might find this a challenge,
which is why I created this page.
The terms Mount
or Hitch
mean to attach a cord to another cord, or to a
ring, dowel, or similar object.
The first step in most Macrame projects is
called the Mounting Process.
You will start with a certain number of cords to
begin the knotted design.
ADDING
cords means you attach extra
cords somewhere in the body of the design, after the
mounting process is completed.
Most of the time, this is done to increase
the size of an area. It's also done
if rings and dowels need extra cords to cover them
completely.
Shown below are the two most common ways that
this is accomplished:
Adding new cords to a ring or dowel
Adding new cords to those
already present
Adding new cords to Ring or Dowel
You may be asked to attach new cords to a ring
or a dowel in the body of the pattern.
Adding cords is easy in that case.
You attach the extra cords beside
or between the other cords
youve been working with.
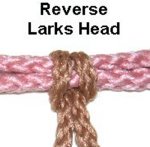
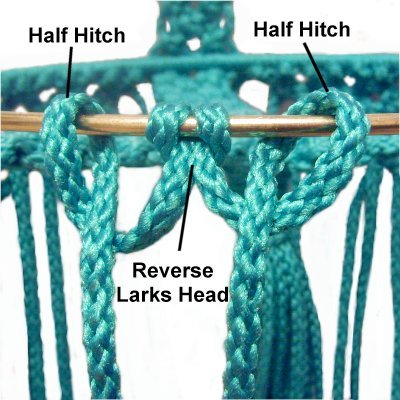
The most common technique is to add the
new cord with a reverseLarks Head knot.
The back of the Larks
Head resembles the two loops of a Double
Half Hitch.
It blends in really well to areas where
DHH are already present.
Sometimes a
pattern calls for a Reverse Larks Head
knot, followed by two Half Hitches (one
with each half of the cord).
The extra knots help to cover the ring
without the need to add more cords.
Adding Cords to Those in Use
Macrame patterns often require you to add more
cords by tying them to cords
already in use.
The patterns will usually tell you exactly
where to attach the new ones and which
decorative knot to use.
Here are some tips for adding cords when the
pattern does not specify the technique, or if
you are not using a pattern:
The
new cords should blend into the overall design.
That's the most important part of adding new
cords. They need to look like they are part
of the general knotting pattern.
Making new cords match the others is often easier
if you don't use knots to attach them.
Sometimes you can slide new cords through spaces,
or fold them around cords in use.
When you do need to use knots, try to choose knots
that are the same, or look like those in the
general area.
Add
cords to both sides of a design.
Your project will be lopsided if you don't add the
same number of cords to both sides of a
design. This may not apply to every
project.
Example:
In the pattern for the Owl
Basket, new cords were
added for the wings on both sides of the
body.
The cords were attached with Double Half
Hitches. They matched the DHH tied
in the lower part of the face.
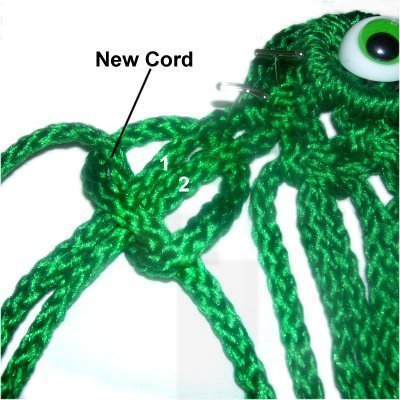
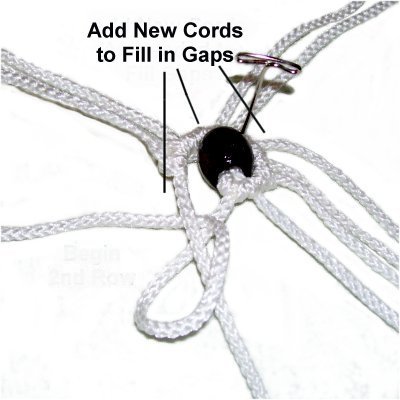
Add cords to
eliminate gaps.
In this image, a circular row of
knots was being tied around a bead.
Each new row was larger than the one
before it. New cords were added
because there were gaps on the holding
cord.
Adding
with Square Knots
The most common decorative knot used for adding
cords is the Square Knot.
You see this technique frequently in Macrame
patterns, whenever an area needs to be
widened. Usually there are Square
knots in the general area.
In the images below, a contrasting color was
added only to show details. Normally, the new
cords would be the same color, because the goal
is to have them blend
in.
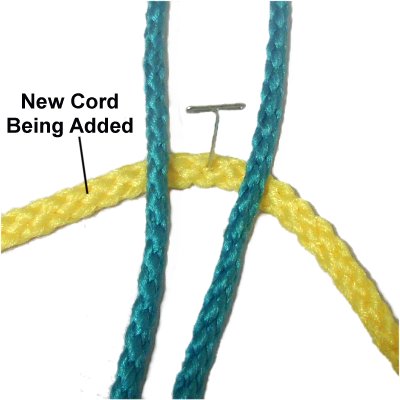
Step 1: Slide the new
cord under 2 of the cords already being
used, and balance it by matching the
ends. Secure it at the
center.
The new cord being added here is
yellow.
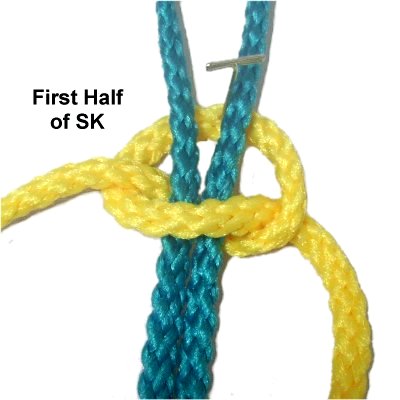
Step 2: Use the new cord
to tie the first half
of the Square Knot.
The cords already in use are the
fillers.
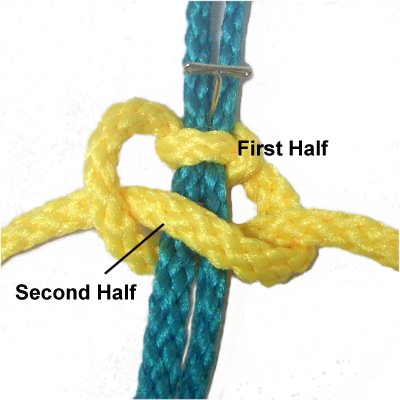
Step
3: Tie the second half of the
Square knot.
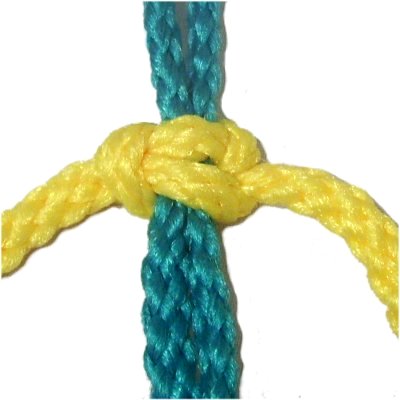
Tighten
the knot firmly,
so there is no slack in the back area,
where the pin was located.