Description:
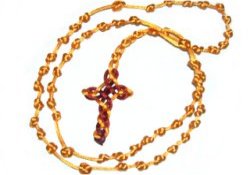
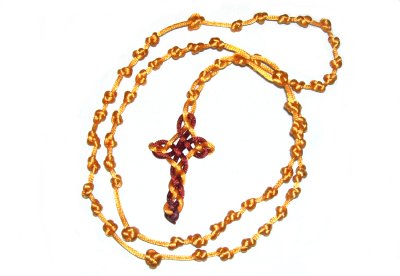
The Satin Rosary features decorative knots that
represent the beads in a standard
Rosary.
This Micro-Macrame
pattern may be challenging for beginners,
unless you have prior experience with all
the knots used.
This custom Macrame Rosary features a Celtic
Cross. Be sure to use
that page along with this one, since you need to
make the cross first.
Satin cord is by far the best, but any
material will be suitable. Just make sure the
material doesn't stretch
too much. Yarn will not work for this
project.
Important:
Satin cord is very fragile. Use theCross-Pin
Technique or LEAN the pins over
the cord, rather than putting them through the
material.
Cut
one cord at least 36 inches in length.
In the example, the rust
cord is the short one.
Cut
a second cord at least 5 yards long.
This is the gold
cord in the example shown. It's used to
create part of the cross and then the Satin
Rosary.
Click on this link to
go to theCeltic
Cross.It
should be in a new window, so you can move
back and forth between the two pages.
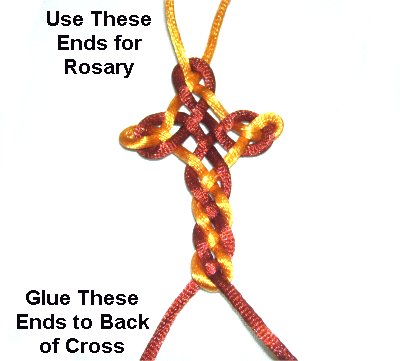
Create the cross
now.
Start with the short
cord, so the ends are at the bottom.
The long
cord is used to make the second
portion, so the ends exit the cross at the top.
The cross should be around 2
inches in length when you are
finished tightening it.
Trim the ends at the bottom to 1-inch
and glue them to the back of the cross.
Wait until the glue is dry before moving
on.
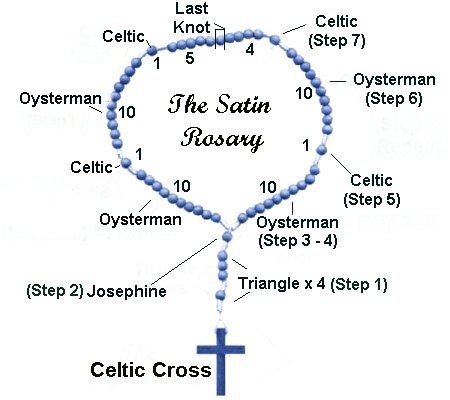
Here is a diagram of a Rosary, showing
the different steps where the knots are
placed.
The numbers on the inside
of the circle refer to the number
of knots that are tied.
Click on the image to see a
larger view.
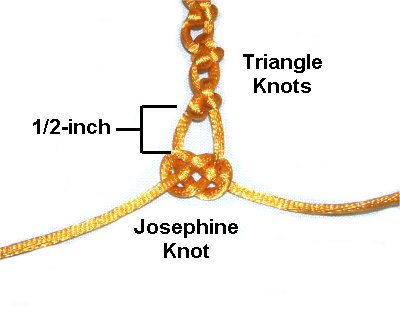
Triangle Knots
You will be making 4Triangle
Knots for the first part of the Satin
Rosary.
Other knots can be used, but choose those that
are tied with
two cords.
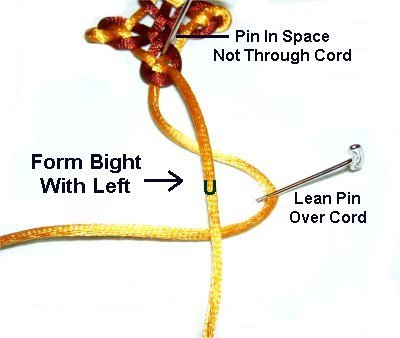
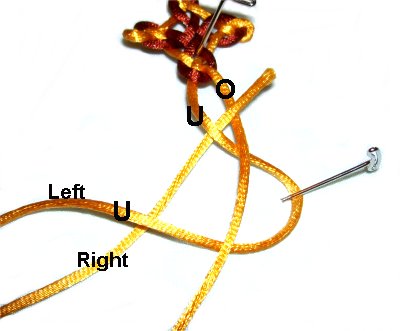
Step 1: Secure the
cross so the two cords are vertical.
Form a bight with the left
cord, pushing it to the right, passing under
the right cord.
Bring the right
end under
the left.
Pass it through the space between
the cords, in the area above
the bight (just below the cross).
It should go through under
- over (from below).
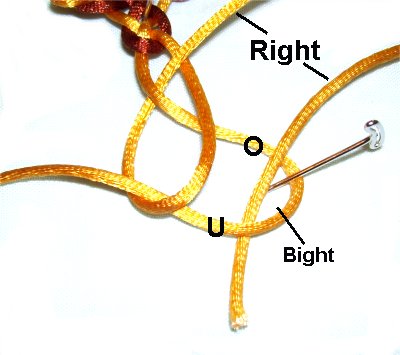
Bring the right
end down, and pass it through the bight
over
- under.
Tighten the knot carefully.
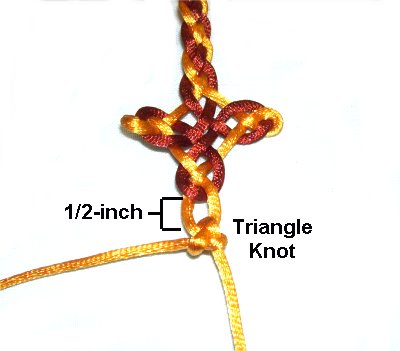
There should be a
1/2-inch space between the
cross and this first knot.
Move
down3/4-inch,
and then tie 3 more Triangle
knots.
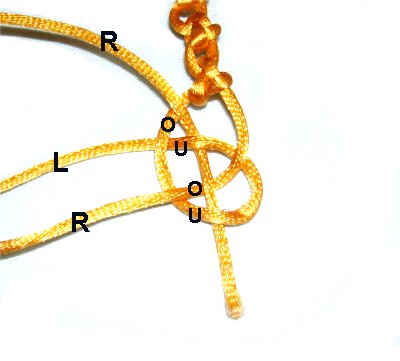
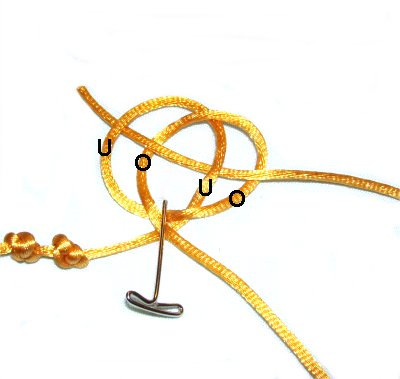
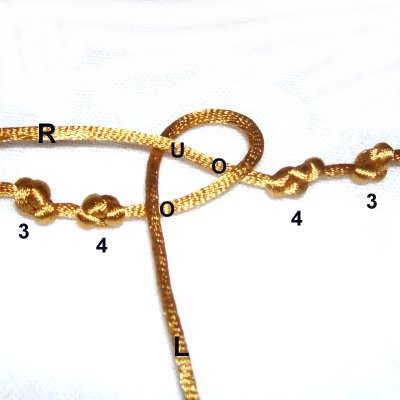
Josephine Knot
Step 2: Now you will
make 1 Josephine knot for the Satin
Rosary.
Make a counter-clockwise
loop with the
left cord. The end should pass
under
to make the crossing point.
Bring the right
cord overthe loop, and then under
the left end, moving clockwise.
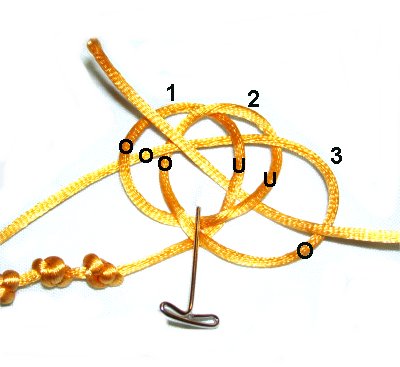
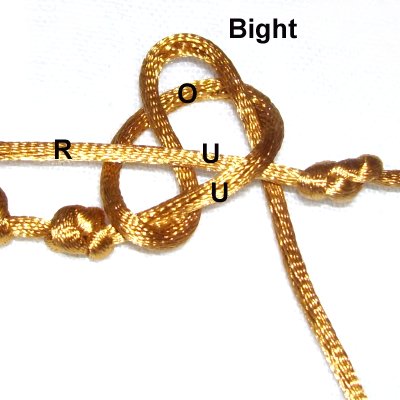
Weave the
right end over
- under - over - under the four
segments as shown.
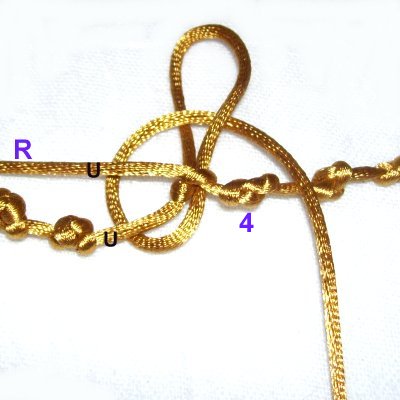
Position the Josephine knot so it rests
1/2-inch below the 4th
Triangle knot.
Tighten it so it's as small as
possible.
Oysterman Knots
Now you will make the circle of knots for the
Satin Rosary. The Oysterman knot was
chosen because it is easy
to tie.
You can use another type of knot, but make sure
it can be tied with one
cord, such as the Celtic
Button Knot.
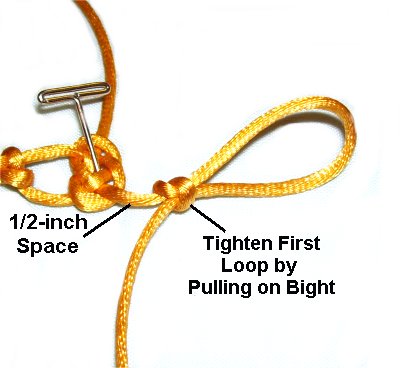
Step 3: Turn the first
part of the Satin Rosary so it's on your
left, and secure it.
Make
a counter-clockwise
loop with the right
half of the cord.
Form a bight.
Push it through the loop under
- over (from below).
Pull on the bight
to tighten the loop around it.
This part of
the knot determines the final
position.
Make sure there is a 1/2-inch
space between it and the Josephine knot.
Pass the end under
the 1/2-inch space you left, next to the
tightened portion. Move it through
the bight over
- under(from
the top).
Pull on the cord close to the tightened
portion. This will tighten the bight.
Pull on the end
to tighten the remainder of the knot.
Important:
Since the cord is very long, you can
bundle it up by wrapping it around your
hand. Wrap the end
around the bundle a few times, and tuck
the end under one of the coils.
You can enlarge the bight before
passing the bundle through, and then
tighten the knot.
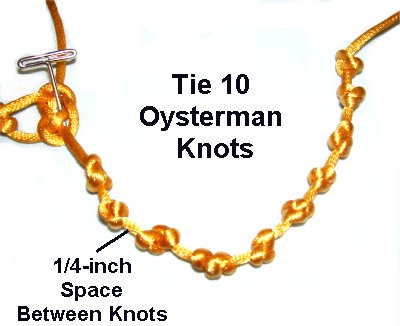
Step 4:Repeat
step 3, tying a total
of ten
(10) Oysterman knots for the
Satin Rosary.
The
first one is already made.
Position them close together, so there
is about 1/4-inch
of space between each one.
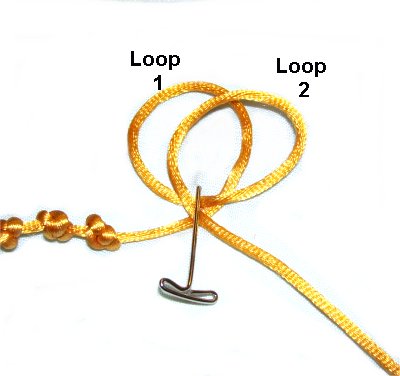
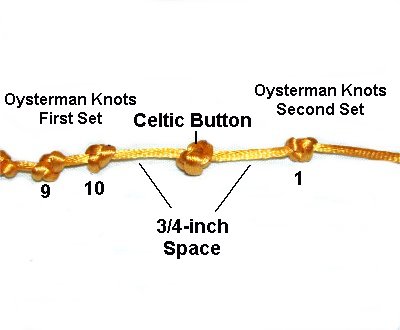
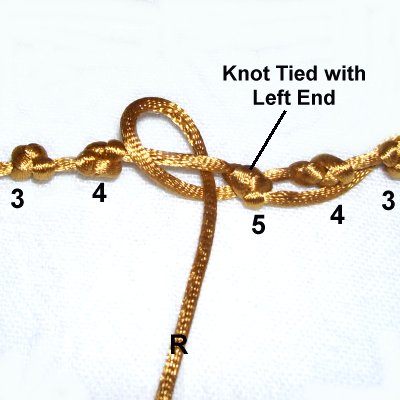
Celtic Button Knot
Step 5: You will now
tie one Celtic Button knot between the
sets of Oysterman knots.
Make a counter-clockwise
loop, so it rests about 3/4
inch away from the 10th
Oysterman knot.
Make a second
counter-clockwise loop.
Place it
on top of, and slightly to the right of
the first.
There should be three obvious spaces.
To make the third loop, pass the end
through the first two loops heading right
to left.
It should weave over
- under - over - underthe four segments.
Bring the end around again, moving
right to left. Pass it over
the right area of loop 3, and under
the next two segments.
Tighten the Celtic Button knot
carefully, removing the slack in the order
the loops were made.
(see
information below)
Design Tip: Tightening Celtic
Buttons is challenging. To arrange the loops at
the right place, adjust the placement as you
tighten the first
two loops.
Once the knot is where you want it, tighten the
3rd and 4th loops.
Try to position the Celtic Button so it
remains 3/4-inchesaway from the 10th Oysterman
knot tied in Step 4.
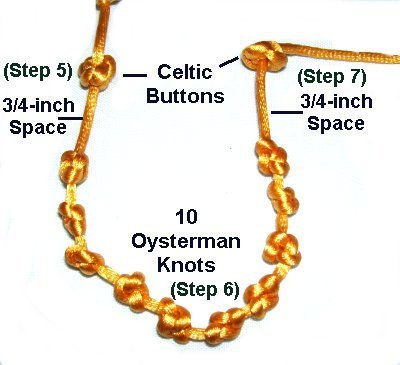
Leave a 3/4-inch space on the other
side, before moving on to the next step.
Step 6:Repeat
steps 3 and 4,
tying ten (10) more Oysterman knots.
They should be 1/4
inches apart.
Step 7:
Repeat step 5. Start
with a 3/4 inch space, tie the Celtic Button,
and leave another 3/4-inch space.
To make the last section on this half of the
Satin Rosary, tie only four
(4)Oysterman
knots, as in step 3.
Step
8:Repeat
steps 3 - 7 using the left
half of the cord.
Place
both halves side by side to
make sure the knots have the same
spacing.
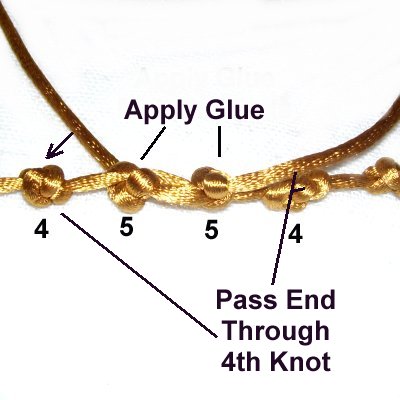
Connect Both Halves
Step 9: Position the Satin
Rosary so the two ends are close together, one
above the other, heading opposite directions as
shown below.
The last section has 4 knots, so mentally number
them.
Move the cords until there is 1
inch of space between the 4th
knots of both halves.
Use the left
end to make the first loop of
an Oysterman knot, passing over
- underthe right end.
When you make the bight, pass it under
the right end as you
bring it into the loop from below.
Apply a small amount of fabric glue.
Pull the bight
to tighten the loop.
Tie the rest of the Oysterman knot,
passing the end under
the portion coming from the left, as
well as the right end.
When you tighten, make sure this knot
(#5) rests 1/4-inch from the 4th
knot on the right.
Step
10: Move the right
end down so it rests below
the portion coming from the left. Repeat step 9.
You may need to change the direction
you tie the knot.
Tighten it between the 4th knot on the
left and the 5th one you just tied on the
right.
Apply glue to
the two knots just tied. Pass the
ends through
the 4th
knots on each side, using
tweezers. You can loosen the knots
slightly if needed, then re-tighten.
Apply more glue.
When the glue is dry, cut the cords close
to the knots and melt the tips with a
flame (if using Satin).
Click on this
image to see a larger view of the
completed Satin Rosary.
By
using any text or images on Free Macrame
Patterns, you are agreeing to ourTerms
of Use