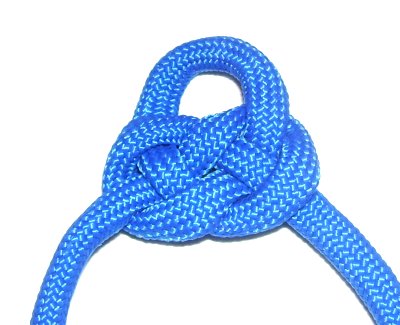
Description:
The Josephine Knot originated in the
Orient, where it is still called the Double
Coin Knot.
In European countries it was named for Empress
Josephine, who was the wife of Napolean for a
time.
There are two variations on this page. The
first set of instructions show you how to tie this
decorative knot in the center
of a cord, with two
ends free to move after the knot is
tied.
The second set of instructions will show you how
to tie this Macrame knot with only one
free end. You will find the method
useful when tying it in a series, or combined with
other knots.
A third variation is on a separate page and is
called the
Sailors Knot. It's made with
two cords and has only two loops.
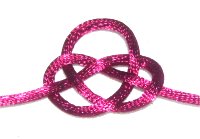
To view two jewelry projects where this knot was
used, click on these links:
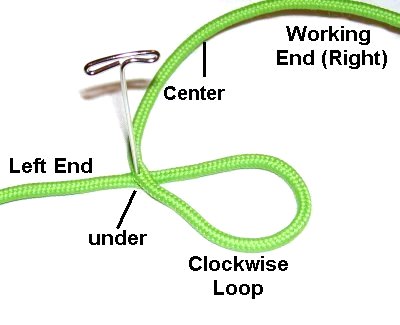
Step
1: Cut one piece of
material, at least 18 inches long.
Fold the cord in half. Make a counter-clockwise
loop with the left
end, passing under
to form the crossing point. Secure
the loop to your board.
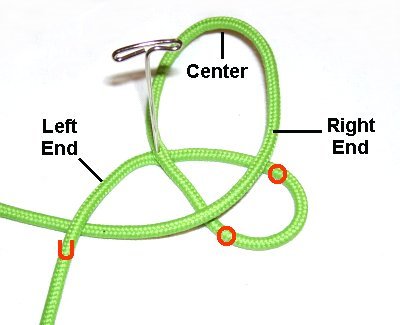
Step
2: To make Loop
2, bring the right
end up, and fold it at the center,movingin aclockwisedirection.
Passover
the first loop, and under
the left end, as you bring it down.
Step
3: To make loop
3,continue to move the right
end to the top in a clockwise
direction.
Weave over
- under - over - under the four
segments of loops 1 and 2, heading
downward.
Step 4: Tighten
loop
2 first, by pulling on loops 1 and
3.
Remove the slack in loops 1 and 3 by pulling on
the ends.
Second
Variation
In the previous
instructions, you rotated the left half of the
cord to make the first loop, which was near the
center. Then you used the right half for the
rest of the knot.
When other knots are present, you need to be able
to make the Josephine knot with only one end free
to move.
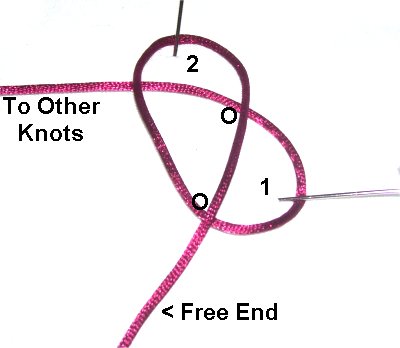
Step
1: Secure one end of the
cord to your project board, as if there
were other knots present (on the left).
Rotate the free end clockwise
to make loop
1.
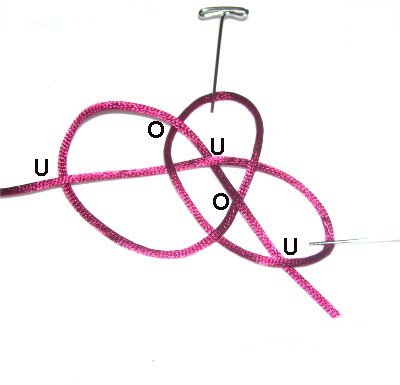
Step
2: Bring the end up to
make loop
2, still rotating clockwise.
Pass the end over
the first loop, as you bring it to the
bottom again.
Step
3: Make the third clockwise
loop by passing the end under
the secured portion.
Weave over
- under - over - underthe other two loops.
Tighten the Josephine knot by removing the
slack from each loop in
the order they were made.
By using any text
or images on Free Macrame Patterns, you are
agreeing to ourTerms of Use