Cut two cords (one of each color) at least 4
yards long, for
necklace sizes 24 inches or less.
To make a longer Empress Necklace, increase the
length of the cords.
Prepare the ends with glue to prevent unraveling.
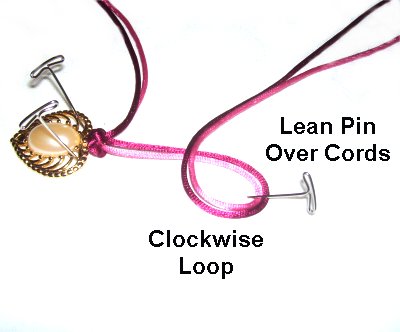
Important:
Do not push pins through Satin material if you
plan to use it. Leanthe pinsover
the cords, or use the Cross-Pin
Technique.
Celtic Button Knot
Step 1: Slide
both cords
through the loop in the pendant, matching the ends
so it rests at the center.
Secure the pendant at your left, with the cords
horizontal. The one closest to you is the
working cord (color
A).
Secure the other three so they are taut, since
they are holding cords.
Make a counter-clockwise
loop with the working
cord, passing under
the three holding cords.
When you bring it down, pass over
the holding cords.
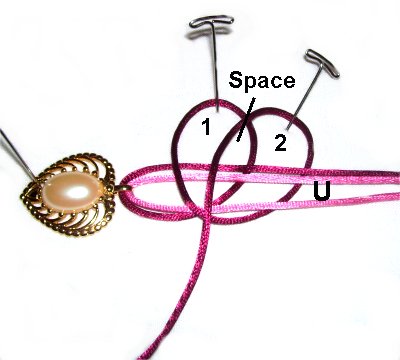
Step
2: Make the second counter-clockwise
loop, passing under
the holding cords, and then overthem
as you bring it down.
Arrange the loop so it rests partly on
top of loop 1, and slightly to
the right. Make sure you can easily
identify the space
indicated, between the two loops.
Step
3: Start the third loop by
passing the end under
the holding cords.
Weave itover
- under - over - under the four
segments (loops 1 and 2).
Position it to to the right
of loop 2.
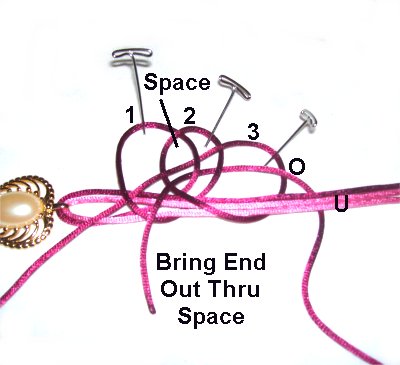
Step
4: To make loop 4, bring
the end under
the holding cords, over
the right area of loop 3, and out through
the space
between loops 1 and 2.
Another way to look at this important step
is to pass over
the first segment, and underthe
next two.
Step
5: Tightening the Celtic Button
for the Empress Necklace is easier if you:
Remove the
slack from each loop in the order
they were made
When you tighten the first loop, it pulls the knot
close to the pendant, right where it should
be.
Hold it steady on the surface with one hand, and
pull on loop
2, removing ALL
the slack from the first loop.
Do the same for loops 3 and 4. The last
thing you do is pull on the end
to tighten loop 4.
Make
sure you tighten each loop all the way, or the
knot will be too loose.
Step 6:
Slide the button knot against
the pendant, which should remain on the left.
Divide the four cords into two setscontaining one cord of each color.
In the example shown, color
A is wine, and is on the outside
of each loop.
Color
B is pink, and is on the
inside.
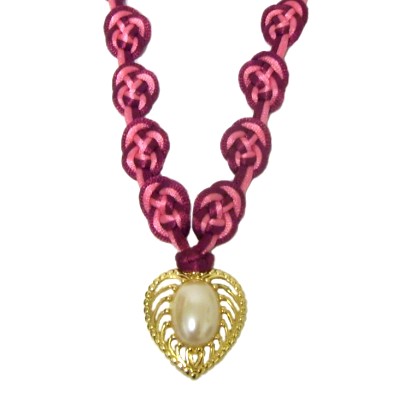
First Half of Empress Necklace
Step
1: Make a clockwise
loop, arranging the cords neatly.
Make sure they are not crossed.
Lean the pin over the cords to secure the
loops, unless you prefer the Cross Pin
Technique.
Step
2: Rotate the two cords clockwise,
creating a second loop(2).
Bring the end to the bottom, passing over
loop 1.
Make sure nothing is twisted, and the
cords are secured well.
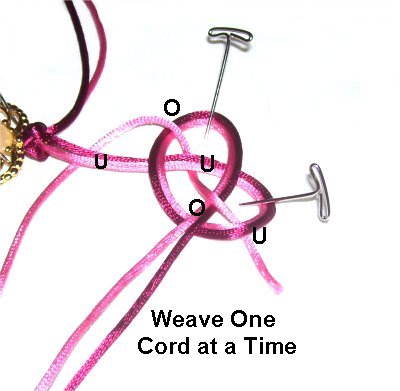
Step 3: For
each Josephine knot in the Empress Necklace, the
weaving process is easier if you do it one
cord at a time:
So use the color
B cord, and pass it under
the segment coming from the pendant.
Weave through over
- under - over - under, creating
loop 3.
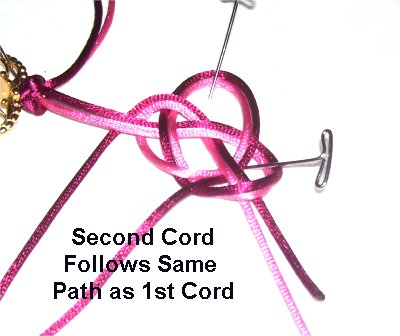
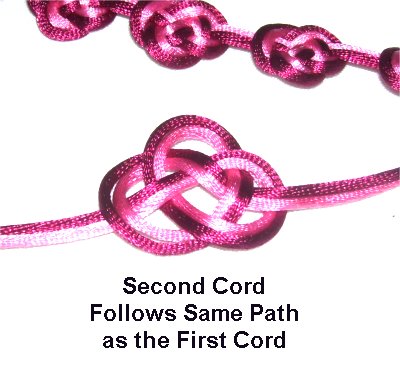
Step
4: Use color
A and follow the same path,
fitting it around the outside
of the other cord.
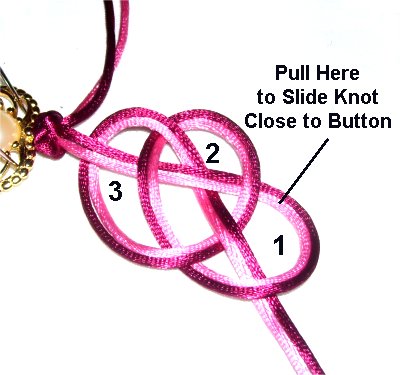
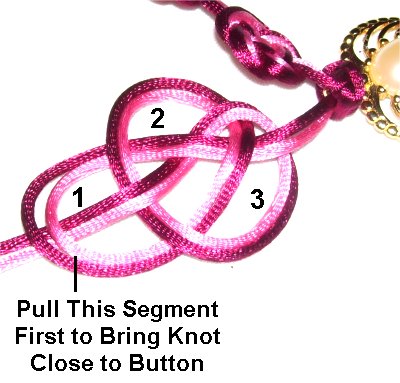
Step
5: Begin to tighten the
Josephine knot by pulling on loop
1, which is on the right.
This will move the entire knot closer to
the button knot.
To remove the slack, pull on loop 2,
followed by 3, and then the end.
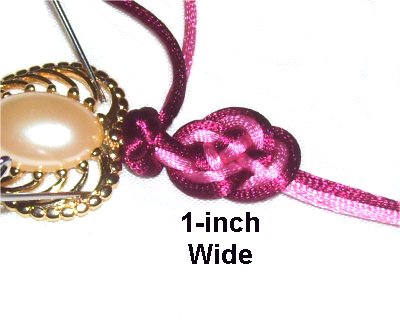
Reduce the
size of each loop even more, so the entire
Josephine knot is 1
inch in size.
Make sure it's as close to the button knot
as possible.
Step
6: Repeat
steps 1 - 5, tying
enough Josephine knots to create thefirst half
of the Empress Necklace. So for a
24-inch necklace, the first half should be
12 inches.
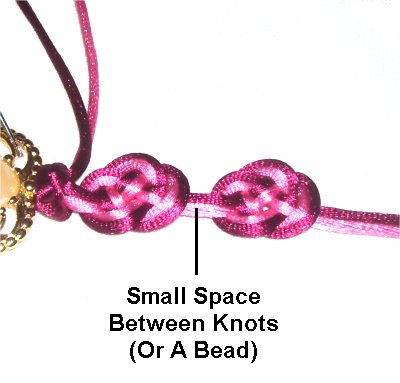
There should be a small amount of space
between the knots. You can add a
bead between them if you wish.
Second Half of Empress Necklace
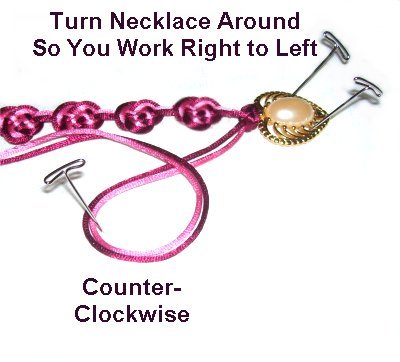
Step
1: Turn the entire
necklace around, so you work right
to left for the second
half.
This is the easiest way to ensure the
knots match on each half.
Make a counter-clockwiseloop with both cords.
Design
Tip: By reversing direction when
tying the second half of the Empress necklace, the
second
loop of each knot will be facing each
another (inward).
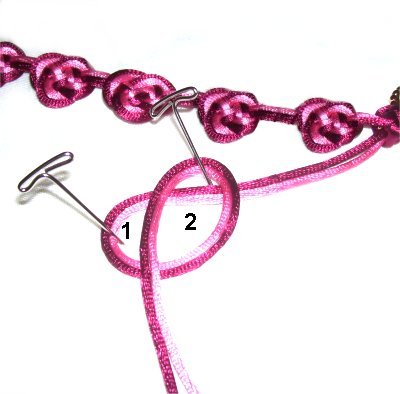
Step
2: Create loop 2 in a counter-clockwise
direction, too.
Pass over
loop 1 as you bring it down, heading
toward you.
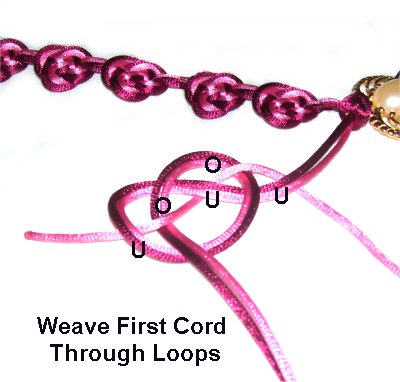
Step
3: Weave color
Aunder
the segment coming from the pendant.
Weave it through over
- under - over - under.
You should be moving right
to left.
Step
4: Weave color
B, following the same path as the
first, resting on the
outside of the loop.
Before tightening, make sure nothing is
twisted.
Step
5: Tighten the knot as you
did all the others:
Pull on the segment furthest to the left
(loop 1), to bring the knot closer to the
pendant.
Remove the
slack and adjust the size of all three
loops, until the knot is the same size as
all the others. Loop
2 should be on the inside.
Step
6: Repeat
steps 1 - 5, tying the
same number of knots as the first
half. Match the positions of the
knots if possible.
Step 7: Arrange
the Empress Necklace vertically, making sure
nothing is twisted and the front
of the knots are facing upward.
Slidethe ends from the left
half through the bead for the
clasp, left
to right.
The cords from the right
half are passed through right
to left (opposite directions).
Step
8: Pull the ends to close
the Empress Necklace
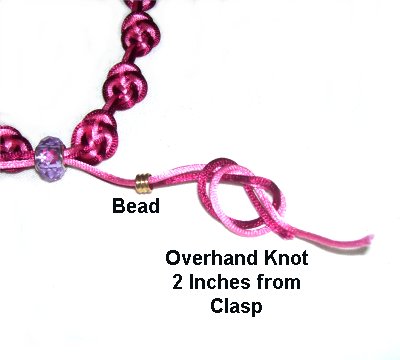
completely. Slide one of the
beads for the ends
onto the two cords on one side of the
clasp. Measure from the bead down 2
to 4 inches, and tie an Overhand
knot. Tighten itloosely.
Repeat this process with the other two
cords.
Stretch
open the necklace by moving the bead for
the clasp out to where the Overhand knots are
placed.
Make sure it fits
over your head. Adjust the Overhand
knots so they are further out, if necessary.
Make any other adjustments needed, before
tightening the two knots firmly.
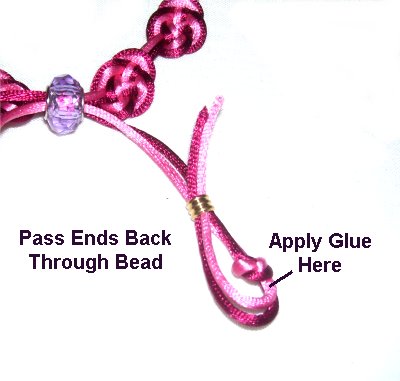
Step
9: Pass the two ends
back through the bead, applying glue next
to the Overhand knot.
Repeat this with the other two ends.
When the glue is completely dry, cut off
the excess material flush with the edge of
the beads.
By
using any text or images on Free Macrame
Patterns, you are agreeing to ourTerms
of Use