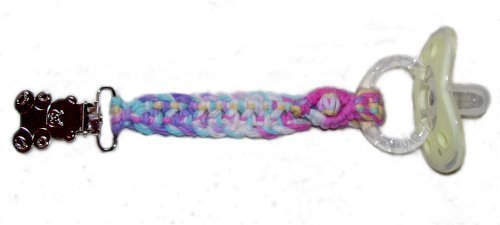
Preparation:
Cut 4 cords, each 15
x the finished length of the
strap. So for a 5-inch strap, you need
75 inches.
When measuring, the strap is the distance between
the bar on the clip and the pacifier's
handle. You will have enough material for
the closure of the Pacifier Strap without adding
extra.
Prepare the ends with Overhand knots or glue.
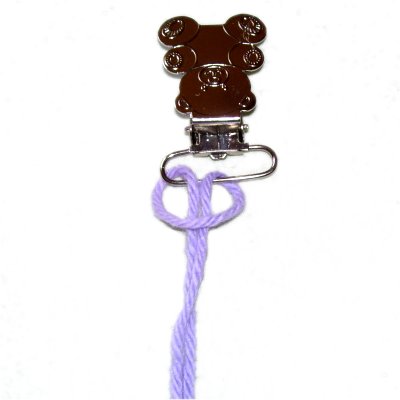
Step
1
Mount
the cords to the bar of the clip with
Larks Head knots:
<<
Fold the cord in half and place it under
the bar, facing forward.
Bring the ends over
the bar and under
the folded area. >>
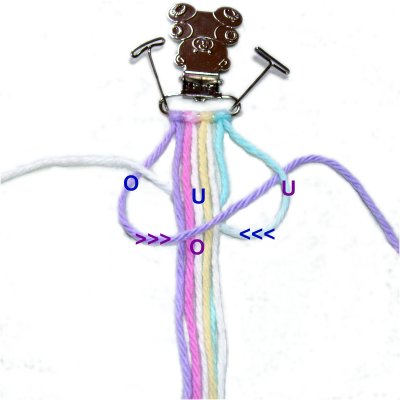
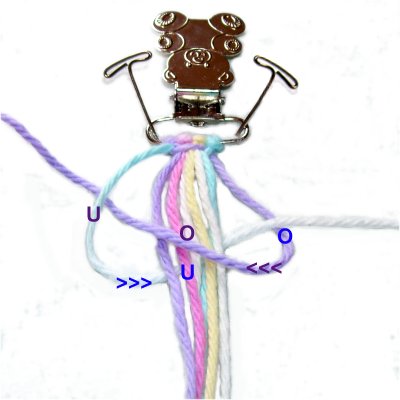
Step 2:
Mentally number the cords 1 - 8. Use cords
1 and 8 to tie a Square Knot around 2 - 7
(fillers).
Here's a reminder
of the steps:
<< First Half:Cord
1 goes over
the fillers and under
cord 8.
<<
Cord
8 goes under
the fillers and over
cord 1.
Second
Half: Repeat, but
reverse the direction, since the working
cords are switched. >>
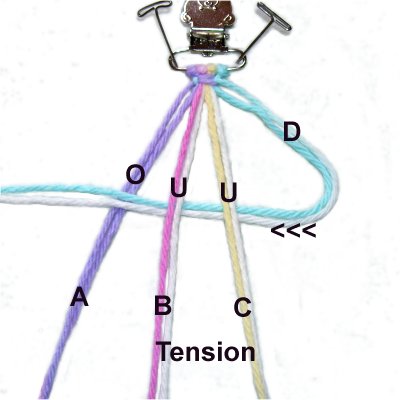
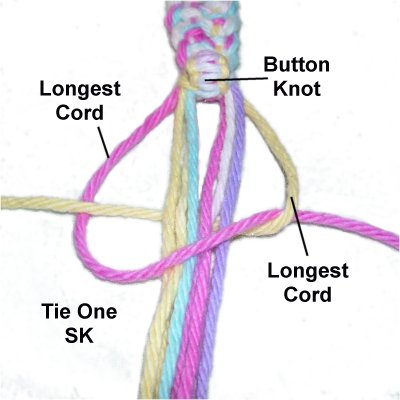
Step
3: Divide the cords into 4 sets
of two. Mentally number them A - D.
Secure sets
B and C lower down, so they have
tension.
Curve set
D to the left, under
sets B and C and over
set A. Keep the cords
neatly arranged.
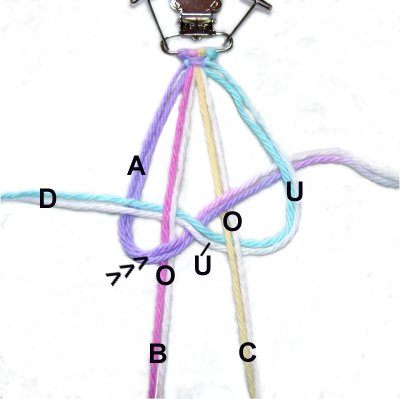
Move set
Aover
set B and under
the portion of set D that's between the
secured cords.
Pass over
set C and under
set D where it curves on the right.
Tighten the
knot firmly so it's neat. The
remaining knots for the Bush Bar can be
tied a little looser if you want the band
to be more flexible.
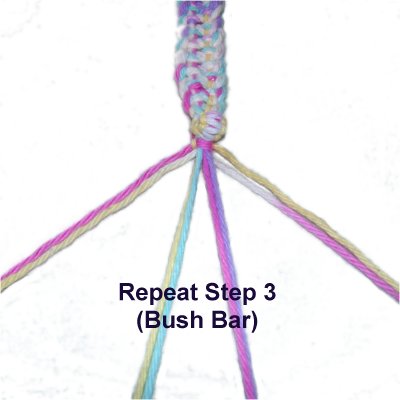
Repeat
step 3 several more
times until the Pacifier Strap is the
length you want.
Clasp
Step
4: Start the Square Knot
Button by tying one SK with cords
1 and 8, around the other six
(fillers).
Leave a
1/4-inch space, and then tie 4
SK.
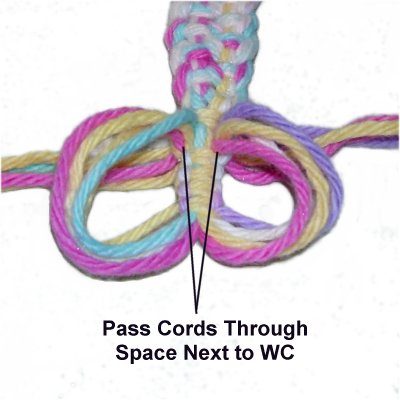
Step
5: Pass half the cords
through one 1/8-inch space, in the area
between the working cord and the fillers.
Do the same with the remaining cords,
passing them through the space near the
other working cord.
(See
next photo)
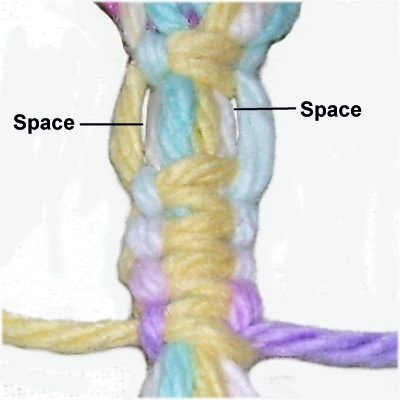
Here's
a close view of the spaces.
You pass the cords through the area
between the working cords (on the outside)
and the five fillers.
Roll the 4 SK
into a button shape, and pull the cords
downward
Select the two longest
cords
on each side. They will be used for the
remainder of the Pacifier Strap.
Use them to tie a SK around the other 6
cords.
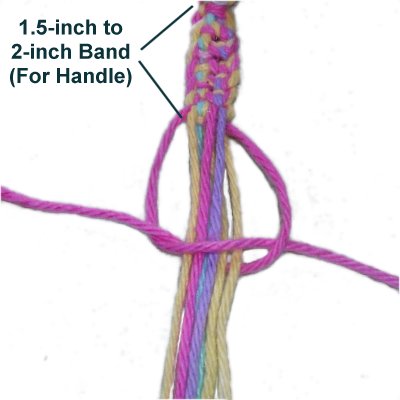
Step 6:
Separate the cords into 4 sets of
two. The long cords should be in 1
and 8 positions.
Repeat
Step 3, creating a 1.5
to 2-inch area with the Bush Bar.
This portion wraps around the handle of
the pacifier.
When the band
is finished, tie a Square Knot using the
cords numbered 1 and 8.
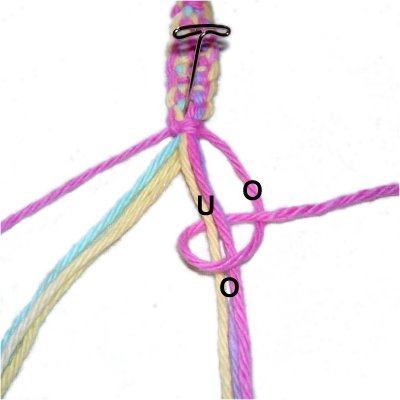
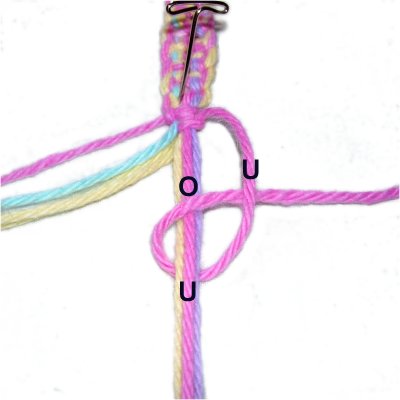
Step 7:
Now you will make a Buttonhole design for the
Pacifier Strap. The Button Knot fits through it to
form the clasp. This allows you to change
the pacifier as needed.
Mentally number the cords. Use cord
8 totie
five Larks Head knots, rotating clockwise
(see images below).
Cords 5 - 7 are the core, and hold the knots.
The images below show the two steps for the Larks
Head knot:
<<
Pass cord
8over
- under cords 5 - 7. As you
pull it right, pass over
cord 8.
For the second loop, pass cord 8 under
- over 5 - 7, and over
cord 8 as you pull it right. >>
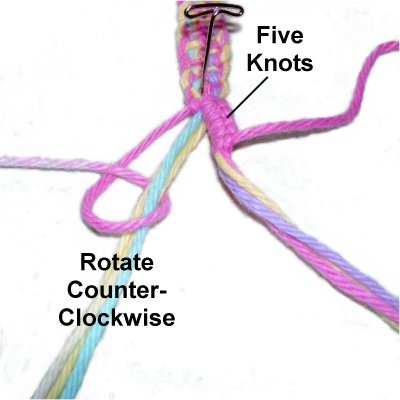
Step 8:Repeat
step 7 on the left, using cord
1. The knots are tied
around cords 2 - 4.
The loops are made counter-clockwise.
Make sure the loop fits around the button
snugly. You can tie one more knot if
necessary (each half).
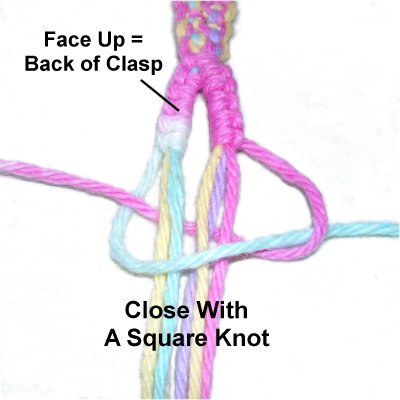
Close the
clasp for the Pacifier Strap by tying a
tight Square Knot with cords
1 and 8, around the others.
The clasp will be turned over when it's
secured around the handle. So the part
face up is actually the back
of the clasp. Keep this in mind when
you finish off the cords in the next step.
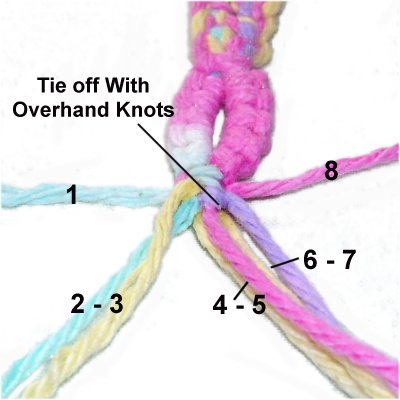
Step
9: Move cords 1 and 8 out of the
way.
Divide the remainder into sets of
two. Tie off each set with Overhand
knots.
Apply glue while tightening.
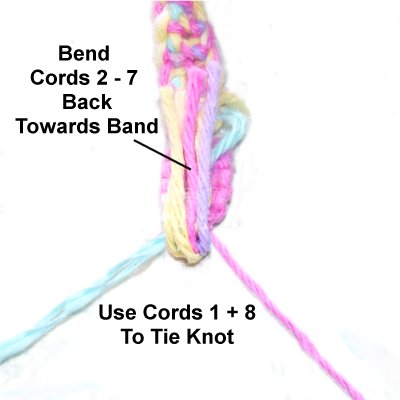
Bend cords 2 -
7 back towards the band. Do Not
Turn Over the Pacifier Strap. Remember
that the back
is face up, which is where these cords
need to rest.
Use cords
1 and 8 to tie a tight Barrel
Knot. Make sure it rests on
top of the bent cords, to hold
them in place. Apply glue while
tightening.
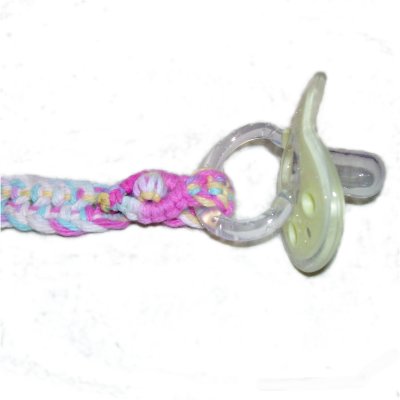
Step 10:
Cut off the excess material completely, applying
more glue as needed.
Attach the
band to the Pacifier Strap, folding the
short segment around the handle.
The button goes through the clasp to
secure it.
By
using any text or images on Free Macrame
Patterns, you are agreeing to ourTerms
of Use