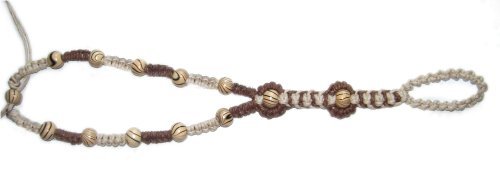
Natural Sandals
Description:
These Natural Sandals feature the use of
the Buttonhole Stitch to surround the beads and
create the strap. Hemp Bracelet
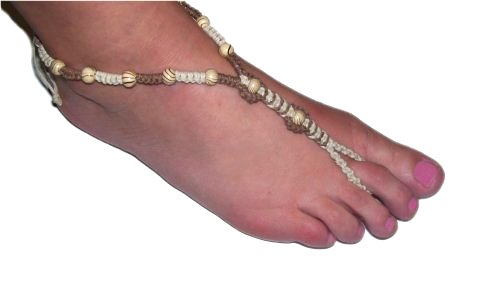
Toe Loop:
Placed around the second toe.
Supplies
Needed:
1mm Hemp or Cotton Cord in light and dark
colors
8mm Wood beads (13) with 5mm size holes
Project Board, pins, tape
Knots
Used:
Preparation:
Measure your foot as shown below, so you can
determine the size of each section of the Natural
Sandals.
To determine
the size of the toe
loop , measure around your toe and
add
1-inch .buttonhole
design .strap
length .
Color
A (light brown): Cut 2 cords, each at
least 65 inches long
Color
B (dark brown): Cut 1 cord, at least
75 inches long
Cut these cords longer if the total length you
need for the Natural Sandals is more
than 8.5 inches.
Prepare the tips of the cords with glue to
stiffen and prevent unraveling.
(Optional) Condition the material with Beeswax
if using Hemp.
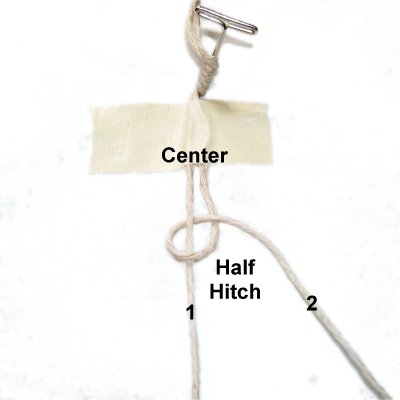
Toe Loop
Step
1: Secure two Color
A cords on your board vertically,
placing tape to mark the center .cord
2 on the right to make a clockwise
Half Hitch onto cord 1 on the left.
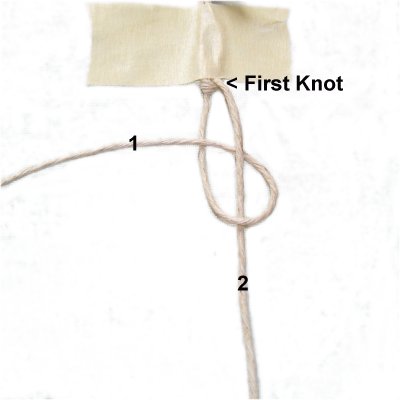
The next Half
Hitch is tied with cord
1 on the left, onto cord 2.
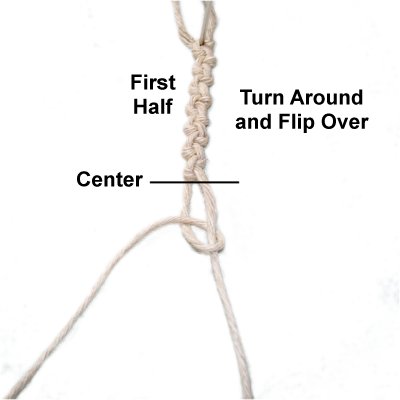
Rotate counter-clockwise .HALF
the size you need for the toe
loop .
Turn the
sennit around and go back to the
center. Flip
over the first half so
the bottom is now face up. The
reason for this is so the knots can be
tied the same way. cord
1 .
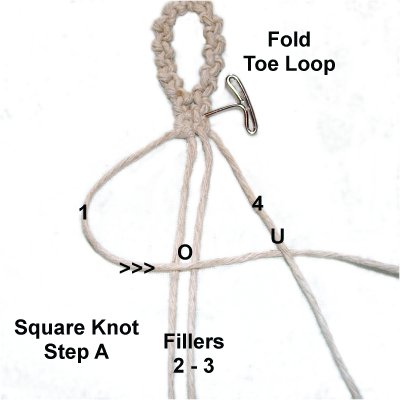
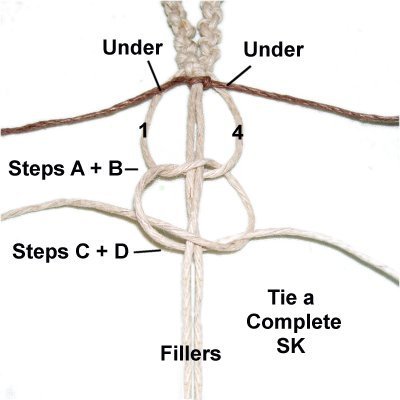
Step 2:
The next four steps (A - D) show you how to tie a
Square Knot to complete the toe loop.
Fold it so the
four ends are together, and secure it on
your board. Step
A: Move cord
1 to the right, over
the fillers and under
cord 4.
Step
B: Move cord
4 to the left, under
the fillers. over
cord 1.
Cords 1 and 4
have switched places. Step
C: Move cord
1 to the left ,
over
the fillers and under
cord 4.
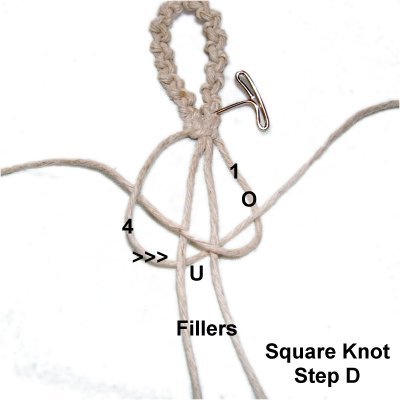
Step
D: Move cord
4 to the right ,
under
the fillers.over
cord 1.Steps C +
D = Second Half of SK
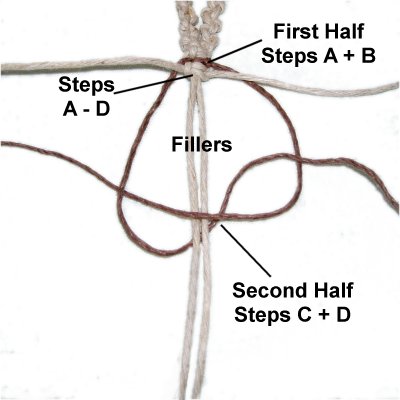
Buttonhole Design
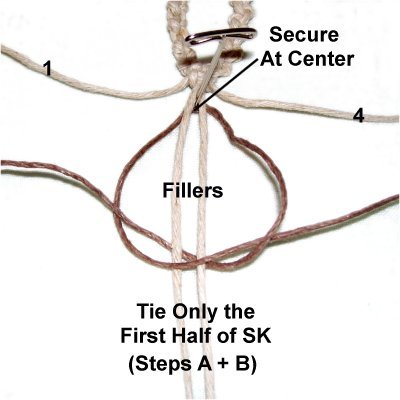
Step
3: Place the color
B cord under cords 2 - 3
(fillers), and secure it at the
center. first
half of an SK (steps A and B).
Move cords
1 and 4 (color A) under
the ends of the color
B cord.both
halves of a SK (Steps A - D)
around the fillers.
Move the ends
of color
B under the color
A working cords (1 and 4).second
half of a SK (steps C + D) around
the fillers.
Design
Tip: The concept for this design is
that a Square Knot tied with one color is nestled
inside the two halves of the second color.
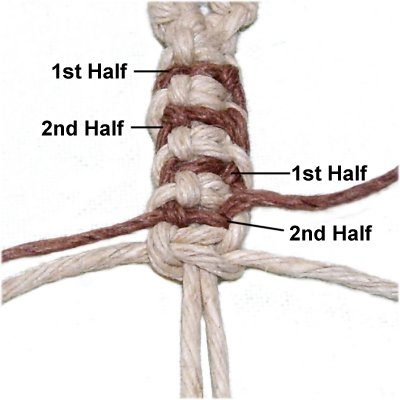
Step 4:
Tie the remaining
SK as follows (see step 2):
Color
B - Steps A + B (first half)
Color
B - Steps C + D (second half)
Important: over
8.5 inches long , tie more knots so this
section is 1-inch in length.color
A .
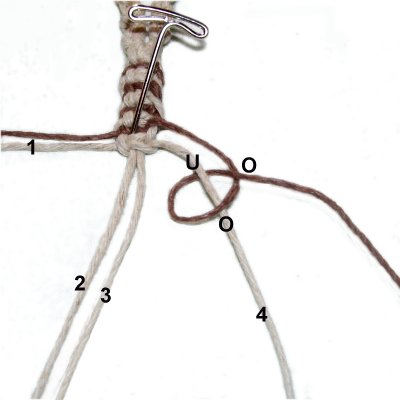
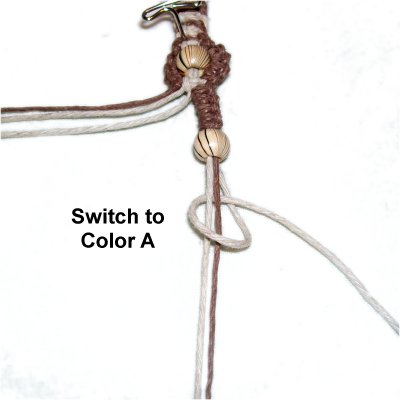
Step
5: Now you will make the first
Buttonhole design for your Natural
Sandals.color
B cord to tie a Half Hitch onto cord
4 (color A). clockwise ,
over
- under - over as shown.
The second
loop is tied by moving color B clockwise,
under
- over cord 4.under
color B.Both
loops = 1 Vertical Larks Head knot
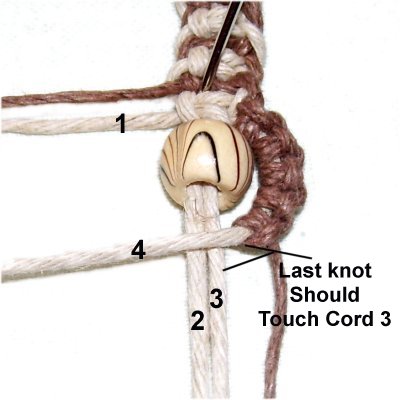
Tie at least 4
more Larks Head knots. Slide a bead onto
cords 2 and 3.The last Larks
Head knot should
touch
cord 3 (filler).
Step
6: Repeat
step 5 on the left, tying the
same number of knots. cord
B is tied around cord
1 (color A).counter-clockwise
to make the two loops.
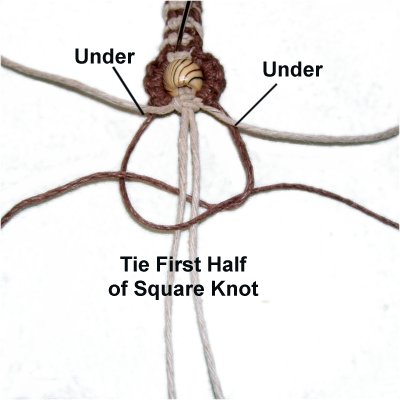
Complete the
first Buttonhole loop for your Natural
Sandals by tying a Square Knot with color
A .
Repeat
Steps 3 - 4 to make the next
section of nestled Square Knots. color
B under
the color A
working cords (1 and 4).
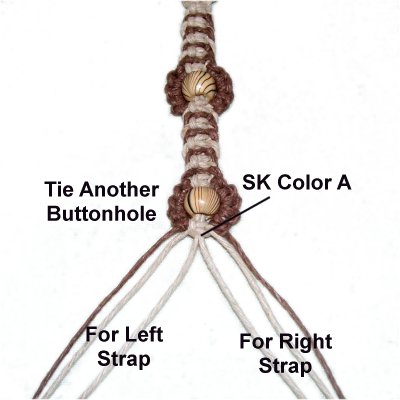
Repeat
steps 5 -
6 , creating another Buttonhole
design.
Divide the cords into two groups, and follow the
instructions below to make the ankle straps for
your Natural Sandals.
Ankle Straps
Step
7: Use the color
B cord on the right
to tie 5 Vertical Larks Head knots onto
the two color A cords.clockwise .
all
3 cords .
Select one of
the color
A cords to tie the next 5
Vertical Larks Head knots.
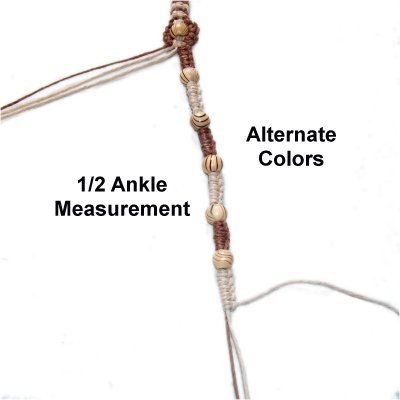
Tie several
more sections, alternating the colors.color
A cords, so you use the material
evenly.1/2
your ankle measurement.
Try the Natural Sandals on your feet to make
sure the design fits properly. The last knot
should rest in the back of the ankle, in the
middle. without a bead
at the end.
Step
8: Repeat
Step 7 , tying the same number of
sections.counter-clockwise ,
since the color B is to the left of the
others.
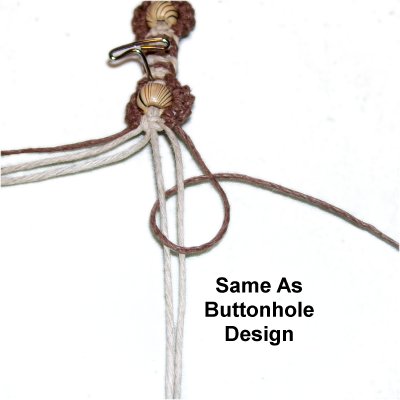
Finishing + Clasp
Tie an Overhand
Knot at the end of each strap. inside
while tightening.
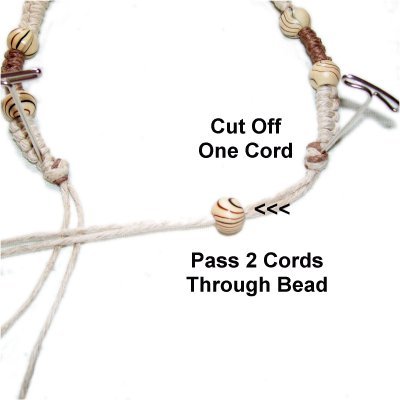
Step
9: When the glue is dry,
cut off one cord close to the knot.
Pass the two
cords from the other side through the same
bead, heading the opposite direction.
Pull both ends
to close
the Natural Sandals.each
set of two cords, move down 3 - 4
inches, so there's enough space for your
foot to pass through.
By
using any text or images on Free Macrame
Patterns, you are agreeing to our Terms
of Use
Have
any comments about the Natural Sandals? Contact
Me.