These Knotting Tips
are suggestions that will help you learn how to
deal with the thin, flexible cords commonly used
in Micro-Macrame and handcrafted jewelry designs.
From choosing supplies to securing cords, these
topics are very important if you are a beginner.
Make sure you visit Macrame Essentials
and read through all the pages in that section.
Knotting Tips for
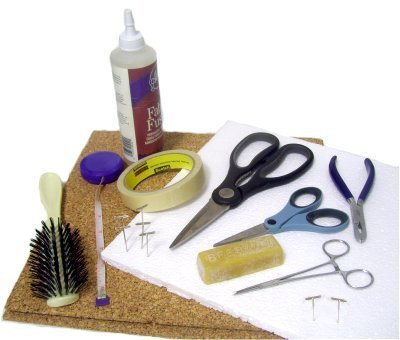
Gathering Supplies
ALWAYS
use a project board.
One of the most important item you need for
Micro-Macrame is a project
board.
It is absolutely essential if you plan to make
jewelry with fine materials. You cannot control
the tiny, thread-like cords without using tape and
pins.
Places that carry jewelry supplies often have
project boards made with cork.
You could also use thick cardboard,
foam, or a clipboard. When using
slippery materials, cover the project
board with fabric.
Make sure you have tape, T-pins, fine
tip pliers or clamps, and small
scissors.
Condition your materials with beeswax to
make them softer, especially with Hemp.
Prepare the
Cords after Cutting
Measure each cord with a ruler or tape
measure. Cut them cleanly with sharp
scissors.
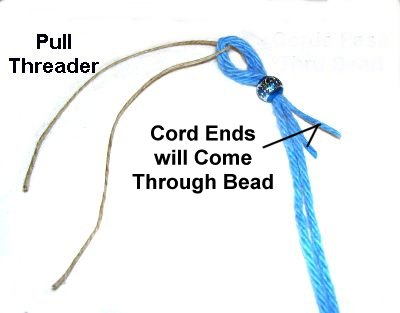
Prepare the cords immediately after you cut them,
by applying glue
to the ends, especially if you intend to use
beads.
Leather cord is the exception to this; it needs no
preparation.
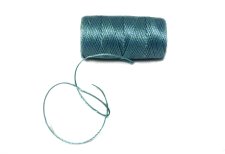
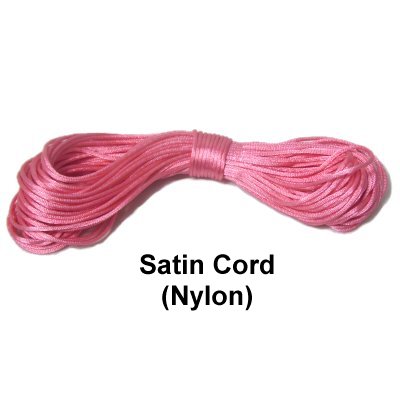
Nylon
Parachute cord (Paracord) is a very
popular material for jewelry.
To prepare the cords, use the flame from a
BBQ lighter to melt the material (at the
tips). This prevents the inner
core material from sliding
out. See Cord
Preparation for details.
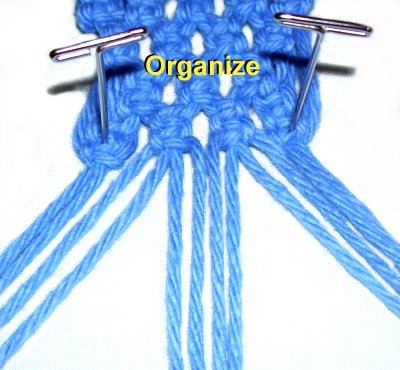
Knotting Tips for Staying Organized
Organize
the cords before each knot is tied.
Arrange them into small
groups prior to knotting.
For example, if you are tying Square
knots with four cords,
divide them up into groups of four.
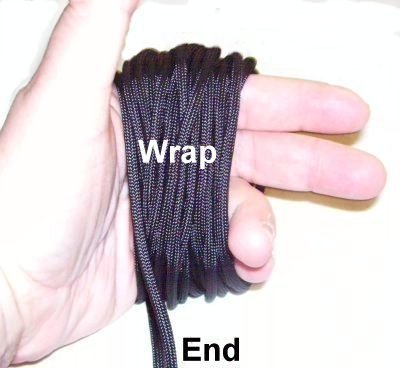
Roll up
the cords
It's important to roll the cords into small
bundles if they are longer than 60 inches, so
they don't get tangled.
Here
is one method:
Wrap the cord around your hand several
times, moving
towards the end.
Stop when you have about 12 inches
left.
Remove the bundle from your hand.
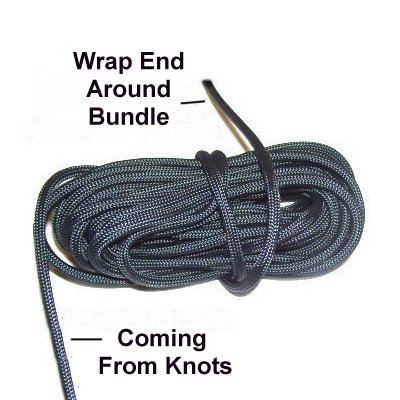
Wrap the end
around the center several times.
Wrap firmly and pull the
end tightly, so you have a sturdy bundle
that's easy to handle.
Tuck the end
under the loop closest to it, and pull
tightly to secure the end. As you
progress, pull the area leading to the
knots to get more material from the
bundle.
Make sure you tug on the end to tighten
the wraps around the center, since the
roll gets smaller as you remove material
from it.
Knotting
Tips for Controlling Cords
Secure
the loops as you progress.
Get in the habit of securing every loop and
fold with tape or pins, so controlling them will
not become a problem for you.
When you use tape, put it on the cord
lengthwise, rather than across it. The
cord wont slip out of the tape as easily.
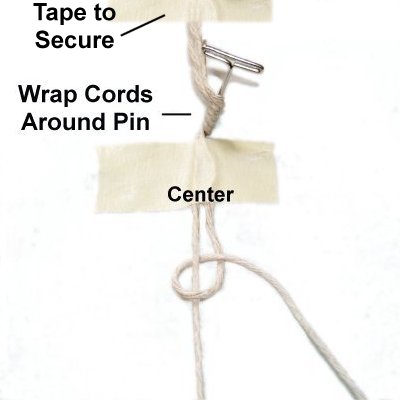
One of the
best methods for securing loops and folds
is to LEANthe
pins over the portion you want to hold
steady.
Click on the image to see this in more
detail.
Another good method for securing fine
materials is to wrap the cord around
the pin several times.
Secure it with a piece of tape to the
board, or to the pin itself.
NEVER
put pins through Leather, Satin or Silk.
Pins can damage the fibers of several types of
material. It's better to use tape, or the
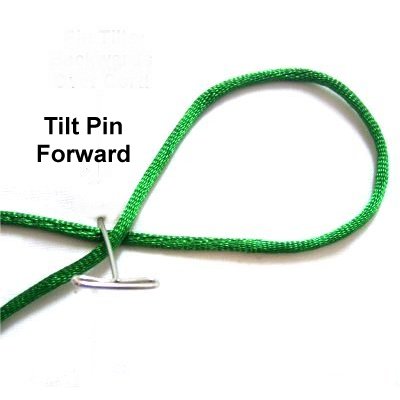
technique shown below.
Make a loop with the cord, arranged
horizontally.
Put the first pin next to the crossing
point.
Tilt it forward, so it leans over the
crossed area.
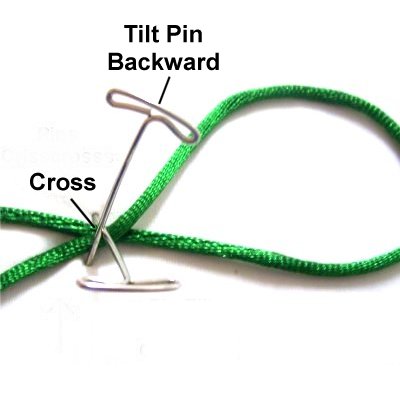
Place a second pin on the other side of
the crossing point.
Tilt it backward,
resting over the crossing point of the
loop.
The two pins should cross, which holds
the cord in place.
Knotting Tips
Regarding Knots
Learn the knots
before you make the project.
Before
trying to tie the knots with small, dainty
threads, I highly recommend you practice ALL the
basic and vintage knots in Learn
Macrame, using cord material
2mm to 4mm thick.
I recommend you practice each of the knots used
in the pattern several times, so you can tie
them easily. Then practice making the knots very
small, which is what the term "micro" means.
Micro-Macrame
projects are often made with several basic
knots, including the Double Half
Hitch.
Click on the link
to see the instructions.
Practice unusualor
complex knots before starting a
project, just to be sure you know what to
expect.
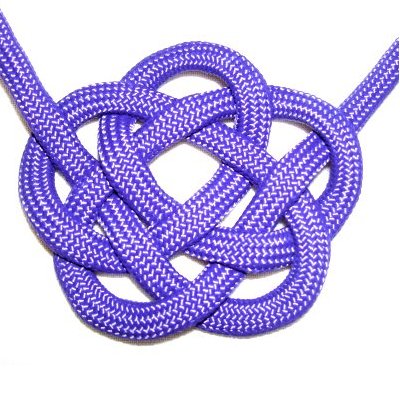
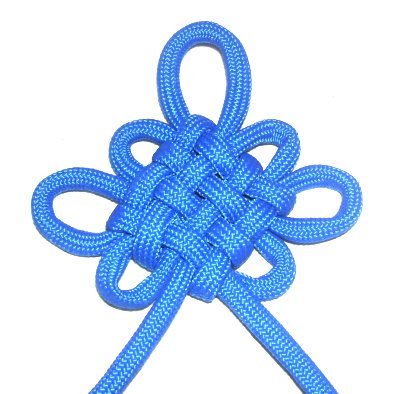
This is the Chinese
Mystic Knot, which is a
challenge to tie, no matter what type of
cord you use.
Practicing will lead to success!
Knotting Tips for
Beading
Don't
add too many beads.
Beads are often used in Micro-Macrame, but
you can easily put in too many.
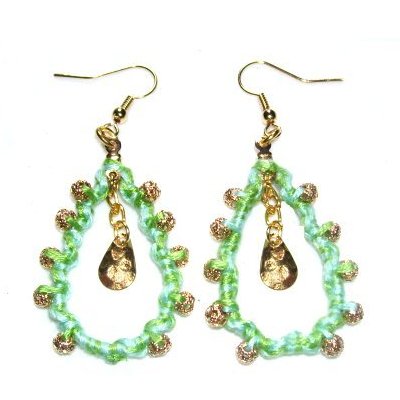
In this pair of Beaded
Teardrops, the beads were
separated by enough knots to avoid
overloading the earrings.
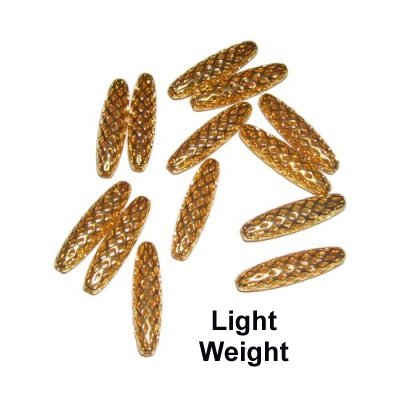
Use
light weight beads.
Choose the smallest beads possible, while
making sure the hole size is adequate for
the number of cords that will pass through
them.