Cord Preparation is a topic seldom found in
Macrame books. Preparing the tips of cords
properly is the most important step for every
Macrame project. Materials may need
conditioning or stiffening, too.
This page shows you various ways to deal with the
cut ends, to prevent the cords from unraveling
while you work.
Handling materials can cause messy and frayed
ends, which can be frustrating.
Twisted materials are likely to come apart
completely, if you don't do something about it
BEFORE starting your project.
Preparing the cords should take place as
you cut each one, which is usually the
first step.
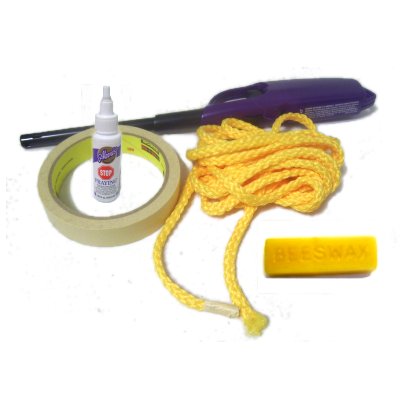
Conditioning
After you cut each cord from the roll, you
can apply beeswax
to soften it, and eliminate any fuzz.
Warm the wax in your hands, then apply it
like a crayon, rubbing it along the length
of the cord (both sides).
I recommend applying beeswax, or a similar
product, to all the Natural Materials
(except Leather).
When using Synthetic Materials,
beeswax can be applied to Satin and fine Nylon
Beading cords. The others are optional.
After the cords are conditioned, inspect each one
for imperfections. Discard any material
that's damaged.
Then use one of the following methods for cord
preparation:
Preparing with Tape
The term "fray" means the fibers are
separated.
So using tape to hold the fibers together
is one technique you can use for cord
preparation.
Cut a SMALL piece of masking tape (or cellophane
tape). Wrap it around the tip of the cord
while you squeeze the area to make it narrower.
During the finishing process, you can cut off the
area with the tape.
This is my favorite technique, and I use it when I
will be applying beads. By making the tip
narrow and as flat as possible, it is much easier
to pass the cord through the bead.
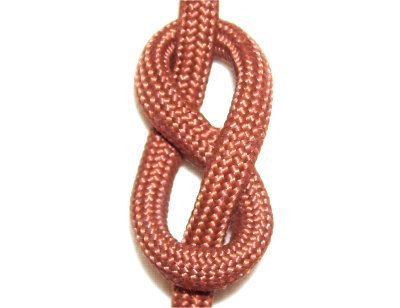
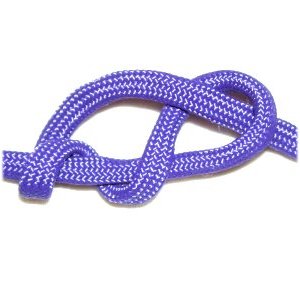
Preparing
with Knots
One quick and easy way to prepare cords is
to tie knots near the tips.
The Figure 8
Knot is another
option. It's easy to tie and to
remove.
This is the best option for flexible cords
where you need to remove the knots at some
point. It won't be as tight as other
knots.
Use the Stevedore
knot when working with
slippery material, such as Satin or Nylon.
You can place it anywhere on a cord, and
it's very easy to tie.
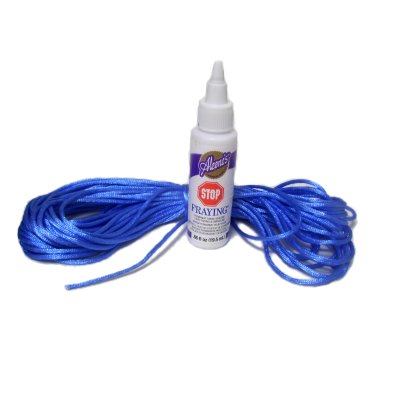
Preparing with Glue
There are certain brands of glue specially
formulated to prevent cords from fraying.
Aleen's
Stop Fray is one such product.
Glue works best with cords that are 1mm
to 3mm wide. You should TEST the
glue on a small piece of material before using it,
to see if damage occurs. Some brands
will permanently darken the material.
You can also use household glue for cord
preparation. Dilute it with water first,
then dip the ends into the glue.
In designs where you plan to add beads, you can
roll the tips between your fingers to make them
narrower, as the glue is drying.
You can also use Nail
Polish in the same way, applying it with
the brush or by dipping.
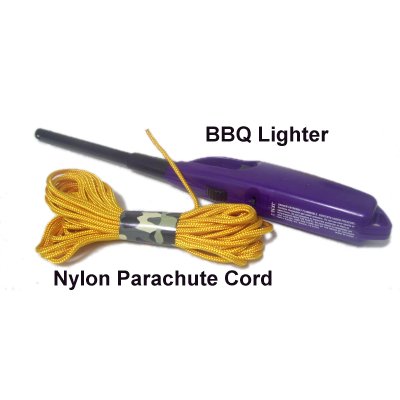
Preparing with a Flame
Sometimes Synthetic
Materials can be prepared
and finished with a flame from a BBQ
lighter.
Parachute
cord should ALWAYS be prepared
with this method.
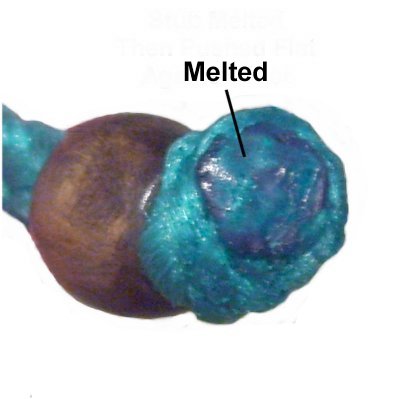
Makes sure you
testthe
material first, by applying a
flame to a small piece. The material needs
to MELT rather than burn.
The melted portion will be darker than the
rest of the material, but it should NOT
ignite.
Olefin,
Polyester, and Nylon should be prepared
as follows:
Hold the flame to the tip of the cord for 1 to 5
seconds, then stop when the area is melted.
Important:
Observe the cord for signs of burning, and stop if
you see it ignite.
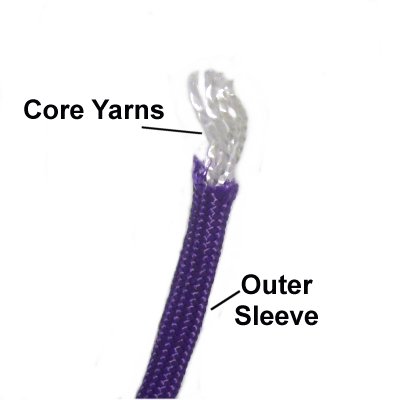
Preparing Parachute Cord (Paracord)
Parachute cord is a little different, because it
is made up of several core yarns surrounded by a
braided sleeve.
You must seal in the core yarns by melting the
sleeve around them, or you run the risk of
accidentally pulling them out while you are
working. Then the cord will bunch up, or
unravel completely.
Here's
how you prepare Paracord:
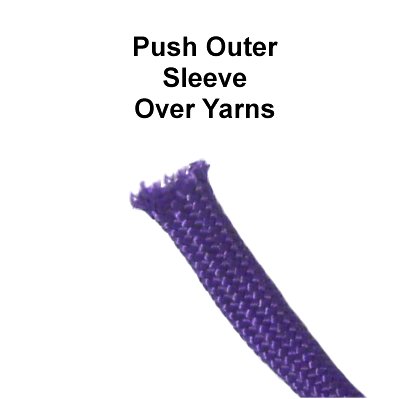
Immediately after cutting, pull the core
yarns out of the sleeve, so you expose
approximately 1/2-inch.
Cut the core
yarns back, so they are even with the
outer sleeve.
Then push the outer sleeve forward, so you
can't see the core yarns anymore.
Apply the
flame to the outer sleeve, until you see
it MELT. Then press the handle of
the BBQ lighter down onto the area,
flattening it as much as possible.
The melted area will look a lot like
plastic, and will be darker than the
material.
By
using any text or images on Free Macrame
Patterns, you are agreeing to ourTerms
of Use