Description:
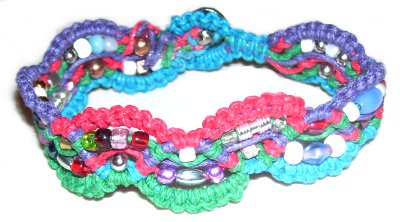
The Rainbow Wave Bracelet is a
Micro-Macrame design that
features the use of multiple colors to create a
rainbow effect. You can also make it with a
solid color, if you want it to be more elegant.
This is a good Macrame project for beginners who
have some experience with the knots used in the
bracelet design.
This Bracelet design can be confusing, so make
sure you know the difference between holding
cords and working
cords (visit the Dictionary if you don't).
The cord lengths
indicated below include color
changes on the right and left
edges (step 8).
You
must swap
cords,or
2 will become too short.
Keep that in
mind when choosing materials and
arranging the colors.
Cut 3 cords, each at least 2.5
yards long (for sizes up to 7.5
inches).
Cut 1 cord, at least 3
yards long (working cord for clasp)
For bracelets more
than7.5
inches, cut the cords longer.
Prepare the ends with
glue,
if you plan to add beads to your Rainbow Wave
Bracelet.
Buttonhole Clasp
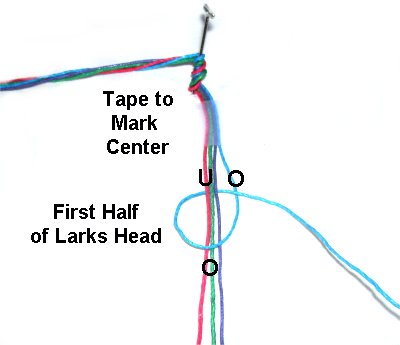
Locate the center
of the cords by matching the ends.
Arrange the cords vertically,
placing tape over them to mark the center. The3-yard
working cordused for theclaspshould be placed to the right of
the other three.
In
the following images for the Rainbow Wave
Bracelet, that's the blue
cord.
Step A:
The first half of the vertical Larks Head
knot is tied with the working
cord, onto the other three.
Rotate clockwise,
passing over
- under - over as shown.
Tighten the
first half firmly, so it
rests against the tape.
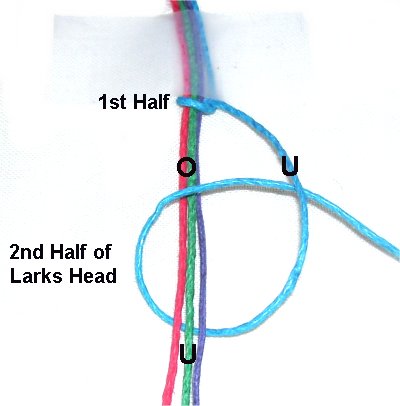
Step B:
The second half of the vertical Larks Head
knot is tied under
- over - under as shown.
Steps
A + B = one Larks Head knot
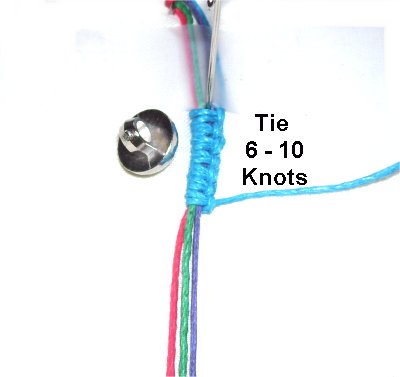
Tie a total of
6- 10 Larks Head knots, so the sennit is
approximately 1.5
times the size of the button.
In the Rainbow Wave Bracelet shown, the
button was 1/2 inches in size. So
the sennit was 3/4 inches in size.
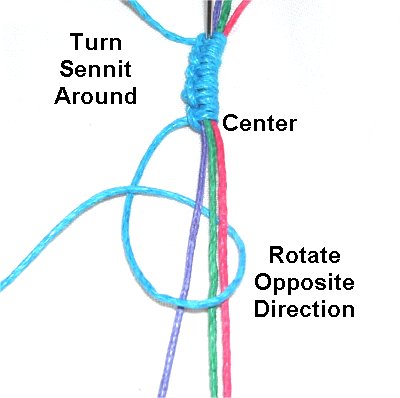
Turn the
sennit around to make the second
half.
Since the heads of the knots are on the
left, you need to tie the Larks Head knots
counter-clockwise.
Tie the same
numberof knotsas the first half, starting at the
center.
Fold the Buttonhole Clasp design to form a
circle. Hold it together and check that the button
will fit through it.
Add more Larks Head knots at
each end if needed.
Arrange
the colors now, in whatever
pattern you prefer (fillers).
Use the two
working cords to tie a tight
Square Knot around all the others.
Tie 2 - 4 more SK, keeping the filler cords in
the positions you chose.
You can still make adjustments to the order after
the SK are tied, but it's easier to do it now.
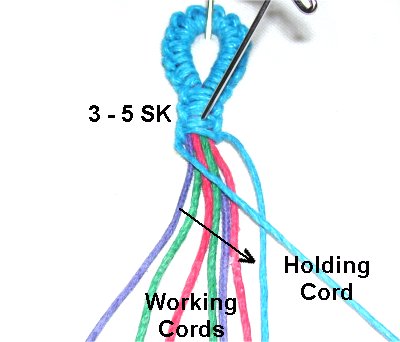
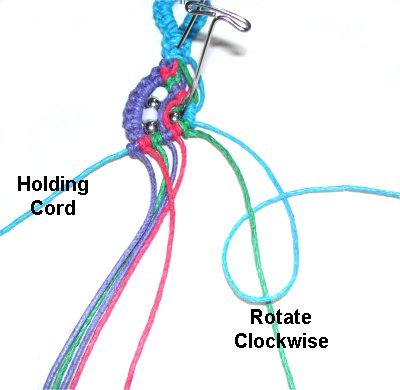
Wave Design
Step
1: Mentally number the
cords.Movecord 1to the right.It
will be used as a holding cord, through
the entire Rainbow Wave Bracelet design.Secure
it so it's taut.
Attach each of the remaining cords
to it with a Double Half Hitch
(DHH). Progress from left to
right.
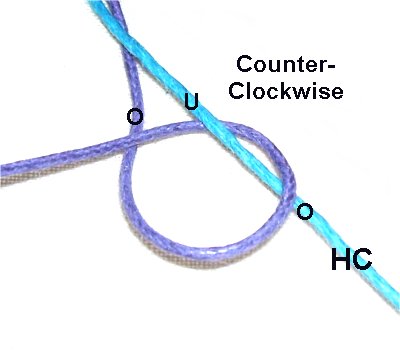
Rotate counter-clockwise
as you tie these knots, and tighten each
one firmly.
A Half Hitch is tied over
- under - over as shown. Tie a
second knot to make a Double Half Hitch.
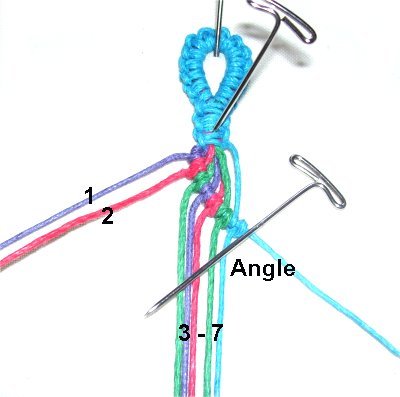
Step
2: Place a pin next to the
last knot tied, and move it as needed,
until it's the same angle as the first
row. When you find the proper angle,
push the pin through the board.
Mentally number the working cords 1 -
7. Separate cords 1 and 2, which are
used next.
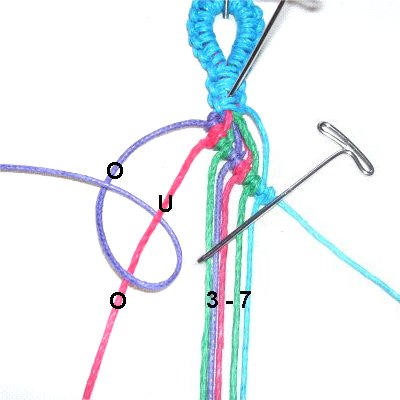
Step
3: Use cord
1 to tie several Larks Head
knots onto cord 2, rotating counter-clockwise.
<
Step
A
Step B >
This is the same knot used for
the clasp
for the Rainbow Wave Bracelet.
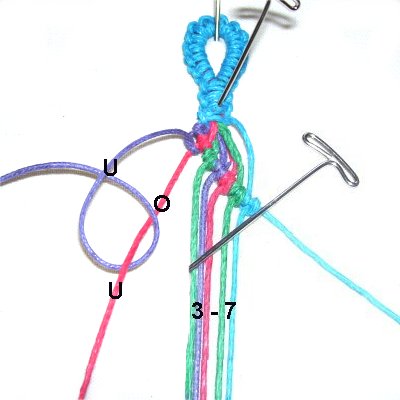
Step 3,
continued: Tie enough Larks Head
knots to reach the place directly across from
where the pin enters your board.
In most cases that will be 6 to 10 knots,
depending on the angle.
(see image below)
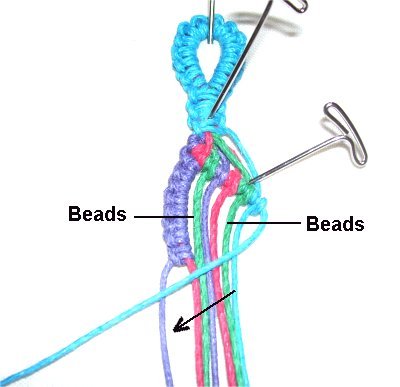
Step
4: (Optional) Attach
beads to cord
3, which is next to the Larks
Head sennit. You can add more to the
other cords, but make sure there's only 1
or 2 small ones, so they fit inside the
triangle shape.
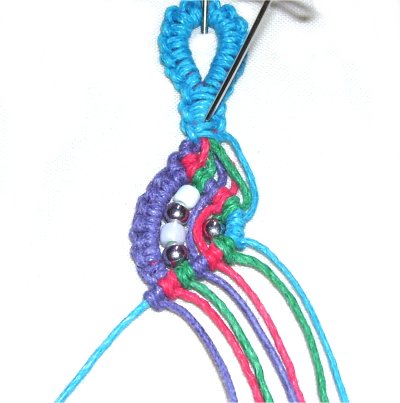
Move the holding
cordto the left
and secure it so it rests against the
bottom the Larks Head sennit.
Attach the
working cords to it with DHH. Move
right to left as you progress, and tighten
the knots firmly.
These knots should be tied in a clockwise
direction.
The Larks Head sennit and the portion of
the cords inside
the triangle should be as
straight as possible.
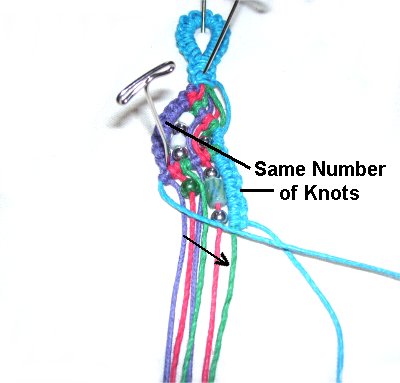
Step
5: Repeat
step 3, using working cord
7 to tie the Larks Head knots
onto cord 6.
These knots are tied in a clockwise
direction.
Tie the same
number of knotsas on the other side, so the angle
will be the same (see next image).
Step
6: Move the holding
cord to the right
and secure it so it rests against the
bottom of the Larks Head sennit.
Attach the working cords to it with DHH,
moving left to right.
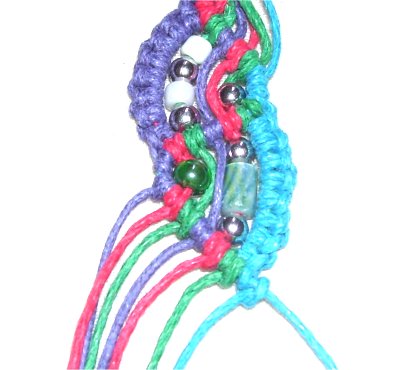
Here is a
closer view of the first two triangle
shapes.
Step 7:
Repeat
steps 4 - 6 several times, to create the
rest of the Rainbow Wave Bracelet.
Important:
Cords 1 and 7 will eventually become too short to
be used as working cords.
You need to switch
them with cords 2 and 6, which will change the
color of the Larks Head knots.Swap the cords before
you tie the Larks Head Knots (step 3). You can switch after
every triangle shape, or in some other
pattern. Just make sure the Rainbow Wave
Bracelet design isbalanced.
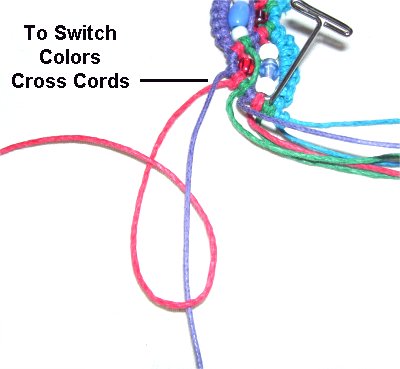
Step
8: To switch,
cross cord
2under
cord 1 on the left, and
then tie the Larks Head knots with cord 2.
When you work on the right side, crosscord
6undercord
7, and then tie the
knots with cord 6.
Finishing and Clasp
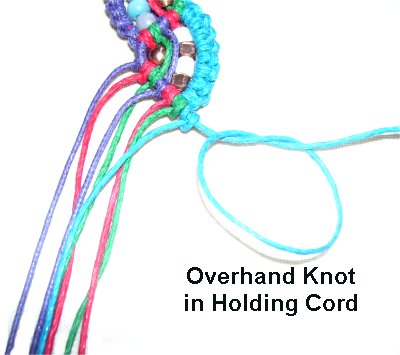
Step
9 : When the Rainbow Wave
Bracelet is the size you want, tie an
Overhand Knot with the holding
cord.
Position it so it rests next to the last
DHH tied, and tighten it firmly.
This prevents the working cords from
sliding down.
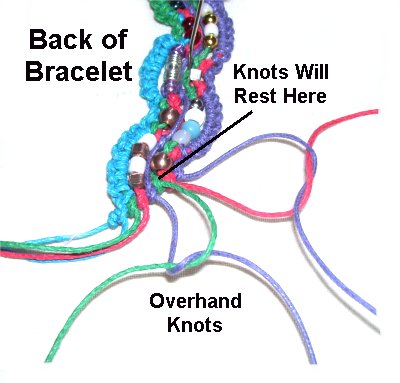
Turn over the bracelet so you are working in the
back.
Select 4 cords to be finished off now.
It doesn't matter which ones.
Using two cords, tie tight
Overhand knots. Arrange the knots so
they rest against the row of DHH closest
to them.
Apply glue to these knots and allow it to
dry completely, before cutting off the
excess material.
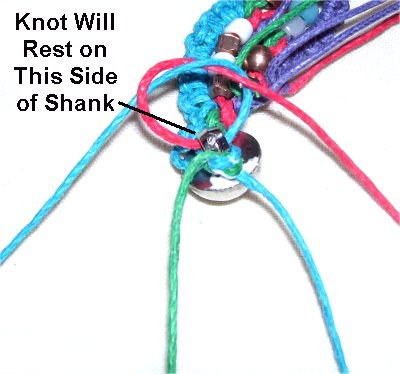
Step
10: Pass two of the
remaining cords through the button's
shank.
Do the same with the other two, heading
the opposite
direction.
Tie an
Overhand Knot with one
cord from each side. Apply
glue next to the shank, so the knot will
rest on it once tightened.
Make sure this knot is as tight as
possible. When the glue dries, cut
off the excess material.
Use the
remaining two cords to tie a second
Overhand knot. It should be arranged
so it rests on the other side of the
shank.
Apply glue and tighten firmly. Use a
clip to hold the cords in place while the
glue dries. Cut off the excess
material.
By
using any text or images on Free Macrame
Patterns, you are agreeing to ourTerms
of Use