Description:
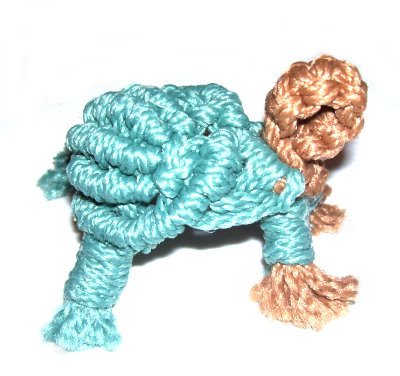
The Mini Turtle project is suitable for
older children, teens and adults. This Macrame
pattern is a bit complex compared to other designs
in Macrame for Kids, and will be difficult for
YOUNG children.
Make sure you know how to tie each of the knots
used in the design.
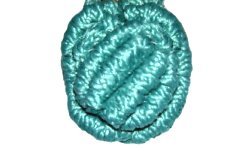
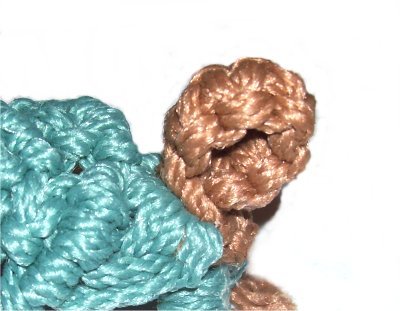
The Shell
Knot is the primary decorative knot used
in the pattern. It's sometimes called the Berry
Knot in modern patterns.
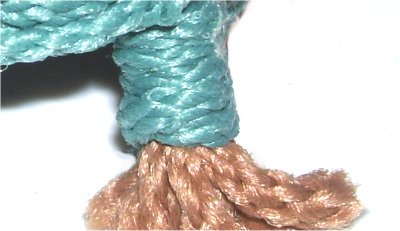
The size of this turtle decoration depends on the
material you use. In the example, 4mm cord
was used, and the finished width was approximately
2 inches in size. For a smaller turtle, use 2mm
cord.
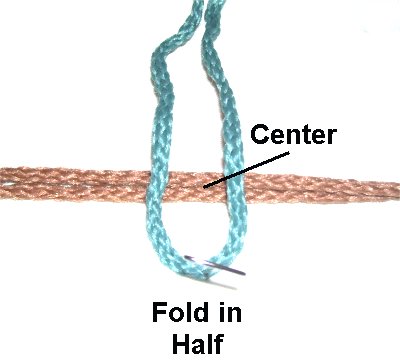
Using two colors is optional, but if you decide to
do so, Color
A is for the head and front legs (brown).
Color
B is for the shell and back legs (turquoise).
Zarrina Akbarova sent in the suggestion for this
project.
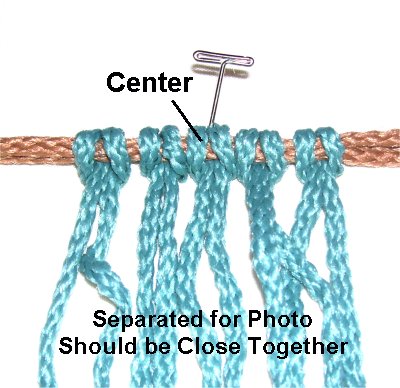
Repeat
this process again,to
make a Double Half
Hitch. It should rest to the left
of the first, lower down on the
holding cord.
Tighten both knots firmly, so
the shell for your Mini Turtle is as small as
possible.
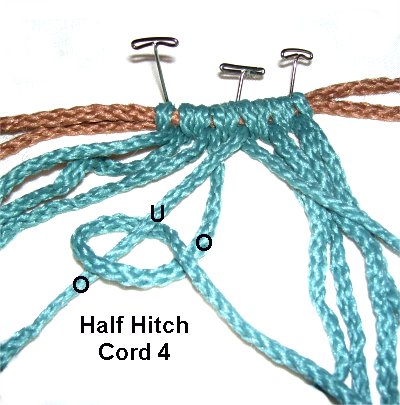
Attach
cords 3 and 2the
same way (in that order).
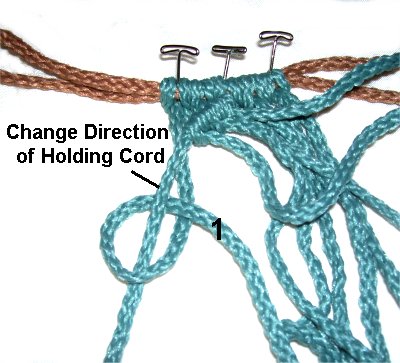
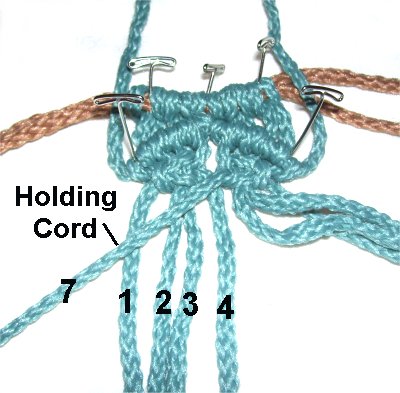
Step
3:Change
the direction of holding
cord 6, so it's more vertical (up
and down).
Attach cord
1 to it with a DHH, the same way
you did the others in step 2.
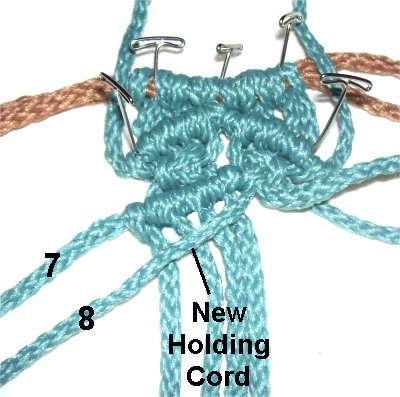
Repeat
steps 2 and 3 on the right,
attaching cords
7 - 9 to holding cord 5.
The Half Hitches should be tied counter-clockwise.
Change the
directionof the holding cord,
and attach cord
10.
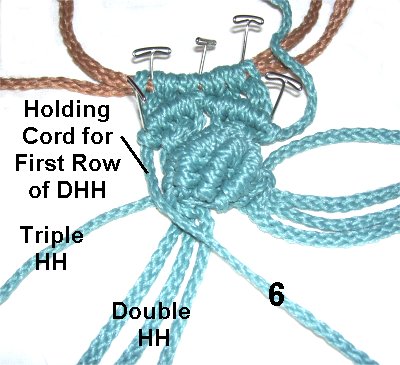
Re-secure the upper shell of the Mini Turtle to
your board, so it can't move. Push the two
holding cords (5 and 6) out of the way for now.
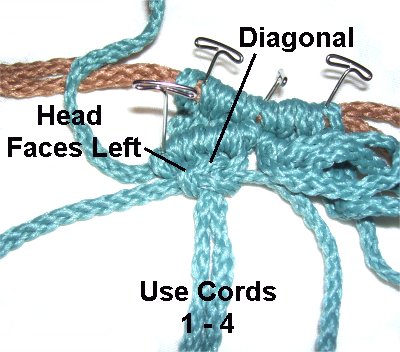
Step
4:Cords
1 and 4 are the working cords for
the first Square Knot. Cords 2 and 3
are fillers.
Tie a LEFT Square knot. As you tighten it,
make sure it rests against
the row of DHH, and is on the same
diagonal angle.
Tighten it as much as you can.
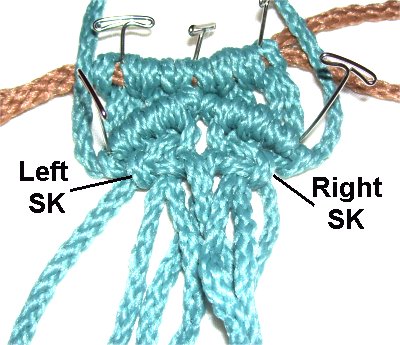
Repeat
step 4, tying a RIGHTSquare Knot with cords
7 and 10. Cords 8 and 9 are
fillers.
Make sure the SK rests next to the DHH and
that it's on an angle.
Step 5:
The inside
area of the shell for the Mini Turtle has 4 diagonal
rows of DHH, tied as follows:
Bring cord
7 (from the right SK) over
cords 1 - 4, on a diagonal slant to the left.
Make sure it restsagainst
the bottom of the SK on the
left.
Attach cords 4 - 1 to it with DHH (in that
order), rotating clockwise.
Tighten the knots firmly.
Step
6: Move cord
8 to the left, on the same
angle. It will be the next holding
cord. Place it close to the first row of
DHH.
Attach cords
4 - 1 to it with DHH (in that
order). Pull the cords firmly so the
two rows are against each other.
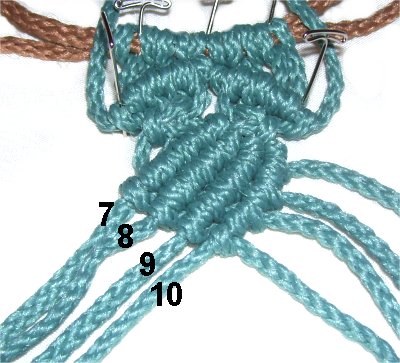
Step
7: Repeat
step 6 two more times,
using cord
9 for the next
row,and then
cord 10 (holding cords).
Place them close to the other rows and
tighten the knots firmly.
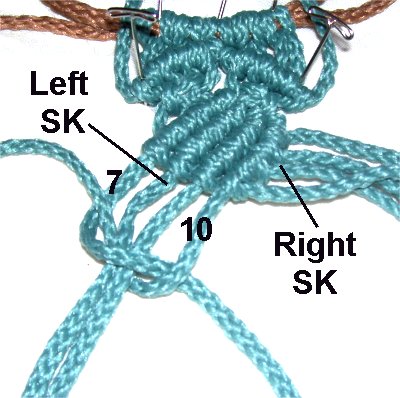
Step
8: Tie a LEFT Square Knot
with cords
7 - 10, which are now on the
left.
Tie a RIGHT SK with cords
1- 4, which are now on the right.
Step 8,
continued: Both knots should be on
an angle, and tightened
as much as possible.
This will cause the inside portion of the shell to
bend
upward.
Next you will make the lower outer edges (bottom
half of shell) for your Mini Turtle:
Step 9:
Locate holding
cord 6, which you pushed out of the way
earlier.
Move it around the
left edge of the design you just made,close to the SK.
Attach cord
7 to it with a Triple
Half Hitch (one Double
Half Hitch + one single).
Attach cords
8 - 10 to it with Double
Half Hitches.
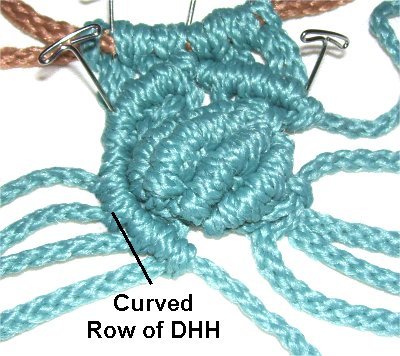
When you are
finished, the row of DHH should be curved.Repeat step 9on the right:
Use
holding cord 5, and attach cord
4 to it with a Triple
Half Hitch.
Attach cords
3 - 1 with Double
Half Hitches.
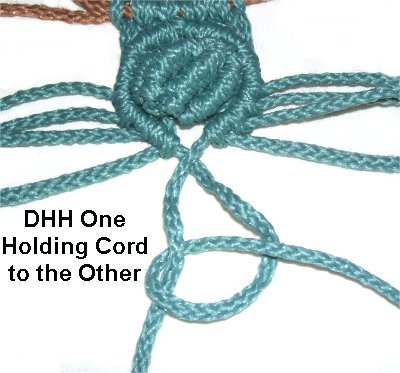
Step
10: The final step for the
shell of your Mini Turtle is to attach
one holding cord to the other
with a Double Half Hitch.
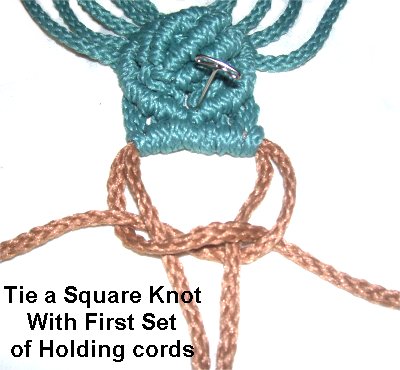
Step
11: Use the first set of
holding cords (color
A) that the mounting knots are
attached to.
Mentally number the ends 1 - 4. Tie a
Square Knot with cords 1 and 4 (cords 2 -
3 are fillers).
As you tighten
the Square Knot, create
a circle with a small opening for
the head.
This is considered the neck of the Mini
Turtle.
Creating the Head
The head of the Mini Turtle is the easiest part
of the design. You can tie some type of
button knot using 4 cords, if you don't like the
technique used for this area.
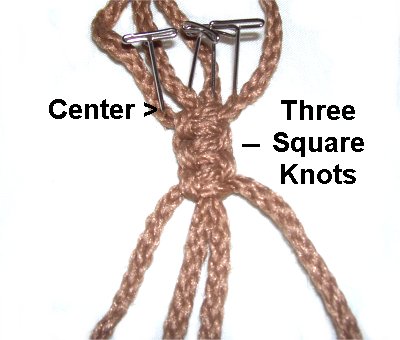
Step
1: Arrange the remaining
four Color A
cords on your board vertically (up and
down).
Secure them at the center.
Tie a small chain of 3 LEFT Square Knots
using the lower half of the cords.
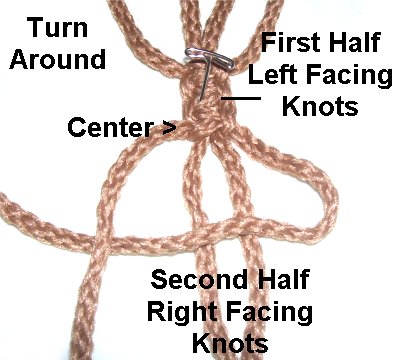
Step
2: Turn the knots around
and go back to the center.
Tie three RIGHT Square knots.
Step
3: Fold the sennit in half
and secure it to your board.
Use two cords at the right and left edges
of the group to tie a Square knot around
the other six (fillers).
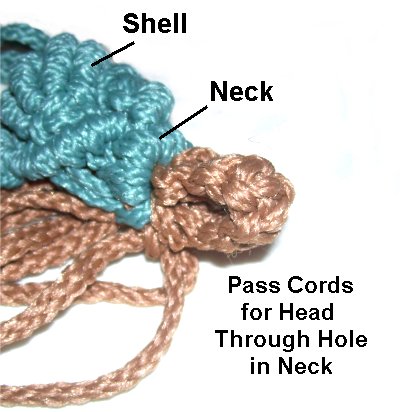
Step
4: Pass the cords through the
hole in the neck, at the top of the shell.
Use pliers or tweezers, and pass them
through one at a time.
When you pull on them, make sure the
Square Knot you tied in step
3 is on the inside
of the Mini Turtle, where it can't be
seen.
Creating the Legs
The legs for the Mini Turtle are simply four
Wrapped Knots. Below are instructions for
tying them. Each knot is tied with the
20-inch pieces of material.
These knots can be a challenge for those new to
Macrame, so here are some tips:
Place the cords for the legs horizontally
(side to side).
When you wrap, move vertically
(up and down)
Wrap firmly, and make sure the coils don't
overlap.
As you tighten, hold the wraps so they don't
loosen.
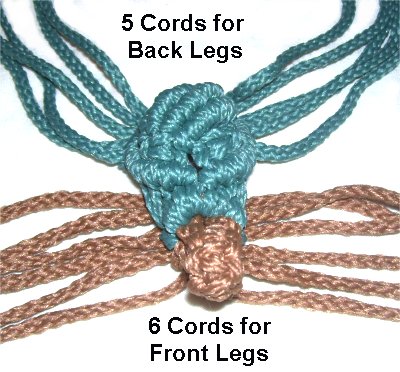
Step
1: Organize the cords into four
groups. In the front of the Mini
Turtle, each leg will have 6 cords.
In the back, each leg will have 5 cords.
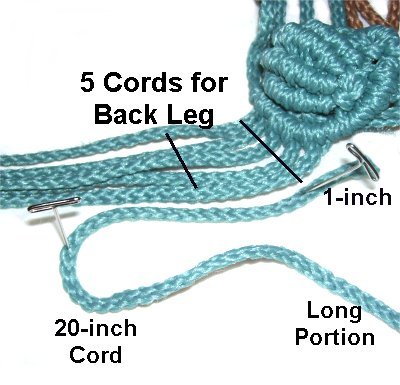
Step 2: Secure
a 20-inch cord next to the 5 cords for one back
leg.
The pin should be placed at
least 1-inch from the end of the cord.
Fold the cord
further down, beyond the area where you
will wrap. (indicated by black lines)
The short portion will be on the inside,
and the long portion is used to wrap.
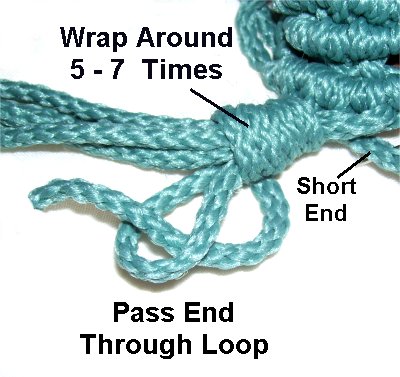
Step
3: Wrap the long end
around allthe cords for the leg. Make sure
you pass around the short end as well, and
that you wrap firmly.
Wrap 5 - 7 times, depending on how long
you want the legs. Pass the end
through folded area (loop).
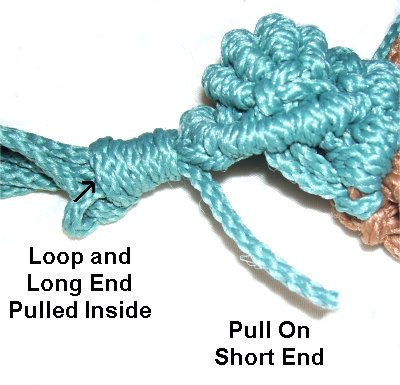
Step
4: Hold the wraps so they
don't loosen, and pull on the short
end, which was secured near the
shell.
The loop and the long end will be pulled inside
the Wrapped Knot.
Slide the knot up so it rests next to the
shell of the Mini Turtle.
Step
5: Apply glue to the outside of
the Wrapped Knot. When it's dry, cut
off the excess material from the short
end, close to the top
edge of the knot.
Cut off the long end close to the bottom
edge.
Trim the 5
leg cords (inside the knot) to at
least 1-inch.
Step 6: Repeat
steps 2 - 5 to create the remaining three
legs for your Mini Turtle.
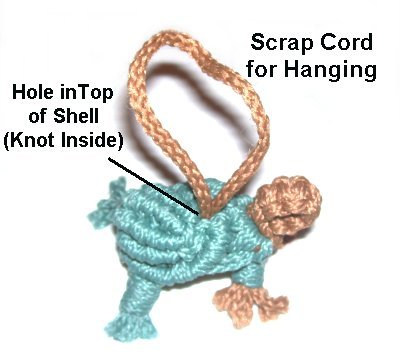
There
is a small space in the top of the
shell. You can make a loop with a
piece of scrap cord, and place it through
the hole.
Tie an Overhand knot with the two end on
the
inside. Then you can use
this cute design as a pendant or ornament.
By
using any text or images on Free Macrame
Patterns, you are agreeing to ourTerms
of Use