Prepare the ends with GLUE to stiffen the
material, which helps with attaching the beads for
the Leaf Pendant.
Roll the tips between your fingers to make them as
narrow as possible, if you are using material over
1mm thick.
(Optional) Apply beeswax to each cord,
making sure it's not placed on the area with the
glue. This softens the material so the knots
are neater.
Check your E-Beads to make sure they are the sameheight,
which is the area from hole to hole.
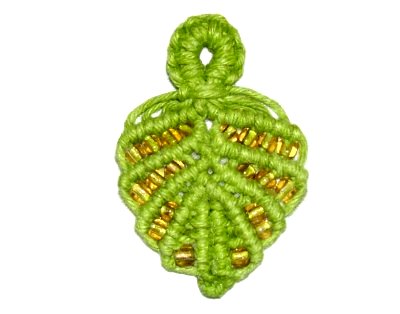
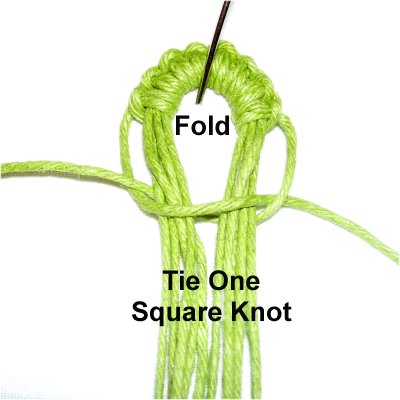
Buttonhole Loop
Step 1:
Arrange the five 30-inch cords on your board
vertically, secured at the center with tape.
Secure the upper portion as well.
These cords are used as the core
for the the loop.
The 36-inch cord should be placed to the left
of the others. It will be the working
cord for the Buttonhole Loop.
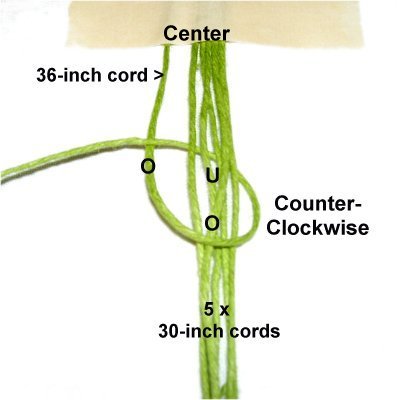
<<
Make a counter-clockwise
loop with the working cord, passing over
- under the other five, and over
the cord you are holding.
The 2nd loop is under
- over the core and under
the one you are holding (opposite of loop
1). >>
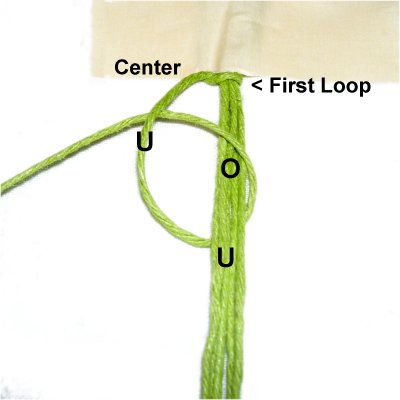
Tie at least 4
knots, so the design measures 1/4-inch in
size.
Turn the knots around and remove the tape
from the center.
Tie another 1/4-inch of knots, rotating clockwise,
since the working cord is on the right.
Fold the knots
at the center so the last knot on each end
lines up. All the cords for the core will
be together in the center with the working
cords on either side.
Tie a tight Square Knot with the working
cords, around all the others.
This completes the loop for the Leaf
Pendant.
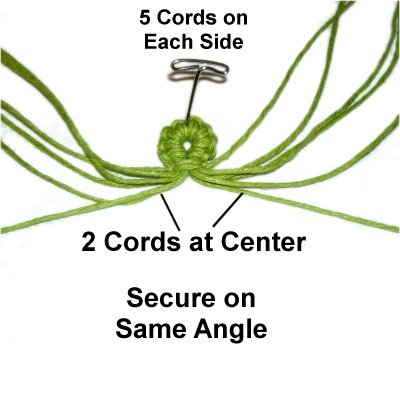
Leaf Design
Step
2: Organize the cords and
secure the two at the center.
They should rest diagonally on the same
angle,
which should be wide.
They will be the first holding
cords.
Move the remaining cords above the holding
cords, five on each side. These are
the working cords.
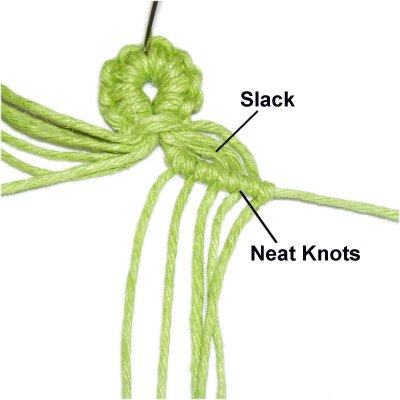
Bring each
working cord under
the holding cord first.
Then attach them with a counter-clockwise
DHH, since you are moving left
to right.
Make sure you attach them in
the correct order, leaving a
little slack above the holding cord (see
next image).
You can see in
this first row of DHH for the Leaf Pendant
that the slack above the holding cord will
form a curved design.
Tighten the knots firmly so they are as
neat as possible. Adding more
beeswax really helps!
Attach the
five cords on the left side of the Leaf
Pendant the same way. Make sure you
bring each one under
the holding cord prior to tying the knots.
The only change is that the loops for the
Half Hitches are tied clockwise,
since you are moving right
to left.
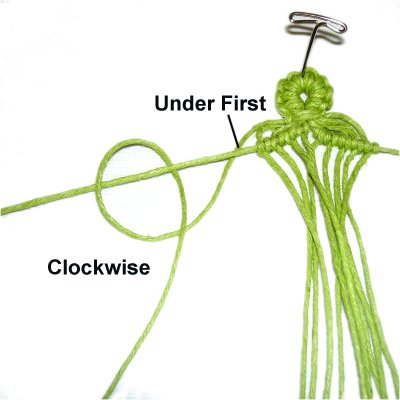
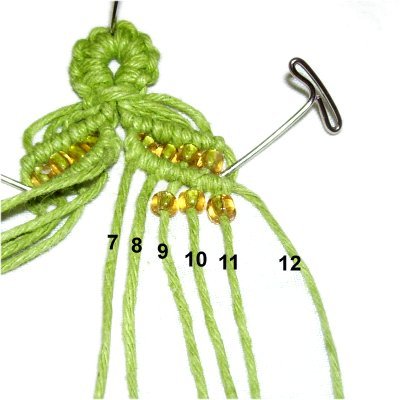
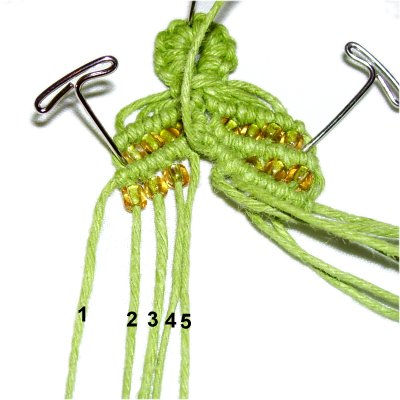
Step
3: Mentally number the
cords 1 - 12. Cord
7 is the holding cord for row
2 on the right.
Attach beads to cords
8 - 11. Move holding cord 7
into place over
them, close to the beads.
Attach cord
8 with a counter-clockwiseTriple
Half Hitch, and the rest with a Double
Half Hitch.
Design Tip:
A Triple Half Hitch is simply 3 loops instead of
two.
The third loop is not quite as neat as the others,
but do your best to make it as small as possible.
Note that the image above shows the holding cord further down
than it should be.
Keep it close to
the beads as you tie the knots.
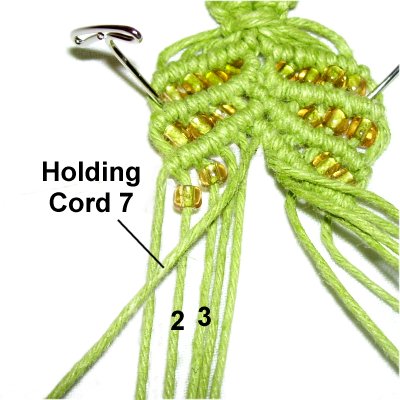
Repeat the
same process to make row
2 with the left
group of cords (1 - 6).
Cord
6 is the holding cord, and the
beads are placed on cords
2 - 5.
Attach cord
5 (Triple Half Hitch), and
progress to the left, tying DHH. The
knots are tied clockwise.
Design Tip:
When tying Double (and Triple) Half Hitches, you
always start with the working cord closest to the
holding cord.
Also, you progress in the same direction as you
moved the holding cord.
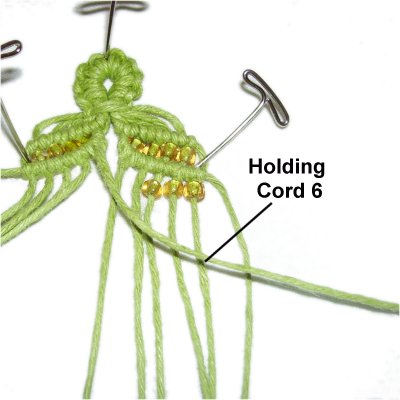
Step
4: Mentally re-number the
cords 1 - 12. You will now use the right
group again (cords 7 - 12).
They are ALL
working cords for row
3.
Apply beads to cords
9 - 11 (total of 3 beads).
Holding
cord 6 comes from the left
group.
Cords 7 - 12 are attached with counter-clockwise
Double Half Hitches.
(Read the information next to the two
images below before
tying the knots).
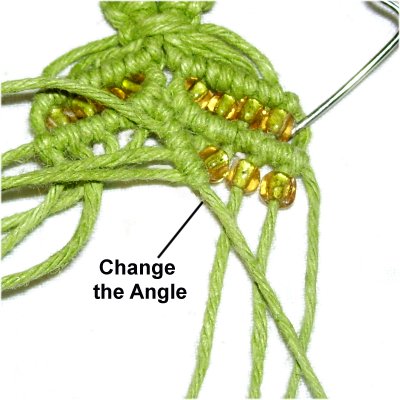
The
angle
of holding
cord 6 needs to be changed so
it's closer to the center of the Leaf
Pendant.
Attach the first
3 cords (7 - 9) with DHH.
Allow the left half of the leaf to move closer
to the right half as you tie the
knots.
Change
the angle of holding cord 6
again, so it
curvesunder
the beads. (cords 10 -12).
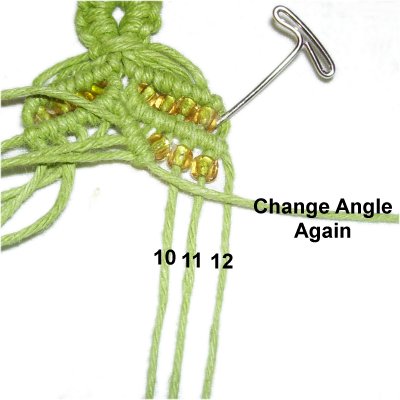
Step
5: Now you will use the
remaining cords (1 - 5) for row
3 on the left
side of the Leaf Pendant.
Apply beads to cords
2 - 5.
Cord
7 is the holding cord, which was
the first cord attached on the other
side.
Attach cords 5 - 1 to it with clockwise
Double Half Hitches (in that order).
Change
the angle of the holding cord as
in the previous steps.
Step
6:Mentally
re-number the cords.
Repeat step 4 to make
row 4 on the right
side.
The only change is that you apply the
beads only to cords
10 and 11.
Cord 6 holds the knots, and 7 - 12 are
attached to it.
Repeat
step 5 to make row
4 on the left.
Cord 7 holds the knots, and the beads are
placed on cords 2 and 3.
Step
7: Repeat
Step 3 to make row
5 of the Leaf Pendant. The
holding cord comes from the right
group, not the left (same as row 2).
One
bead is placed on cord
11. Cord 7 holds the
knots. When you attach cord
8, make it a Triple
Half Hitch. The rest are Double Half
Hitches.
Step
7, continued: On the left, the bead
is placed on cord
2, and cord
6 holds the knots.
When you attach cord
5, make it Triple
Half Hitch. The rest are Double Half
Hitches.
Finishing Touches
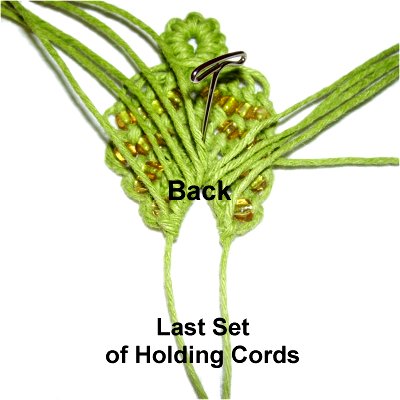
Step
8: Turn over the Leaf
Pendant. Separate the working cords
coming from each bar made in the previous
step. The holding
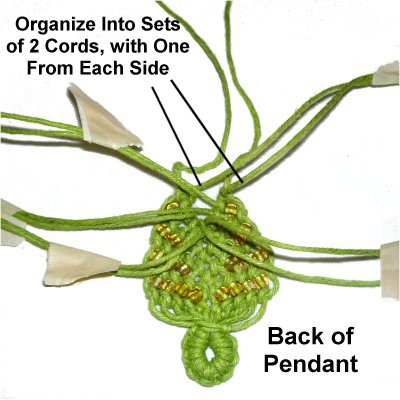
cords should be vertical.
Organize the cords into sets of two,
selecting one from each bar.
Placing tape on each set will prevent you
from using the same cords twice. (see
image below)
Start with the
cords closest to the top and work towards
the bottom of the leaf. Tie Barrel
knots with the first 4 pairs of
cords.
Check in the front
to make sure the two bars
touch each other, without any gaps.
Tighten as much as possible, and add glue.
Tie Overhand
knots in the two sets closest to
the bottom. Apply glue to these
knots, too.
Move the last 4 cords backwards, so they
rest flat on top of the other knots.
Secure them with more glue.
Hold them in place with clips or tape
while the glue dries. Cut off the
excess material from all the cords.
By
using any text or images on Free Macrame
Patterns, you are agreeing to ourTerms
of Use