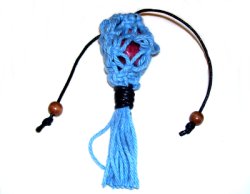
Step 2: Tie the
first row of Alternating Square Knots,
so they rest directly below the mounting
knots. Make sure they are tight.
Each SK should have two working cords
and two fillers.
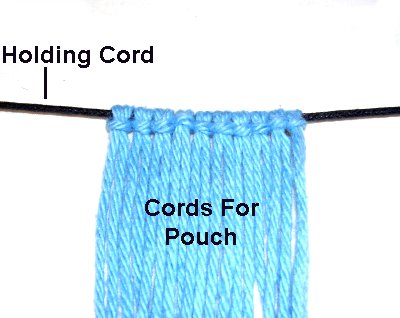
Step 3: Arrange
the top of the Gemstone pouch so it
forms a circle, by bringing the two ends
of the holding cord together.
Secure the design in two areas, so the
circle remains in place while you work.
Design Tip: Notice how I organized
the cords into five groups in the image above.
If you do this in each step, it helps you
visualize where the knots are placed.
Also, place the Gemstone pouch in the center
of your project board. This way you can move the
entire board as you tie the
knots in a circle.
Step 4: Tie the second
row of Alternating Square knots, so they
rest 1/4-inch below the
first row.
Move in a circle, using all the cords
in groups of four.
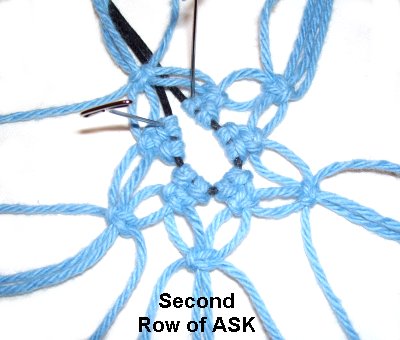
Step 5: Alternate the
cords and tie the next row of ASK,
1/4-inch below the second row.
As you do so, the pouch will begin to
form, and the edges will curve upward
naturally.
Step 6: Tie the fourth
row of knots, but place them next to the
knots in the third row (no space). This
will tighten the bottom of the pouch.
Place the Gemstone Pouch on your work
surface upside
down, so you have access to the
bottom.
Step 7: Divide the
cords into two sets of 10. Use one
cord from each set to tie a tight
Overhand knot. Add glue and tie a
second knots on top of the first.
Repeat this process with the other
cords, until the bottom is closed.
Finishing
Touches
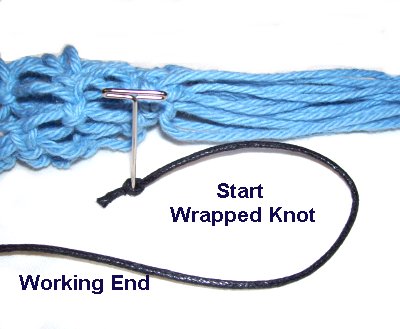
Step
8: Tie an Overhand knot at one
end of the 18-inch
cord.
Secure the knotted end next to the pouch,
and fold it so the long portion (working
end) is on the outside.
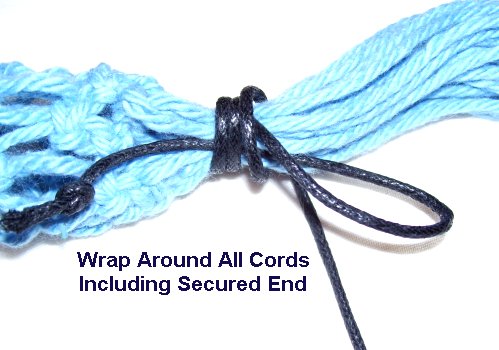
Step 9: Use the long
portion to wrap around all the cords,
including the secured portion with the
knot in it.
Wrap firmly several times, moving
towards the folded area.
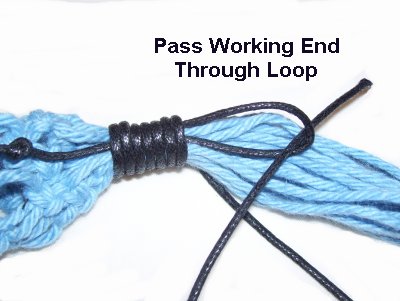
Step
10: Wrap for 1-inch and then
pass the working end through the loop
(folded area).
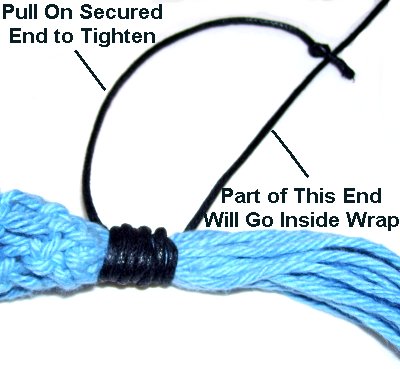
Step 11: Pull on the
end with the knot in it, until the loop
and the working end move inside
the wrapped portion.
Trim off any extra material, close to
the top and bottom edges of the Wrapped
knot (18-inch cord only).
Step 11,
continued: Trim the ends of the
pouch cords to form a fringe.
You can add beads followed by finishing knots if
you wish to decorate the ends.
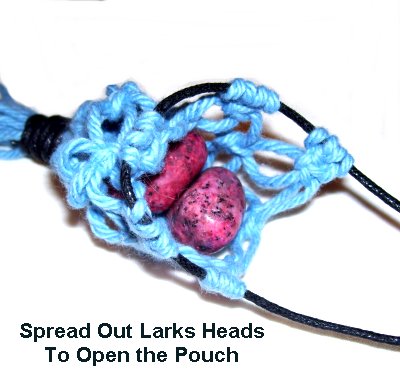
To open the
Gemstone Pouch, spread out the Larks Head
knots at the top. By using waxed material,
they should move easily.
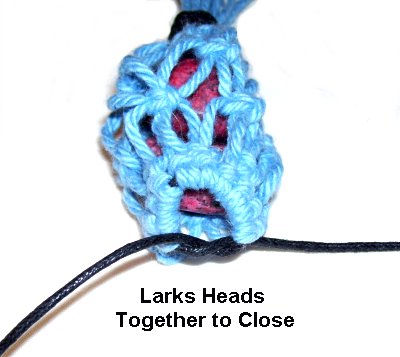
To close the
pouch, pull on the holding cord so the
Larks Head knots are close together.
By
using any text or images on Free Macrame
Patterns, you are agreeing to ourTerms
of Use