Description: The Serpent is a
suitable Macrame project for older children, as
well as beginners. There are only a few
decorative knots used in the design, so it's
easy to make.
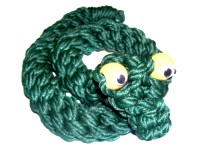
This Macrame snake features a body make with a
chain of knots that spiral, a flat head, and
large eyes. Adding wiggle eyes to the
beads makes him look really interesting.
Adults may need to participate, especially if
the child is not familiar with the basic knots.
Be sure to
practice each knot before making the snake.
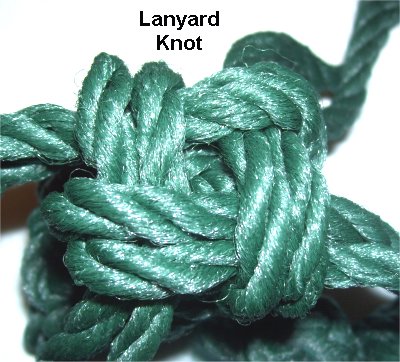
Please note that the Lanyard Knot is now named
the Crown Knot. The images still say
"Lanyard Knot".
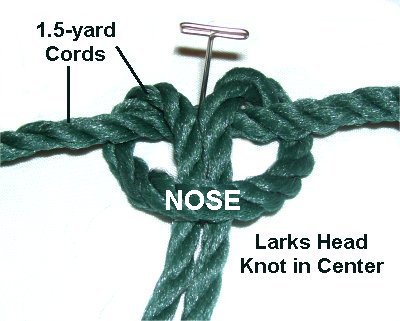
Step 1: Locate the
center of a 1.5-yard
cord. Fold the second 1.5-yard
cord in half, and use it to tie a Larks
Head knot onto the first cord, placing
it at the center.
The front
of this Larks Head knot is the nose
for the Serpent.
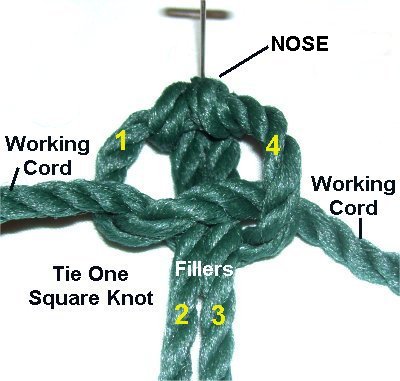
Step 2: Flip the knot
upside down, and secure it. Arrange all
four ends vertically,
and mentally number them 1 - 4.
The working cords are 1 and 4, and thefillers
are cords 2 and 3.
Tie one Square knot with the working
cords.
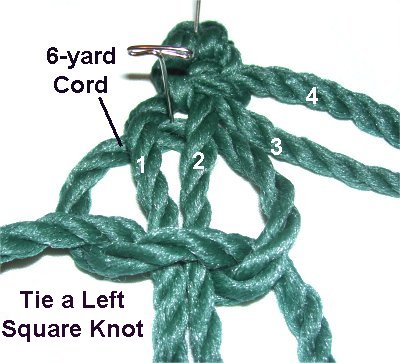
Step 3: Fold a 6-yard
cord in half. Place it under
cords 1 and 2, and secure it.
The ends of this new
cord are the working cords for the next
Square Knot. The short cords (1 and 2)
are the fillers.
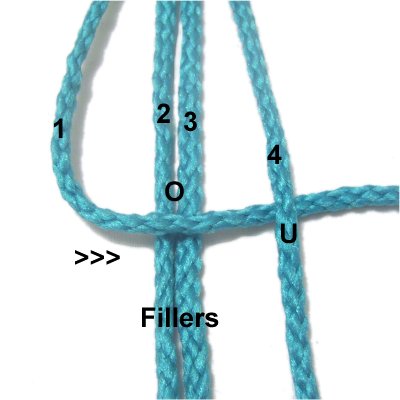
Tie a left
Square Knot. (See below)
The first working cord you move, which
curves over
the fillers, determines the
knot's direction.
The knot in step
3 will face left,
if you move the left
working cord in front of the fillers for
the first step.
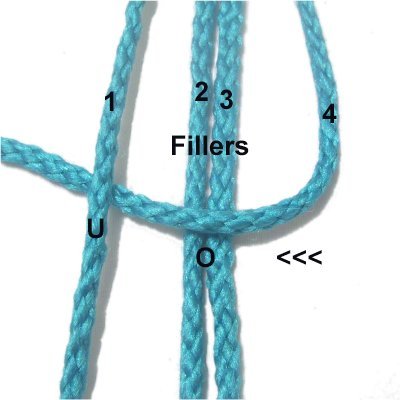
The knot in step
4 will face right,
if the right
working cord is over
the fillers for the first step.
Step 4: Fold another
6-yard cord in half. Place it under
cords 3 and 4, and secure it.
Attach it as in the previous step, but
make sure it's arightSquare Knot.
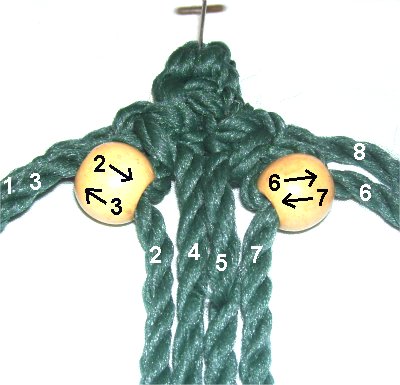
Step 5: Here is a
closer view of the two knots.
Mentally number the cords 1 - 8 as
shown.
Left Eye: Pass cord 2
through the first bead, heading left to
right. Pass cord 3 through as well,
heading right to left.
Right Eye: Pass cord 6
through the second bead, heading left to
right. Cord 7 goes through the hole
right to left.
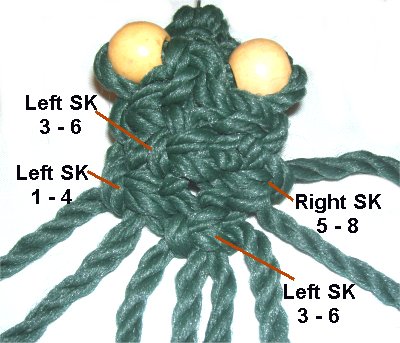
Step 6:
Mentally re-number the cords, so the four in the center are 3 -
6.
Cords 1 and 2 are on the left, and cords 7 - 8 are
on the right.
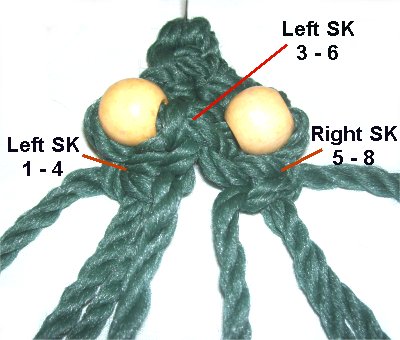
Tie a left
Square Knot with cord 3 - 6.
It should rest between
the two eyes.
Tie a left
Square Knot with cords 1 - 4, and a rightSK with cords 5 - 8.
Tighten
the knots firmly so the eyes
bulge upward slightly.
Step 7: Tie a left
Square Knot with cords 3 - 6.
In the next row tie a left
Square Knot with 1 - 4, and a right
SK with cords 5 - 8.
For the final row, tie a left
SK with cords 3 - 6.
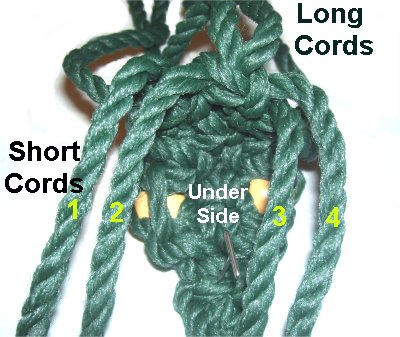
Step 8: Flip the head
of the Serpent upside
downand secure it to your board in
two places, so it's stable.Separate the short and long
cords.
Using
only the four short
cords, tie 3 Square Knots to
make the lower jaw. The working cords
are 1 and 4.
Use two short
cords to tie an Overhand knot, so it rests against the
three knots you just tied (at the tip of the
jaw). Apply glue just before tightening the
knot, so it's on the inside of the knot.
Do the same with the other two cords.
Trim the ends to 3 inches. Do
not cut them off completely.
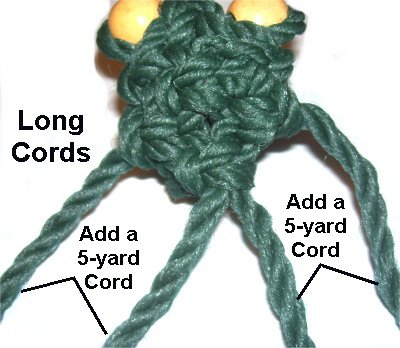
Step 9: To finish the
head of the Serpent, flip the design
back to how it was originally (face up).
Add two 5-yard cords to the four long
cords that are left, using the same
technique as in steps
3 and 4.
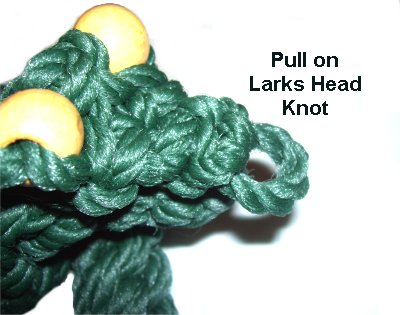
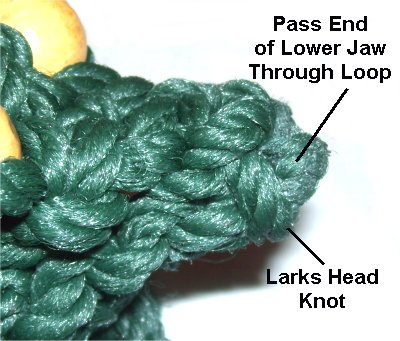
Arrange the head of the Serpent as
shown.
Pull on the segment at the end of the nose,
which is the Larks Head knot you tied in
step
1.
Make it as large as possible.
Pass the 4 cords in the
lower jaw(made in step 8) through the loop
from
the bottom up.
Make sure the Overhand knots pass
through the loop.
Weave the ends through spaces in the
head, so they rest along the bottom
of the upper
jaw. Apply
glue.
The Body
Step 1: Organize the long
cords into four sets of two.
Bundle each set to
make them easier to work with.
Step 2: Make a series
of Crown knots, following the
instructions below.
Stop when the sennit measures 10
inches.
Crown
Knot Instructions
The images below show a Crown knot made with
only two cords (one cord per segment). The knots
you will make have 2
cords per segment (working together).
The cords will be coming off the head rather
than secured in the center, but the process is
the same.
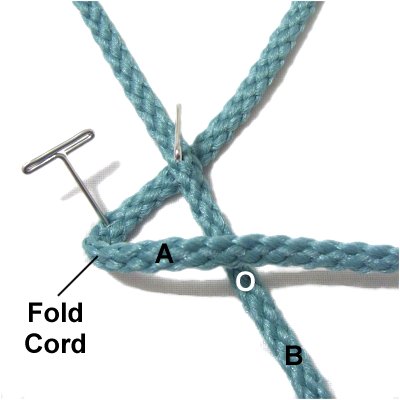
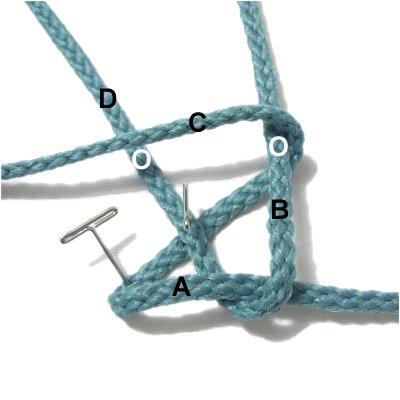
Make sure the cords are arranged neatly after
you fold each segment. Mentally number the
segments A - D, beginning on the lower left.
It helps if you place the head of the Serpent between
your knees to work on the body.
Move the two cords in
segment A to the right, so they
rest on top of segment B.
Make sure you leave a space for the
fourth set of cords to pass through.
Fold the two cords in segment
B towards the back of your
board (backward).
Position them on top of segment C.
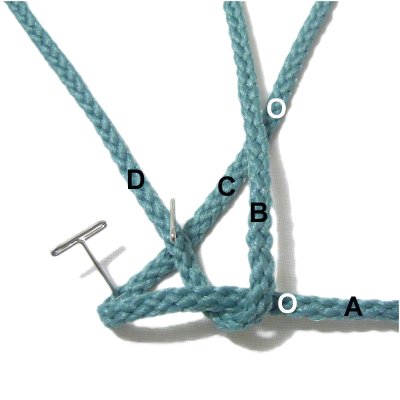
Fold the two
cords in segment
C to the left.
Place them on top of segment D.
Fold the two cords in segment
D towards you (forward).
Pass them through the space made by
segment A where it folds, over - under.
Pull all four segments gradually
to tighten the knot.
Step 3: To coil the
body, curve it towards the head and neck
of the Serpent. Pass two ends through a
space at the neck.
This
step is optional-
You can leave
the body straight if you wish.
Important:
When you resume tying the Crown knots, start with
the two cords you passed through the space at the
neck.
Step 4: Continue to
tie Crown knots for at least 10 more
inches.
To
make sure you have enough material
to finish,stop when the
shortest
cords are around 12 inches.
Step 5: Pass one cord
through a space in the first 10-inch
sennit (if
you are coiling the body).
Tie one more Crown knot.
Hold the Serpent between
your knees for the next step.
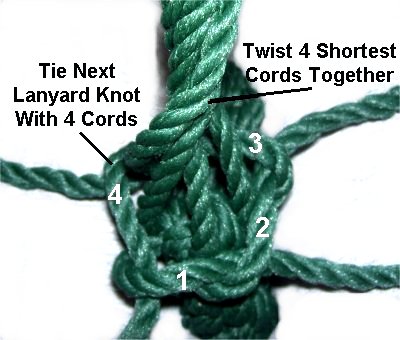
Step 6: Bundle the
four shortest
cords, and twist
them together. You may
need someone to help hold them upright.
Tie 5 more Crown knots with the four
remaining cords. One cord should passbehindthe bundle, so the knot surrounds
the four twisted cords.
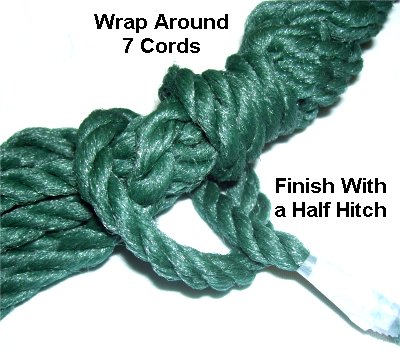
Step 7:
Find the longest
cord and wrap it around all the others 4
times. Finish with a Half Hitch. Before
tightening, apply glue to the inside
of the knot.
Select another cord and tie a Half Hitch
around all the others (including the one
just used). Apply glue to the inside.
When it's dry, cut off the extra material.
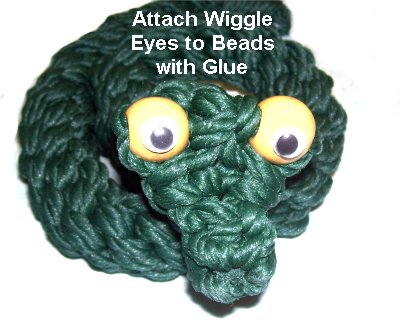
Step 8: Apply glue to
the wiggle eyes and attach them to the
beads, completing the Serpent.
By using any
text or images on Free Macrame Patterns, you are
agreeing to ourTerms of Use