|
|
| |
|
|
|
Description:
The Linen Stitch is a simple way to
collect a group of cords into a bundle.
For that reason, it's called the Gathering
Knot or Collecting Knot in vintage Macrame
patterns.
Below the instructions is a unique
variation you should also practice. |
|
|
|

|
|
The Wrapped
Knot is a similar technique
you should practice next.
The main difference is that you use a separate cord
to make that knot, where in this design
the working cord is one already in use.
Click on the image or link to visit the
page. |
|
| |
| |
| |
| |
Linen Stitch Instructions
|
| |
|
|
|
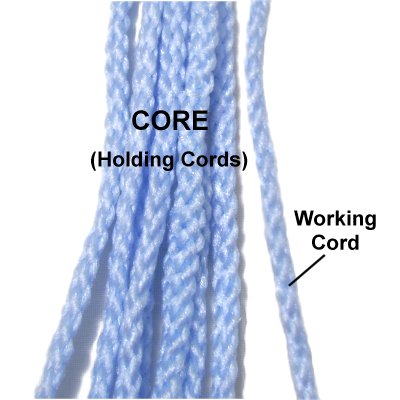
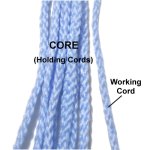
Step
1: To practice, secure
several cords to your board
vertically. They should be at least
36 inches long.
The cord furthest to the right is the
working cord. The rest form the CORE
(a group of holding cords). |
|
| |
|
|
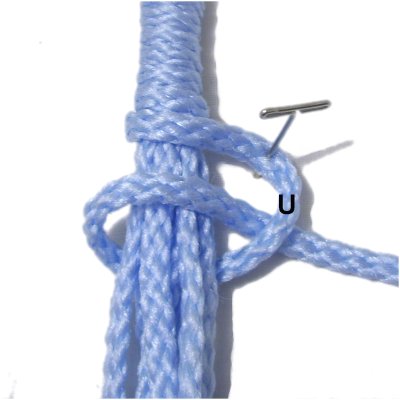
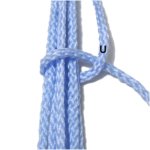
Step
2: Wrap the working cord
around the core, passing under
- over the cords in a clockwise
direction.
Bring it under
the working cord to complete the loop.
|
|
| |
| |
| |
| |
|
|
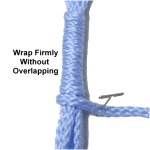
Step
3: Wrap around the core
several times, in a clockwise
direction.
Wrap firmly and evenly, making sure the
coils don't overlap. Stop when the
wrapped area is the length you want.
Secure the working cord.
|
|
| |
|
| |

|
|
Step
4: Repeat
step 2.
Remove the pin and pull firmly on the
working cord to tighten the loop.
You can now finish off the working cord in
whatever manner is suitable for your
project.
|
|
| |
|
|
|

|
|
Alternating Pattern
|
|
|
|
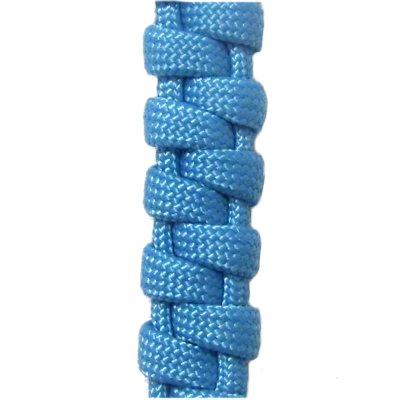
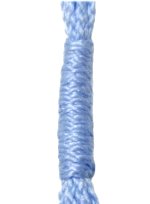
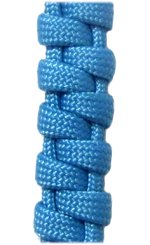
Description:
This variation of the Linen Stitch is made
by wrapping the cord around two sets of
holding cords. This creates an
alternating pattern, similar to a
switchback design.
This design can be used as a strap for a
purse, a belt or a bracelet. You can even
make it as part of a plant hanger.
Parachute cord was used in this example
because it shows the alternating pattern
better than other materials. |
|
|
|
|
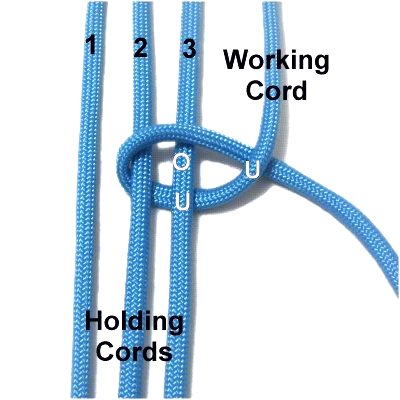
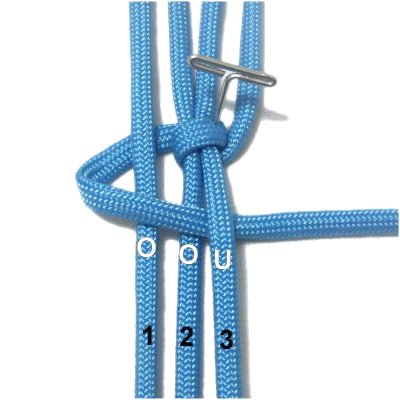
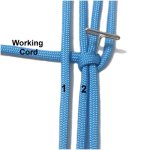
Step 1:
Arrange four cords vertically on your board.
The working cord is furthest to the right.
Mentally number the other three, which are holding
cords. |
|
|
| |

|
|
Make a reverse Half Hitch with the
working cord, passing under
- over cords
2 and 3 (clockwise).
Pass it under
the working cord to complete the loop.
|
|
| |
|
|
|
|
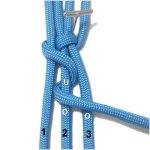
Step
2: To start the next
wrap, move the working cord under
the 3 holding cords, heading left.
|
|
| |
|
|

|
|
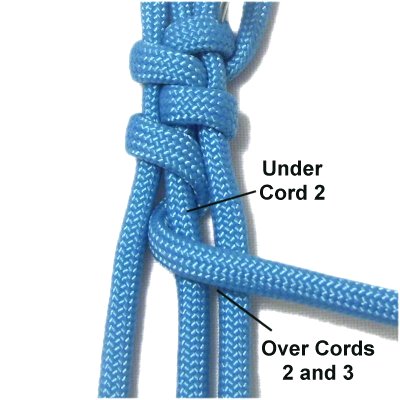
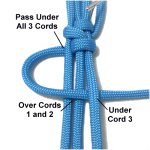
Step
3: To complete the wrap,
bring the working cord over
cords
1 and 2, heading right.
Pass it under
cord 3.
|
|
|
|
|
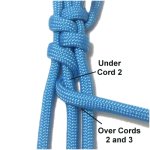
Step
4: Start the next wrap by
moving the working cord under
holding
cord 2, heading left.
Complete the wrap by moving it over
cords
2 and 3, heading right.
|
|
| |
|
| |
|
|
Step
5: Repeat
steps 2 and 3, passing the
working cord under all three holding
cords, heading left.
Then pass over
cords 1 and 2, and under
cord 3 as you wrap towards the right.
|
|
| |
|
|
Step
6: Repeat
step 4.
Step 7:
Repeat
steps 5 and 6 several times,
until the sennit is the size you want.
Make sure
you stop on Step
5.
|
|
| |
|
| |
|
|
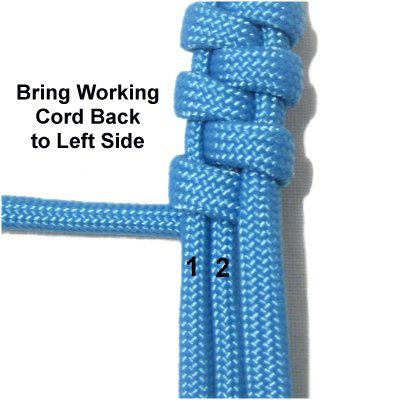
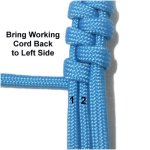
Bring the
working cord to the left side of the
sennit, by passing it under
cords
1 and 2.
|
|
| |
|
|
|
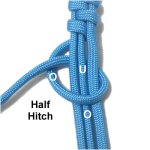
Step
8: Tie a Half Hitch with
the working cord, passing over
- under the three holding cords.
Pull it left, passing over
the working cord. Tighten
firmly.
Finish off the working cord in a manner
most suitable for your project.
|
|
|
| |
| |
|
|
| By using any
text or images on Free Macrame Patterns, you are
agreeing to our Terms of Use |
|
|
|
| Have
any comments about the Linen Stitch? Contact Me.
|
|
|
|
|
|
|
|