Description:
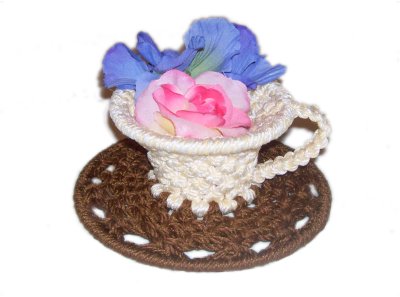
This Tea Cup Decoration is an adorable
way to decorate your kitchen. Inside the
cup, place either real or artificial flowers,
potpourri, or similar small items. The
finished size is 6 inches wide and 3 inches
tall.
Alternating Square knots are used to create both
the cup and saucer, which is a different
color. These instructions do not
contain the steps to tie a Square Knot, so be sure
to view that page by clicking the link below.
This Macrame project is rated Easy, suitable for
beginners.
Important:
The material used to make this Macrame decoration
should be either nylon or polypropylene, which can
be melted as part of the finishing process.
Test the material by heating it with a
flame. Do not use if the material burns
rather than melts.
Supplies
Needed:
4mm synthetic
cord material that melts when heated
Color
A (for cup): Cut 24 cords, each
25 inches long (63.5cm).
Color
B (for saucer): Cut 24 cords,
each 25 inches long.
Prepare the cords for the Tea Cup Decoration by
applying masking tape to the tips (or Overhand
knots).
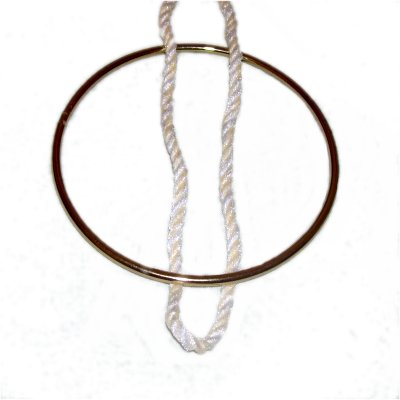
Step 1:
Mount one Color
A cord (for the cup) to the
4-inch ring with a Larks Head knot:
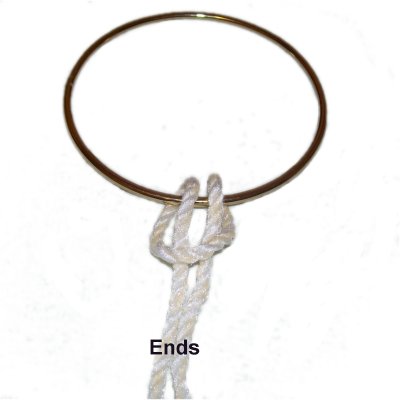
<<<
Fold the cord in half and place it under
the ring.
Bring the ends over
the ring and under
the folded area. >>>
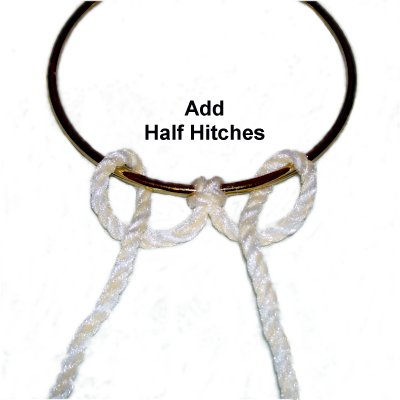
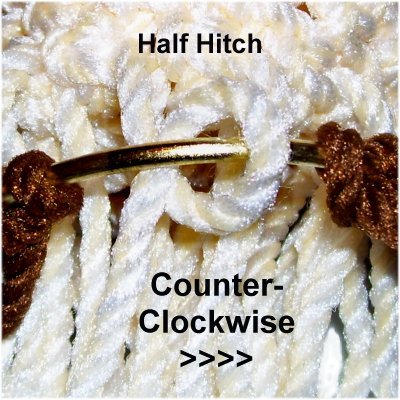
Add a Half
Hitch with each end, by making a loop over
and under
the ring.
As you pull the end down, it should pass over
the cord.
Step 2: Repeat
step 1 with all the remaining Color
A cords.
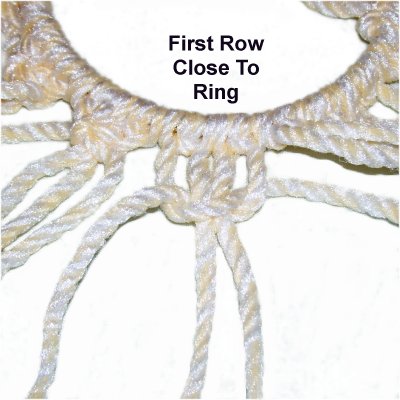
Create the Cup
Step
3: Tie one
row of Square Knots with groups
of four cords.
Tighten the knots firmly so they rest as
close to the ring as possible
Step 4:
Tie five (5) more
rows of Alternating Square knots to form the cup
portion of the Tea Cup Decoration.
Read the text below for a review on how to
alternate cords.
Important:
You need to tip the ring or suspend it in some
manner, so you are making a short tube rather than
a flat design. See
the image for step 5.
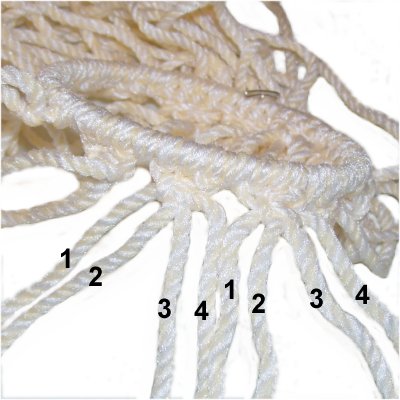
Design
Tip: When making
Alternating Square Knots (ASK), the
easiest way to alternate is to mentally
number the cords coming from two knots in
the last row you tied.
Combine cords 3 and 4 from the knot on the
left, with cords 1 and 2 from the one on
the right, and use them to tie the ASK in
the next row.
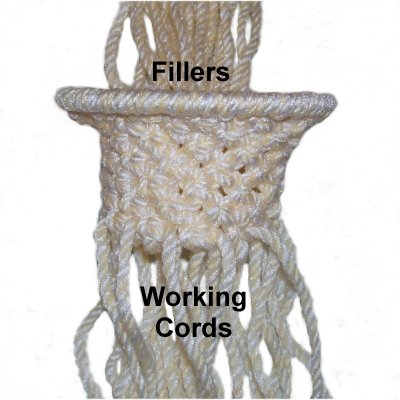
Step
5: Tie one
more row of ASK. After each knot is
tied, push the FILLERS inside the cup and
out the top.
Only the working cords are attached to the
next ring.
Use a rubber band or tape to keep the
fillers in a group.
Step
6: Mount 12 of the Color
B cords for the saucer onto the
2-inch ring.
Attach them with Larks Head knots.
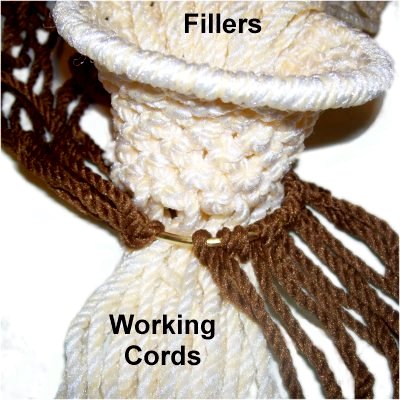
Step
7: Slide the working cords
for the cup through the 2-inch ring.
Arrange half of the color B cords to the
right of the cup, and the others to the
left.
Step
8: Attach two
cords from the cup to the ring
with counter-clockwise
Double Half Hitches, since you should
progress left to right.
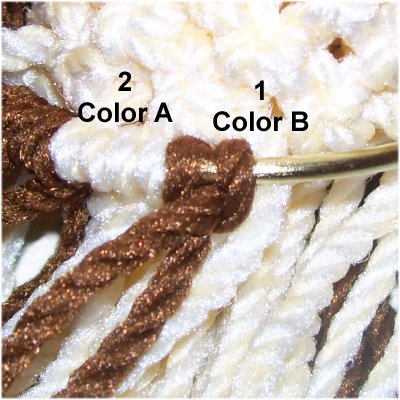
Step
9: Slide a Color
B cord next to the two cords you
just attached (from the cup).
Then attach the next two Color
A cords with DHH.
Continue this patterns (2 Color A -- 1
Color B), all the way around the
ring.
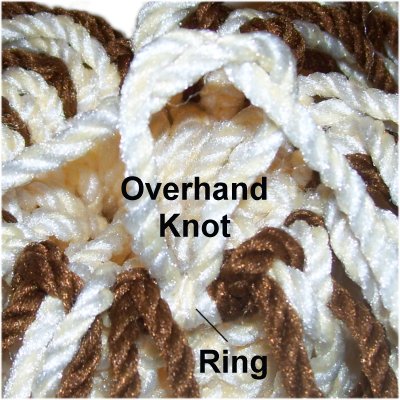
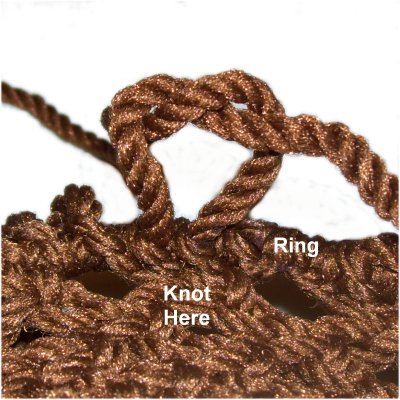
Step
10: Turn the Tea Cup
Decoration upside down, resting on the top
edge of the cup.
Tie off each pair of Color
A
cords you just attached to the
ring, with tight Overhand knots.
Try to arrange the knots so they rest to
the inside
of
the ring, not directly on the metal (see
next image).
Step
11: Cut off the excess
material close to each knot, leaving two
very short tips approximately 1/8-inch in
size.
Use a lighter to heat and melt the tips,
so they stick to the knot.
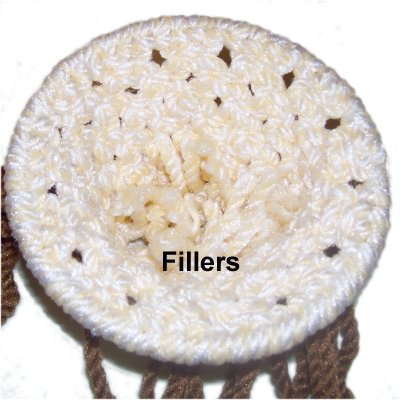
Step
12: Trim the fillers cords
you pushed inside the cup to 1-inch, and
unravel each one to form a soft
nest.
This will not prevent heavy items from
dropping through the ring. Use a
different finishing method if you need a
secure bottom.
Create the Saucer
Step 13: To
create the saucer for the Tea Cup Decoration, you
need to add the remaining Color
B cords to those on the 2-inch ring:
<<<
Fold one new cord in half and secure it
under two cords coming from the ring.
Use the NEW cord to tie a Square
Knot. The cords coming from the ring
are the fillers. >>>
Step 14:
After all the cords are added, tie 4
rows of Alternating Square Knots.
Important:
This is the most challenging step, so tighten each
knot carefully. The knots should remain flat
on your board.
Tightening the knots too much will cause it to
curve upward. Loosen the knots slightly if
that occurs.
Step
15: Attach each cord to the
6-inch ring with Double Half
Hitches. Add extra Half Hitches if
needed, to cover the ring
completely.
When moving right to left, you tie the
knots clockwise. Make them
counter-clockwise if you progress left to
right.
Step
16: Finish off the ends of
the cords by tying Overhand knots with
sets of two cords.
Remember to push the knots so they rest to
the inside
of the ring, not directly on it.
Trim the excess off close to the knot,
then heat and melt the tips, as you did in
step 12.
Create the
Handle
Step 17: Cut
two cords, each 36 inches long (1-yard), to make
the handle for your Tea Cup Decoration.
Prepare the tips with tape.
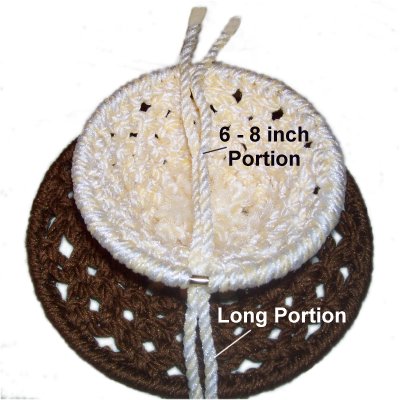
At the top of
the cup, push some knots aside to make
room for the new cords.
Slide them under the ring, arranged so
that 6 - 8 inches is heading away from
you, and the rest dangling down towards
the saucer.
Step
18: Move the short segments
towards you, passing over
the ring.
Use the long segments to tie a Square Knot
around the short segments, which are the
fillers.
After the first knot is tied, pull firmly
on the fillers (short).
Step 18,
continued: Tie several more Square
Knots, until the sennit is 3.5 inches long.
Step
19: Slide all 4 handle
cords through a space at the bottom of the
cup, just above the 2-inch ring.
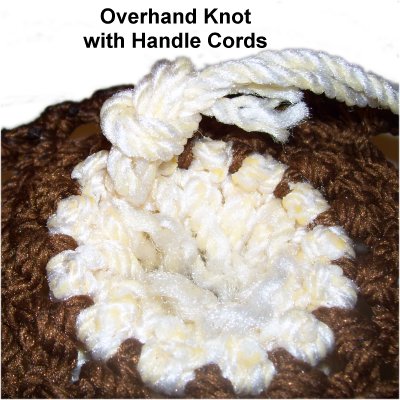
Step
20: Turn the Tea Cup
Decoration upside down and locate the 4
handle cords.
Use all 4 cords together to make one large
Overhand Knot. Trim the tips
close to the knot. Heat and melt the
tips if you wish.
Decorate the inside of the cup with
flowers, potpourri, or similar items.
By
using any text or images on Free Macrame
Patterns, you are agreeing to ourTerms
of Use