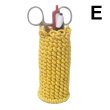
Start by deciding what size Paracord Container
you wish to make. The height is the size
from top to bottom. The circumference is the
size all the way around the container (same
size as the ring).
Use the table below to determine the length and
number of working
cords, along with the total amount for
the project.
Heightof
Container
Length of
Cords
Circumference
Number of
Cords
Total Amount
to Purchase
5 inches
2
yards
2 inches
10 cords
20 yards
6 inches
2.5 yards
3 inches
15 cords
38 yards
7 inches
3 yards
4 inches
20 cords
60 yards
8 inches
3.5 yards
5 inches
25 cords
88 yards
For sizes above or below those listed above, use
this formula:
Height of container (in inches) x 14 = Length of
working cords
Circumference (in inches) x 5 = Number of
cords
Divide by 36 to determine the yards.
Preparation,
continued:
Cut one holding
cord (green in images), 1
yard longer than the working cords.
Parachute cord must be prepared by melting the
tips with a flame (BBQ lighter) prior to
knotting. There is an inner core than can
slip out if you don't do this.
You should also wrap small pieces of masking tape
around the tips, just in case.
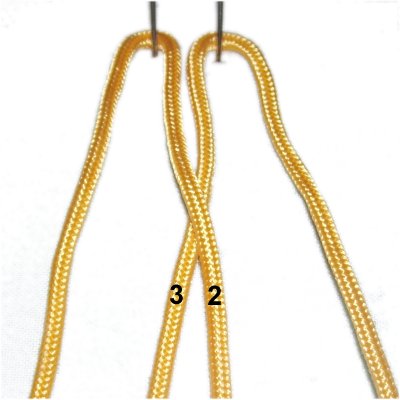
Mounting Process
Step
1: Fold two cords in half
and secure them to your board at the fold.
Mentally number the four segments.
Step
2: Cross cord 2 over
cord 3.
Push the crossed area up closer to the
pins (see next image).
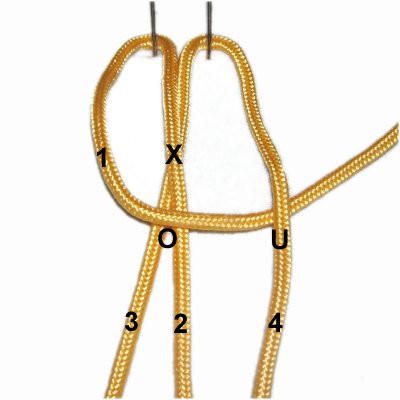
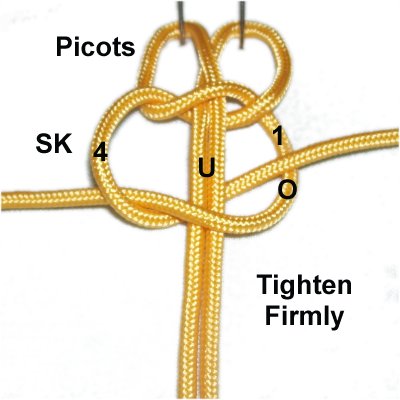
Step 3:
To form the picots at the top of the Paracord
Container, follow the four steps below to make a
Square Knot. The picots are formed by
placing the SK slightly below the folded area of
the cords.
Don't like the
picots? Use a different
mounting technique, beginning in step
4.
Important:Make sure you tie the Square knot below the
crossed area of cords 2 and 3, which is indicated
by the X
in these images.
<<
Move cord
1 to the right, over
cords 3 and 2, and under
cord 4.
Move cord
4under
cords 2 - 3, and over
cord 1 on the left. >>
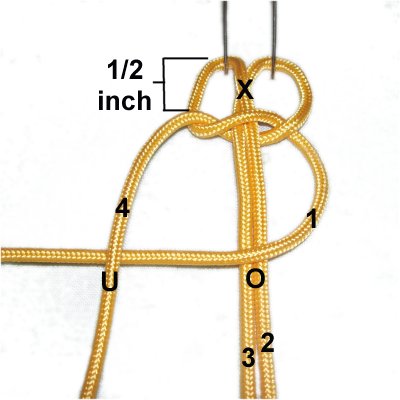
Tighten this portion of the SK so it rests
1/2-inch below the fold.
<<
Move cord
1 to the left, over
cords 2 - 3 and under
cord 4.
Move cord
4under
cords 2 - 3 and over
cord 1 on the right. >>
Tighten both halves firmly,
keeping the picots 1/2 inch in size.
Step
4: Arrange the holding
cord on your board
horizontally.
Measure at least 6 inches from one end,
and place a pin at that point. That
segment is called the "tail".
You will start attaching the working cords
at the pin, moving right.
The Clove Hitch is used to mount the SK Picot
designs onto the holding cord. It's made in
two steps, which are shown below.
Should you decide to use a different mounting
technique, go to step
7.
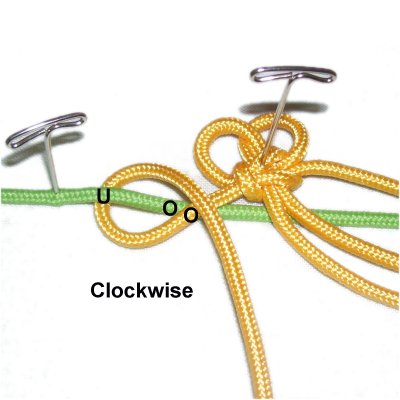
Step 5:
Start by securing one SK picot design just above
the holding cord.
Use the segment furthest to the left to
make a clockwise
loop, passing over
- under the holding cord.
It should pass over
the working cord as you bring it to the
right for the next step.
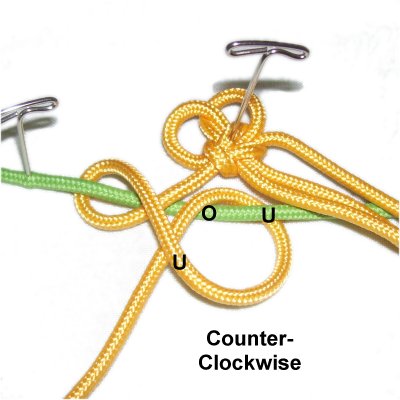
Make the next
loop to the right of the first, rotating
in a counter-clockwise
direction.
Pass under
- over the holding cord. As
you pull the end down, pass under
the working cord.
Tighten both loops as
much as possible, to eliminate
any gaps between the SK and the Clove
Hitch.
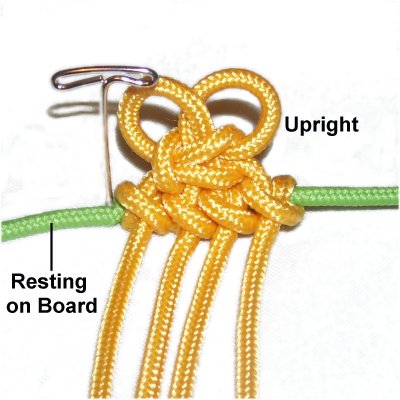
Step
6: Slide the first Clove Hitch
next to the pin.
Tie a Clove Hitch with the remaining 4
segments of the SK design.
When you are finished, arrange the SK
picot design upright.
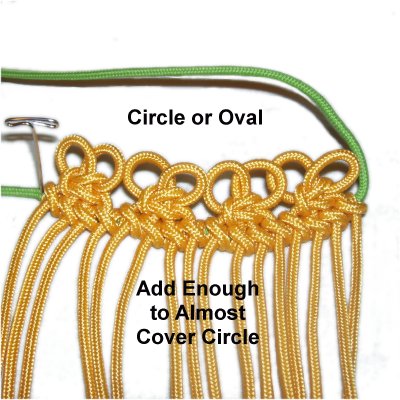
Step
7:Repeat
step 5 with most of the remaining
working cords. Form a circle or
oval, and add more to the holding
cord.
Save one SK design (or one cord) for the
next step.
Step 7,
continued: Arrange the mounted
cords so the first and last knots are
touching. Then measure to determine if it is
close to the size you are aiming for.
Add or subtract cords to get it to the right size.
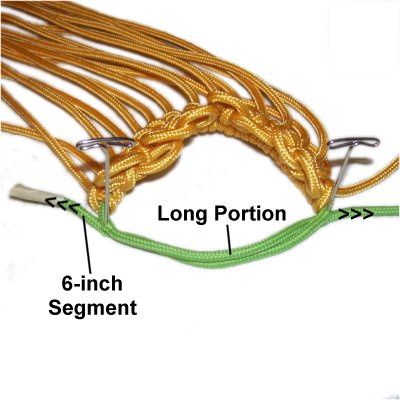
Step
8: Arrange the holding cord
so the long portion and the 6-inch tail
are close to each other, heading in
opposite directions.
(<<< see arrows >>>).
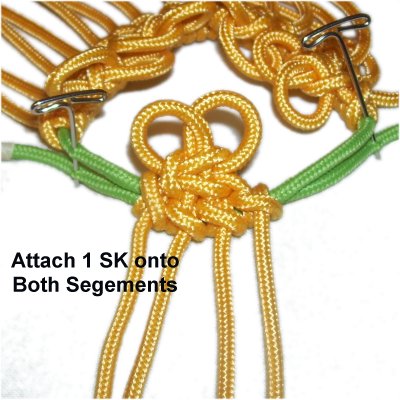
Step
9: Attach the last SK
design (or last cord) onto BOTH segments
of the holding cord, with the same
technique used for the others.
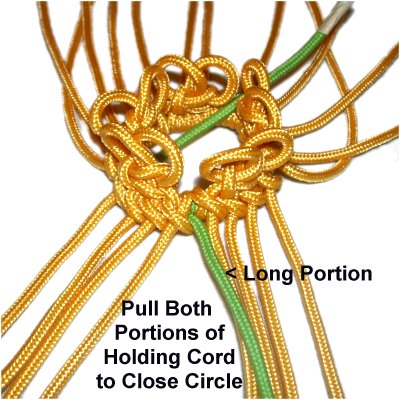
Step
10: Pull both portions of the
holding cord to close the circle.
Measure to make sure the top of the
Paracord Container is the size you want,
and make adjustments if needed.
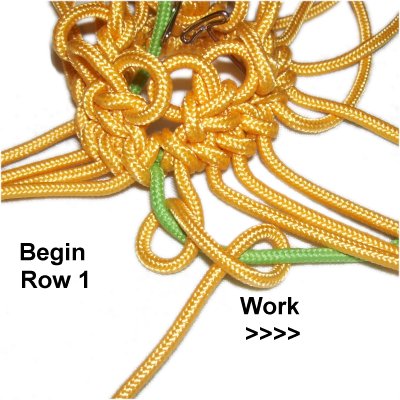
Body of Container
Step
11: You will now create
rows of Clove Hitches to make the rest of
the Paracord Container.
The long portion of the holding cord moves
all the way around from left to right, and
you attach each working cord to it.
(more details below)
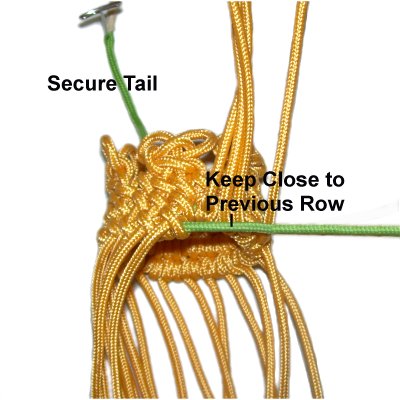
Step 11,
continued: A great way to secure
the Paracord Container is to push a pin through
the short tail, and then into your board (see next
image).
You can then move the container around as needed
while tying the knots.
In the image
above, the holding cord was moved down a
bit, so you could see the details.
It should be kept horizontal, close to the
previous row of knots.
Make sure the holding cord is always under
the working cords. Tighten each
Clove Hitch as much as you can, to
eliminate gaps between the knots.
Step 11,
continued: Tie several rows of
Clove Hitches, measuring as you progress.
Stop when the Paracord Container is the height you
want. Keep in mind that you will be
attaching a ring at the bottom, which will add to
the height.
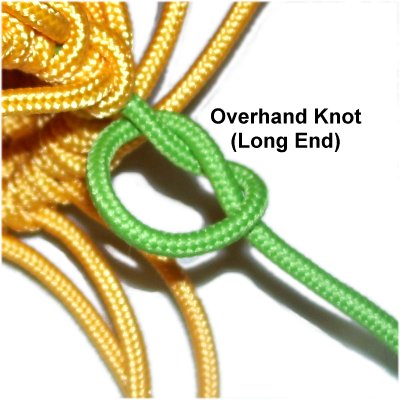
Step
12: Finish off the long
portion of the holding cord by tying an
Overhand knot.
It should rest close to the last Clove
Hitch tied.
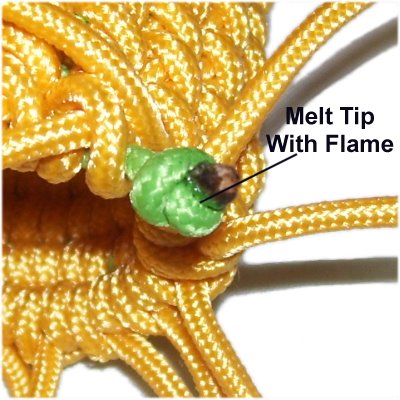
Cut
off the excess material (holding cord)
beyond the knot.
Apply a flame to the tip of the cord so
the material melts.
Push the
Overhand knot inside the container, prior
to adding the ring.
Bottom of Container
Notice how the
last two rows of the Paracord Container are uneven?
Don't panic, this is why you attach the ring to
the bottom - to make it more level.
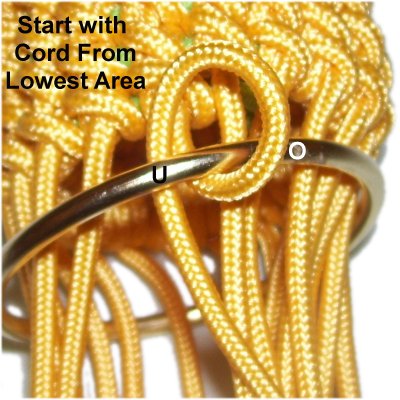
Step
13: Pass all the working
cords through the ring.
Locate the most uneven area, which is
between the last row of knots (bottom) and
the row above it.
You will start with the last working cord
you attached to the holding cord, which is
in the bottom row.
The cords are
attached with a regular Double Half Hitch,
as follows:
Move the cord you selected over
- under the ring. The end
should rest to the left (counter-clockwise).
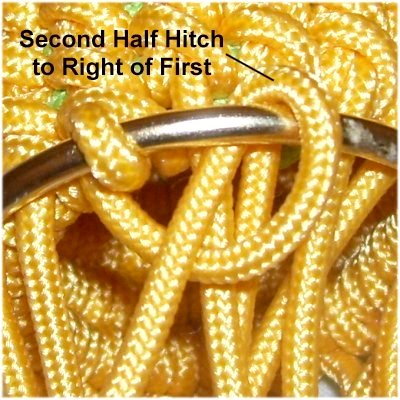
Tie the next
loop to the right of the first, rotating counter-clockwise:
Pass over
- under the ring, and over
the cord as you pull it down.
Tighten both halves firmly, so the ring
touches the Clove Hitches in the bottom
row.
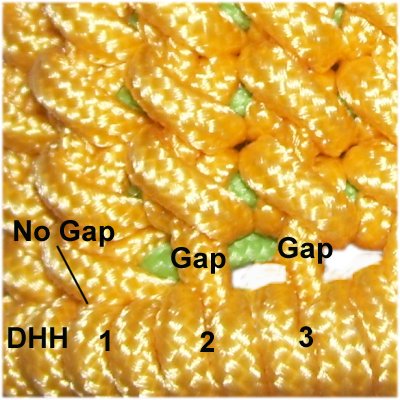
Step
14: The second cord you attach is
not from the bottom row, but is from the
row above it.
Keep the ring level as you tighten the
knot, allowing a small gap between the
ring and the Clove Hitch.
For the first knot, there was no
gap. There will be a gap for the
third knot, and possibly the 4th.
Finishing Touches
Step
15: After all the cords are
attached to the ring, trim them to 1.5
inches.
Melt the tips with a flame and push them
inside the Paracord Container.
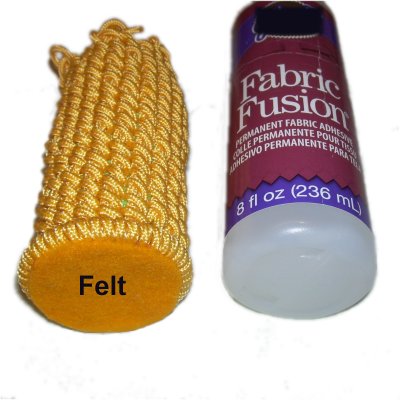
Step
16: Apply a piece of felt,
cardboard, or other material to close the
bottom.
Make sure you use FABRIC glue, or
something that holds really well.
By
using any text or images on Free Macrame
Patterns, you are agreeing to ourTerms
of Use