Free-Macrame-Patterns.com Logo
Free Macrame' Patterns Home Page
Macrame' Essentials
Learn Macrame' Knots
Micro-Macrame': Jewelry
Free Macrame' Patterns
Macrame' for Kids
Advanced Macrame'
Macrame' Dictionary
Contact Free-Macrame-Patterns.com
Etsy Shop
 
Free-Macrame-Patterns.com Left Side Background Image
 
Custom Search

Macrame Vase0

 
Macrame Vase

Description: This Macrame Vase is a great way to introduce older children and teens to this craft.  It is meant to hang on a wall to decorate your kitchen.

You can also use this handcrafted vase the bathroom, to hold combs and brushes.

Simply add a few silk flowers, and this Macrame decoration is ready for when you need an attractive container.

Novelty Buttons or beads are appealing on this basic design.


Supplies Needed:

  • 2mm Braided Macrame Cord, or similar material (39 yards total)
  • 1 plastic or metal ring, 3 inches in diameter
  • Beads and/or Novelty buttons


Knots Used:


Preparation

 
Step 1: Cut 20 cords, each 70 inches long.

You can make the vase wider by using a larger ring. You will need to cut additional cords.

Step 2: Mount the cords onto the ring with Lark’s Head knots.


Main Area


Step 3: Tie 7 rows of Alternating Square Knots, moving in a circle all the way around the ring.

Tie all the knots with four cords (2 working cords, and 2 fillers). Make sure all the rows are directly under one another.


Alternating: Mark the cord you start with for the first row (#1).  For the next row, the first knot is tied with cords 3 - 7.   From there you just select groups of 4 cords as you progress.

You could also mentally number two knots (1 - 4 for each one).  The second row is tied with cords 3 - 4 from one knot and 1 - 2 from the next knot.


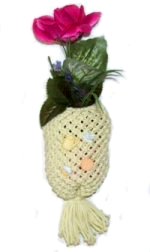
Step 4: After 7 rows, you can add buttons or beads to the front portion of the vase.

To do this, slide 1 or 2 cords through the shank of the button. Slide it up to the row you just completed, and tie the next row of ASK.


Step 5: When you’ve tied 7 more rows, add more beads/buttons, and continue on.

Stop when you feel the vase is deep enough for what you plan to use it for.


Finishing Touches

 
Step 6: Gather all the ends together, and make the Linen Stitch.

You do this by selecting one cord to wrap around the entire bundle, at least 5 times.  Finish with a Half Hitch. 

Trim the ends so they are even, and add beads if you wish.

Tie an Overhand Knot at the tip of each cord. Apply glue to the knots, and allow it to dry, before hanging your Macrame Vase on a wall.


By using any text or images on Free Macrame Patterns, you are agreeing to our Terms of Use


Have Comments about the Macrame Vase?  Contact Me.


Macrame Cord Divider


Free-Macrame-Patterns.com Footer