Description:
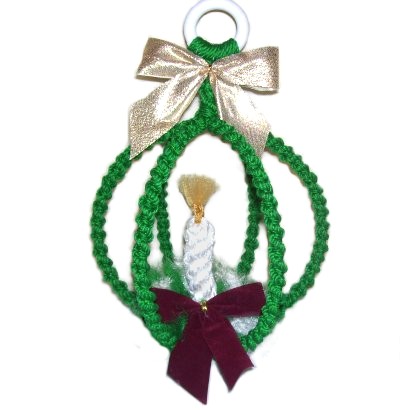
The Holiday Lantern is a Macrame
decoration that features a round frame
covered with a spiral design.
Inside the ball is a white candle with a
flame, much like vintage lanterns.
The brushed fringe at the bottom resembles
a wreath.
This Macrame project is rated Easy, which
is suitable for beginners.
The frame is made by connecting three brass
rings, or you can use a ball frame designed for a
project like this. Most ball frames are
between 5 to 8 inches in size.
For frames/rings larger than 8 inches, be sure to
use 6 mm
material and make the candle longer.
The chart in Preparation
will help you determine the length to cut the
cords for different sizes, and the total you need
to purchase.
This Macrame project is rated easy, suitable for
beginners.
Supplies
Needed:
4 mm cord material (for 5-inch to 8-inch
ball frame) --
see Preparation
6 mm white material for candle (3 yards)
2 mm or 4 mm gold material for flame (24
inches)
One 2-inch ring
Three metal rings or one ball frame (5-inch
to 8-inch) --
see Preparation
Candle:
Cut 2 pieces of 6 mm white
material, each 60 inches long.
Flame:
Cut two pieces of gold
material, each 12 inches long.
Use this chart to determine the cord
lengths you need to cover the frame for
your Holiday Lantern:
(These measurements apply to rings or ball
frames)
Ring
Size
Length
of each Cord
Total
to Purchase
5 inch
6
cords -- 3.5 yards long
22 yards
6 inch
6 cords -- 4 yards long
25 yards
7 inch
6 cords -- 4.5 yards long
28 yards
8 inch
6 cords -- 5 yards long
31 yards
Over 8
inches
see below
see below
For a large Holiday Lantern using rings over
8 inches, here is the math for the cord
lengths:
Diameter of Ring x 3
Multiply by 8
Divide by 36 (for yards) Cut 6 cords, each
the length you came up with.
You should use 6 mm material
for frames over 8 inches.
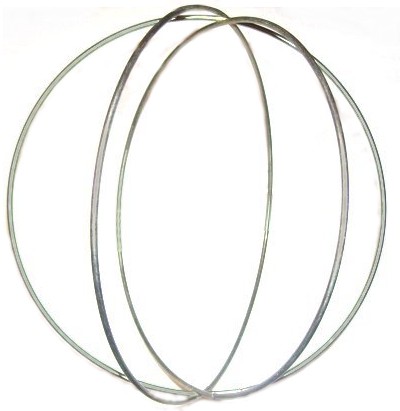
To make the frame with rings, arrange
three of them inside one another so
there are 6 sections.
You may need to bendthe rings slightly.
Secure the top and bottom with tape or
a piece of wire.
The Candle
The candle for the
Holiday Lantern is made with a Crown Knot sennit.
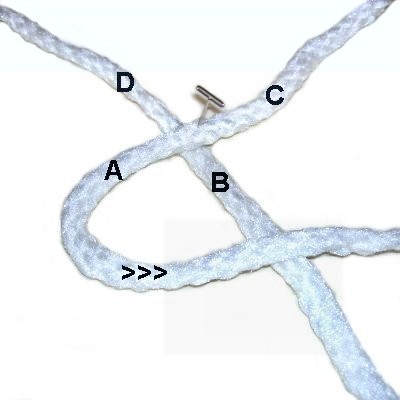
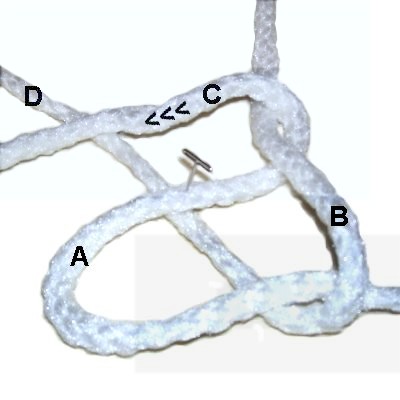
Step 1:
Place the 2 white cords on your project board so
they form an X shape. Match the centers and
secure them.
Mentally label the four segments A - D as shown in
the images below.
Move segment
A to the right, placing it on top
of segment
B.
Make sure it curves as shown.
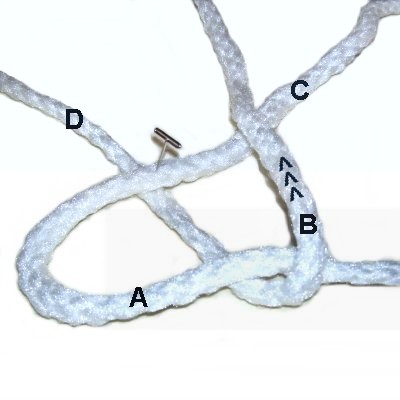
Move segment
Bbackward,
placing it on top of segment
C.
Move segment
C to the left, placing it on top
of
segment D.
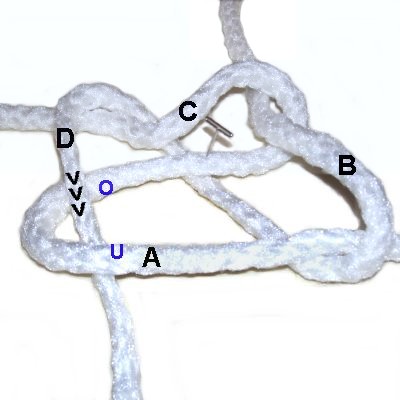
Move segment
Bforward,
heading toward the curved area of
segment A. Pass it over
- under segment A.
Tighten
the first Crown knot by pulling on all
four segments gradually. Tighten
firmly so it's as small as possible.
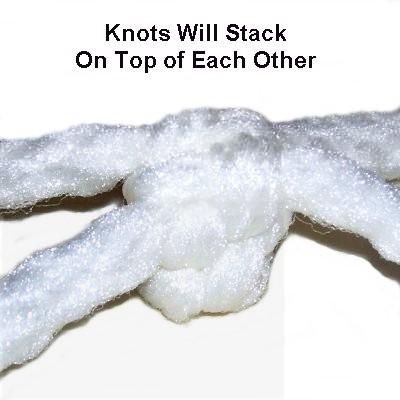
Step
2: Remove the pin
from the center and place it on the outside
of the first knot.
Repeat
step 1 several times to make more
Crown knots. The knots will stack on top
of each other as you progress.
Step 2,
continued: Stop when the candle for
the Holiday Lantern is 5
inches tall.
For ball frames over
8 inches, make the candle 6
inchestall.
Designer's Tip:
Eventually you will need to lay the candle on your
work surface.
Secure it to your board on its side, then curve
the area where you are working upward
so you have easy access to the last knot tied.
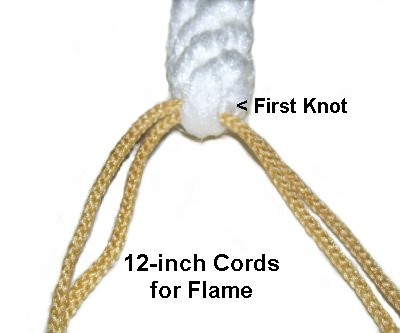
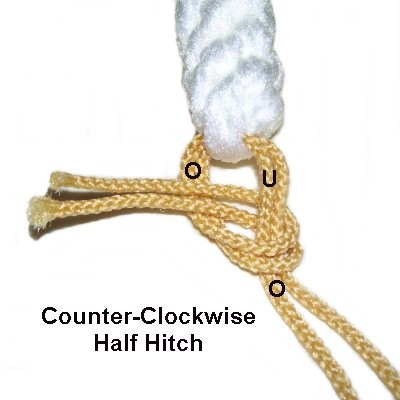
Step
3: Pass the two 12-inch
gold cords through the crossed area at the
top of the candle. Match
the ends so both halves are the same
size.
The two cords will act together to make
the following knots.
Tie a counter-clockwise Half
Hitch with the left
half of the two cords, passing
them around the right half.
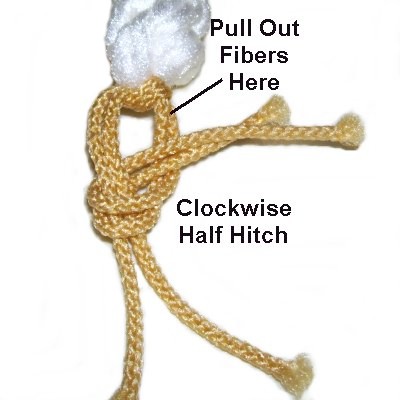
Tie a clockwise
Half Hitch with the right
half of the two cords, passing
them around the left half.
This image shows the area where you pull
out the fibers in the next step.
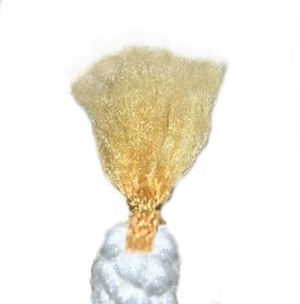
Step
4: Unravel and brush the
fibers to form the flame.
The best way to do this when using braided
material is to pull out individual fibers
close to where the knots are tied (shown
in previous image).
That loosens the braid and makes the rest
come apart more easily.
The Top
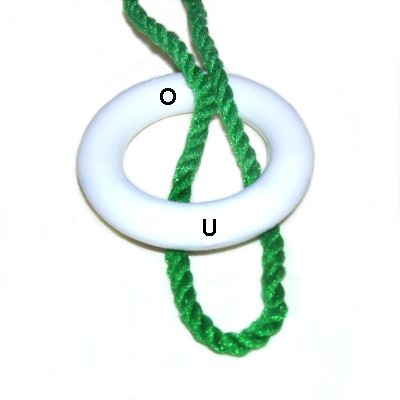
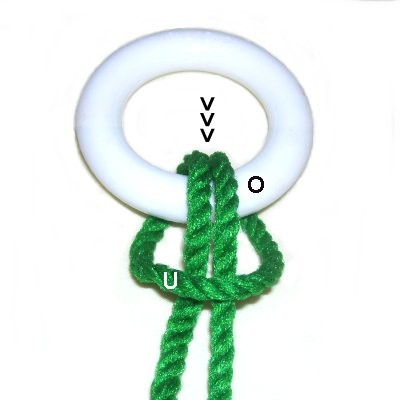
Step
5: Fold one of the cords for the
ball frame in half.
Place it through the 2-inch ring so it's under
the portion in front and over
in the back.
Move both
halves forward,
passing over
the ring and under
the folded area of the cord.
Pull both halves firmly
to tighten the knot.
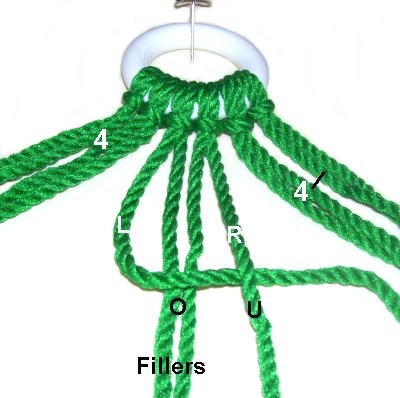
Step 6: Repeat step 5,
attaching the remaining 5 cords you will use to
cover the ball frame.
The top area for the Holiday Lantern is made with
the Spiral Stitch, which will match the knots on
the ball frame.
The term "Half Knot" is used in the instructions
below, which is the same as the first half of a
Square knot.
Step
7: Divide the cords into 3
groups of four.
The Half Knot is tied withtwo working cords and two fillers.
Move the left
working cord to the right, passing over
the fillers and under
the right working cord.
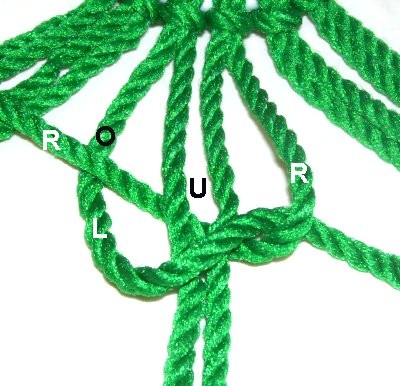
Step 8:
To complete the Half Knot, move the
right
working cord to the left.
Pass itunder
the fillers and over
the left working cord.
Steps
7 and 8 = one Half Knot
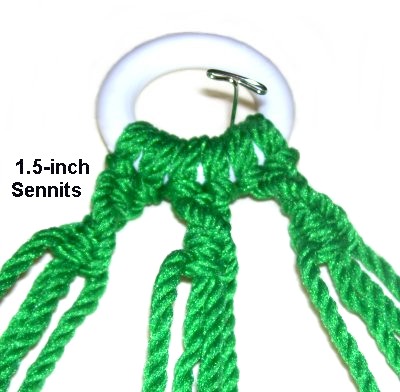
Step 9:
Repeat steps 7 and 8 until the sennit is
1.5 inches long.
Designer's Tip: When you get to the 4th
knot, the spiral will become more visible. With
some material, you may need to rotate
the sennit to create the spiral.
The best way to do so is to hold the fillers
steady and twist the knots so the two working
cords switch
places.
Step
10: Repeat
steps 7 - 9 using the
other two groups of cords, for a total of
3 Spiral Stitch designs.
You can add an extra knot in the first and
third design so the bottoms all line up
evenly.
Step
11: The next portion at
the top of the Holiday Lantern is a large
spiral. This brings all the cords
together.
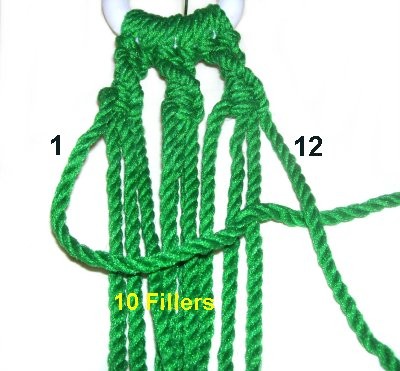
Mentally number the cords 1 - 12.
The working cords are 1 and 12. Tie
a 1.5
inch Spiral Stitch with the
working cords, passing around all the
others (fillers).
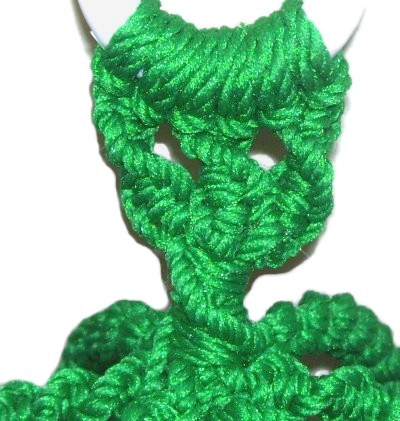
Step 11,
continued: This new spiral is very
thick, so you will need to help it along by
holding the fillers and twisting the knots so the
two working cords switch places.
You will probably be able to twist it only 1 time.
Should you
make changes to the top area of the
Holiday Lantern, I recommend you bring the
cords together in a bundle
like this, using one or more knots.
When you attach the cords to the ball
frame the top area will be more stable.
Covering the Ball Frame
The next step for your Holiday Lantern is to
cover the ball frame.
To keep the spirals the same size, tie a set of 5
knots then twist the knotsso the working cords
switch places.
Also, push the knots close together as you
progress.
Step
12: Choose two cords from
the bundle and arrange them on either side
of a metal segment on the frame.
Tie one Half Knot, just as you did in steps
7 and 8. The
metal is the filler.
Tighten the knot firmly, and push it close
to the top of the frame.
Step 13:
Go to the metal segment directly opposite,
which should be the same
ring. Repeat
step 12 with another pair of cords.
Repeat this process with the rest of the cords,
attaching two cords to each metal segment.
This will anchor the top portion of the Holiday
Lantern to the ball frame.
Step 14:
Continue using the Spiral Stitch to completely
cover the six segments of the frame. Push
the knots close together as you progress.
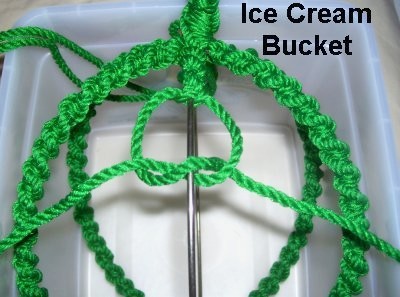
Have
you been wondering what the ice cream
bucket is for?
You use it to hold the ball frame as you
cover it with knots.
It works a lot better than holding the
frame between your knees, so give it a
try!
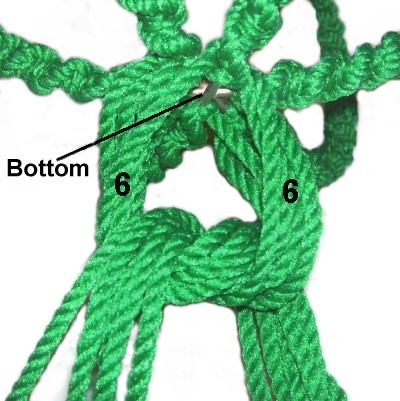
Step
15: At the bottom
of the Holiday Lantern, divide the cords
into two groups of six.
Tie an Overhand knot using both groups
working together. Tighten it as much
as possible.
You can add some glue to the frame, so the
cords sit on top of it.
Step 16:
Unravel and brush each
cord individually after trimming to
2-inches. Keep all the cords outside the
frame while brushing.
When using braided cord, remove one of the fibers
to loosen the others. Do this close to the
frame rather than at the tip of the cord.
Repeat a few more times, until the cord is
completely unraveled.
Repeat this step with the cords at the bottom of
the candle.
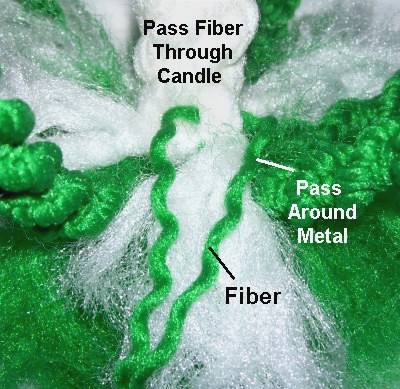
Use one FIBER
from a piece of scrap cord, and pass it through
the candle near the bottom.
Pass one half around the metal and then
tie 2 tight
Overhand knots. This will
secure the candle to the bottom of the
Holiday Lantern.
Do this in three more areas to secure the
candle.
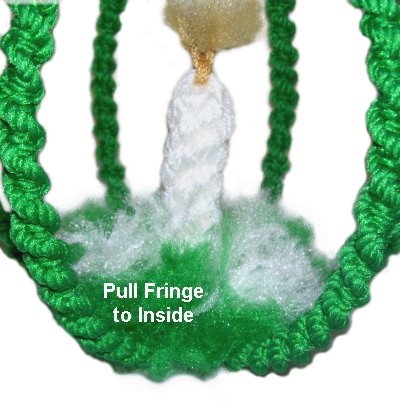
After the
cords are brushed and fluffed, trim them
to neaten the edges.
Pull the fringe inside
the frame so it surrounds the candle.
Add ribbons or other decorations to
complete the Holiday Lantern.
By
using any text or images on Free Macrame
Patterns, you are agreeing to ourTerms
of Use