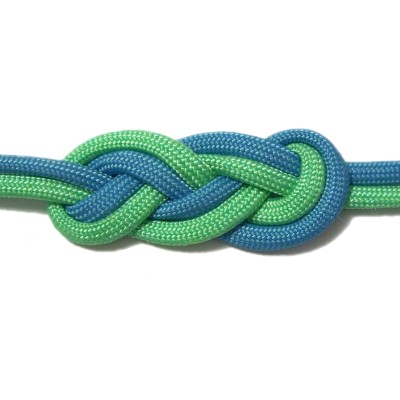
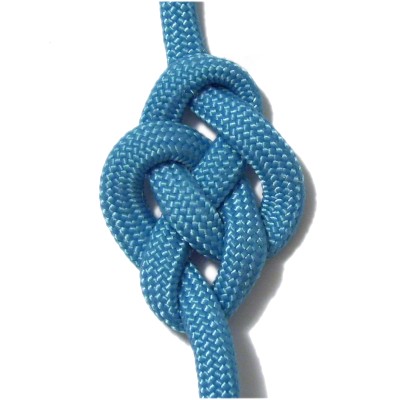
Description: Figure Eight
Knots can be tied singly or in sennits
(chains). The designs on this page are
tied as single
knots.
These knots are sometimes used to decorate or
finish the cords in Macrame projects. They
can be doubled if you want to use them as focal
knots in something like a bracelet or
belt. The third and fourth designs on this
page can be made with rope to create small rugs.
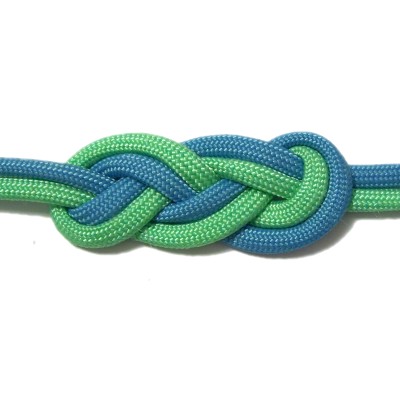
The 8 shape is a historical Celtic symbol that
represents the concepts of eternity, unity and
love. The cord twists and curves in such a way
the eyes are deceived, so it appears endless.
The Figure
EightMedallion
and the EndlessFigure Eight
are not official knots. They are
variations of the basic knot.
Four types of knots are described on this page:
Basic Figure Eight
Extended Figure Eight
Figure Eight Medallion
Endless Figure Eight
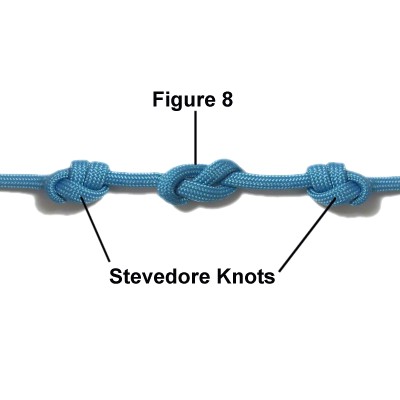
Figure Eight
Knots can be used to make interesting
sennits.
The Figure
8 Stopper is also related
to the Figure Eight Knots on this page.
Click on the link or image to see the
instructions.
Basic Figure Eight
This basic Figure 8 Knot can be used as a
finishing knot. You can tie it near the
ends of cords to prevent unraveling. You
can also use it to decorate a cord. Both
options are great for fringe designs.
It does have a tendency to loosen, so glue can
be applied or other knots can be tied to secure
it.
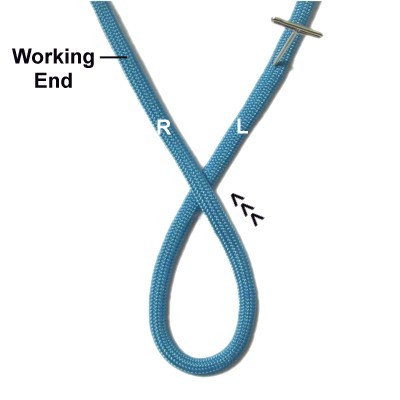
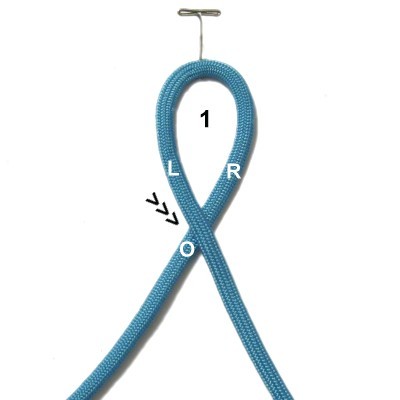
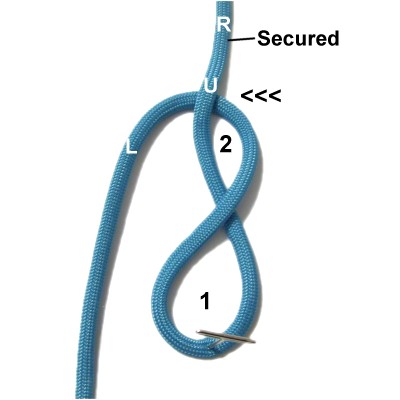
Step
1: Make a loop at the
center of an 18-inch cord, crossing right
over left. Arrange it on
your board with the crook of the loop
closest to you.
Secure the left
half of the cord. The right half
will be the working end.
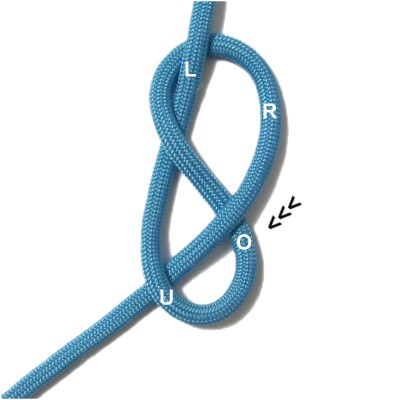
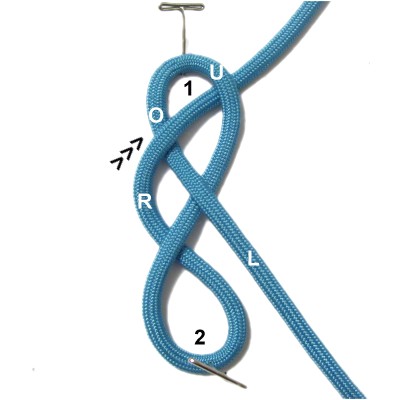
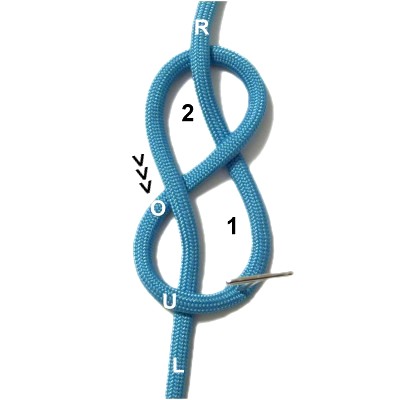
Step
2: Rotate the right half of
the cordclockwise,
passing it under
the left half (left to right).
This is the start of the second loop.
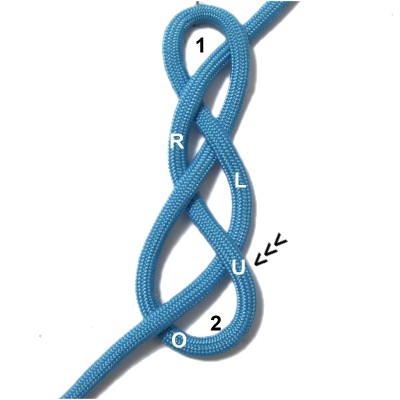
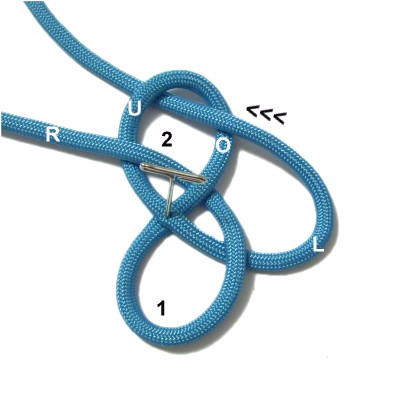
Step
3: Pass the right
half of the cord through the
first loop over
- under.
Tighten the
Figure 8 Knot by pulling on both halves of
the cord.
Figure Eight Knots usually look better if
they are slightly loose, but that depends
on how they are used.
Below are three options for securing the
knot.
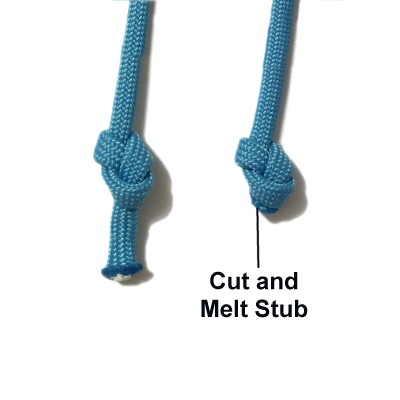
When you are
tying this knot near the end of a cord to
finish it off, make sure it is very tight
and apply glue.
Cut off the excess material. Melt
the stub if you are using synthetic cord
material (like nylon).
Slippery
materials like satin or parachute cord may
require you to tie other knots on either
side to secure the Figure 8 Knot.
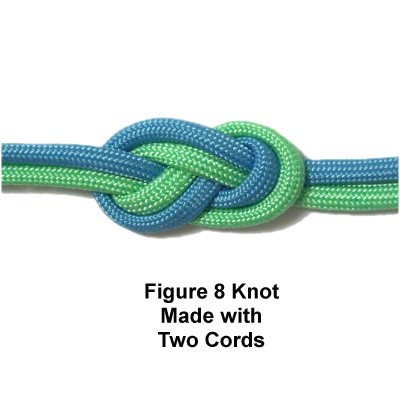
Another option
is to double the knot by adding another
cord. This makes it thicker and less
likely to come untied.
All the Figure Eight Patterns on this page
can be doubled.
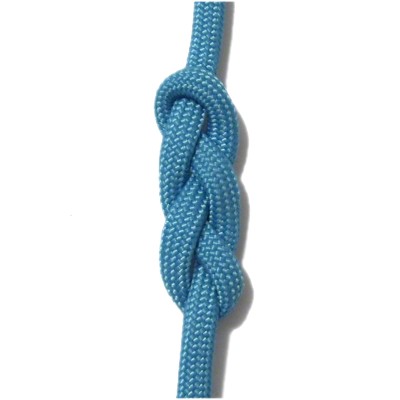
Extended Figure Eight
<
One cord(vertical)
Two
cords (horizontal) >
The Extended Figure Eight is made a little
different than the other Figure Eight Knots on
this page. The two loops are separate from
one another.
You can use it in any project where a regular
Figure 8 knot will work, including earring designs
or as a focal knot.
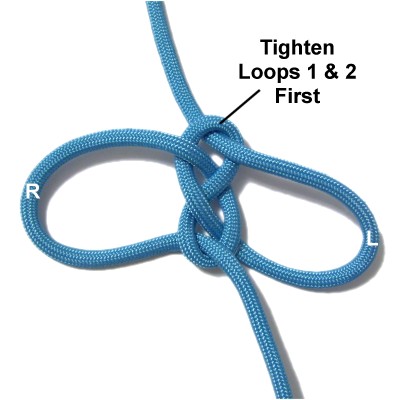
Step
1: Make loop
1 in the center of an 18-inch
cord, crossing left
over right.
Step
2: Use the right
half of the cord to make a counter-clockwise
loop, placing it in front of loop 1.
Pass it under
the diagonal segment to make the crossing
point.
Step
3: Pass the right
half of the cord throughloop 1over
- under, heading left to right.
Step
4: Pass the left
half of the cord through loop
2under
- over, heading right to left.
Balance the knot so loops 1 and 2 are the
same size.
Step
5: You can now double the
knot with another cord, if you plan to do
so (optional).
Tighten it more as needed.
Figure Eight Medallion
<
One cord (vertical)
Two
Cords (horizontal) >
Description:
The Figure Eight Medallion is a variation of the
Figure 8 Tuck, which is used in climbing. It
resembles other Celtic Knots with it's twists and
turns.
The cord exits the knot in opposite directions, so
it can be used as a focal knot for a necklace or
bracelet.
Step
1: Make the first loop at
the center of the cord, crossing left
over right.
Secure the right
half vertically, and use the left
half as the working end.
Step
2: Rotate the left
halfcounter-clockwise
to form loop 2, passing it under
the right half.
Step
3: Complete the Figure 8
Knot by passing the left half of the cord
through loop
1over
- under.
Step
4: Curve the left
halfcounter-clockwise
as you bring it backward toward loop 2.
Pass it through loop 2 over
- under.
Step
5: Curve the right
halfclockwise
as you bring it forward toward loop 1.
Pass it through loop 1 under
- over.
Step
6: Tighten loops
1 and 2 by pulling on the curved
segments to the right and left of the
figure 8.
Then tighten the rest. Leave it
slightly loose so it will be oval in
shape.
Skip this step if you plan to double the
knot (go to next step).
Since Figure
Eight Knots can be doubled, you should do
that before
tightening (optional).
Keep both cords as flat as possible if you
plan to use it as a focal knot.
Rotate the cords to eliminate any unwanted
twist or kinks, then tighten.
Endless Figure Eight
The Endless Figure Eight is my own design, so
it's not an official knot. It started out as
a Figure Eight Medallion (previous design), then I
added some weaving.
Unlike most Figure Eight Knots, you can finish off
the ends in the back of the piece. I suggest
you make it with two cords as shown in the
instructions, so you can finish off the
ends.
You can use this design as a pendant, a coaster,
or even a holiday ornament.
Step
1: You need two cords, at
least 36 inches long.
Create a Figure
Eight Medallion using the
previous instructions (steps 1 - 5).
You should construct it with both cords
rather than one at a time.
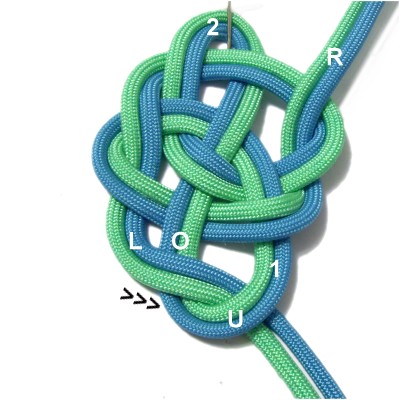
Mentally label the two loops and the left
and right segments between them.
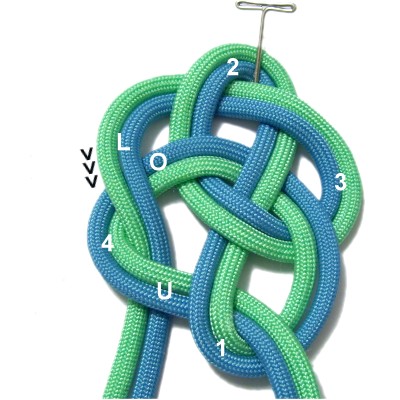
Step
2: Curve the left
half of the cord left and forward
(toward the front of the board).
Pass it through area
4over
- under.
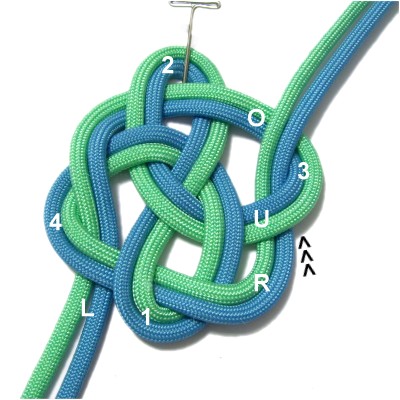
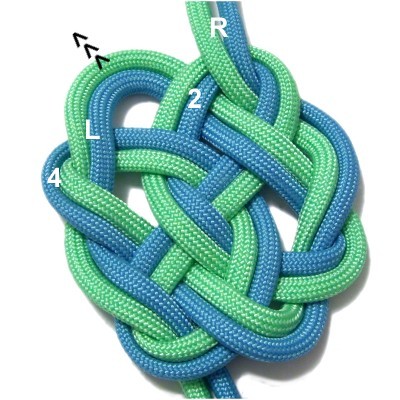
Step
3: Move the right
half of the cord to the right and
backward (toward the back of the board).
Pass it through area
3under
- over.
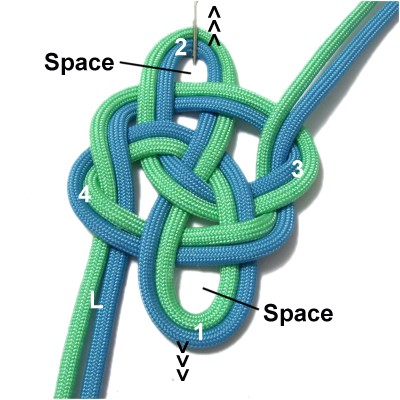
Step
4: Stretch loops
1 and 2 in opposite directions,
so you make some space inside the loops.
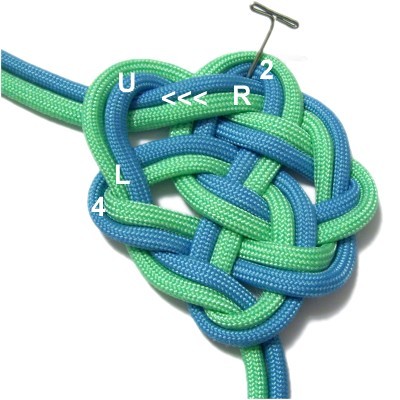
Whenever you make Figure Eight Knots with
more than one cord, they can get twisted
or kinked. So check every area and
fix the cords as needed.
Heading left
to right, pass the left
half of the cord through loop
1over
- under.
Step
5: Heading right to left,
pass the right
half of the cord through
loop 2under
- over.
The knot is finished, but if you want to
finish off both ends in the BACK, complete
step
6 before tightening.
Step
6: Find the segment resting
between loop
2 and area
4, on the left side of the
knot. It leads to the left end of
the cord.
Pull it to make some space for the next
step.
Pass the right half
of the cord through the segment you
pulled, passing under
it as you move it left.
This will allow you to move the right half
to the back
of the knot so you can finish it off.
Tighten and
balance the knot so you can clearly see
the figure 8 shape in the center.
Figure Eight Knots are usually a little
loose, but this one can be tightened
completely.
Finish off the ends in the manner most
appropriate for the material you are using
(optional).
By
using any text or images on Free Macrame
Patterns, you are agreeing to ourTerms
of Use