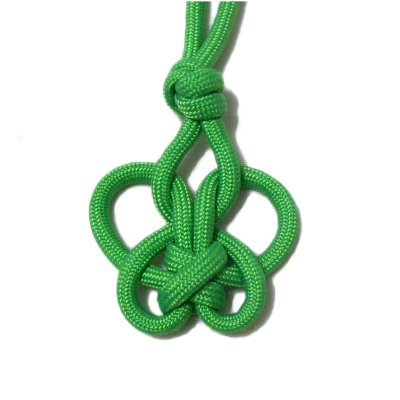
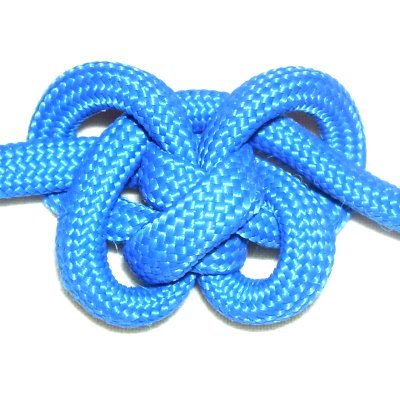
Description:
The Figure Eight Stopper is a slightly
altered variation of the E-Star
Stopper Knot, which is used in boating,
climbing and other activities that require the use
of ropes.
This Butterfly
Pendant is just one example of how this
knot can be used in Macrame.
Any time you need an attractive knot as a
focal point, this interesting knot is a
good choice.
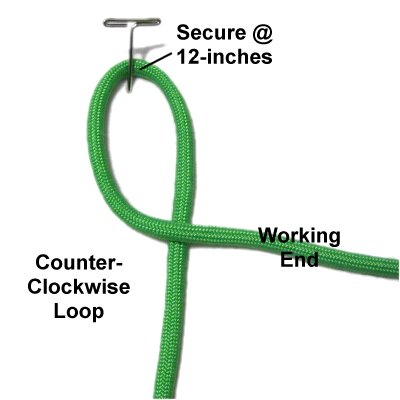
Preparation
When practicing, the cord needs to be 36 inches
long, so the knot will end up in the center of
it. I recommend you use 4mm size material.
When using this knot in a Macrame project, fold
the cord so the left portion (working end) is 12
inches longer than the right portion. Then secure
it at the fold and make the first loop.
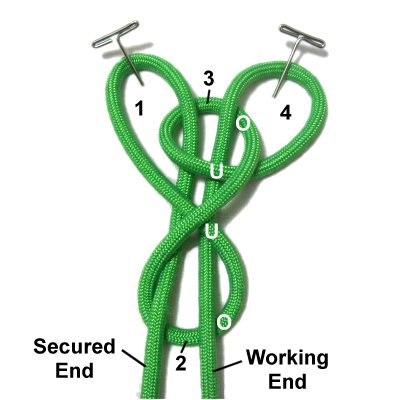
Step
1: Secure the cord
to your board 12 inches from one
end.
Make a counter-clockwise
loop with the remainder of the cord, which
is the working end.
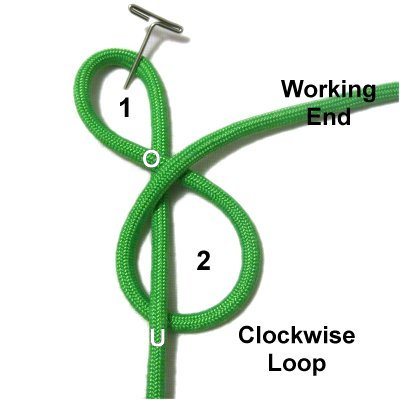
Step
2: To make Loop 2, move
the working end to the left, passing under
the secured end.
Rotating clockwise,
bring it back to the right, passing over
the crossing point of Loop 1.
Designer's
Tip: Loops 2 and 3 are considered
the Figure 8 knot, which is in the center of the
design. That's the crossed area you see when
the knot is tight.
Loops 1 and 4 can be adjusted to be any size you
want.
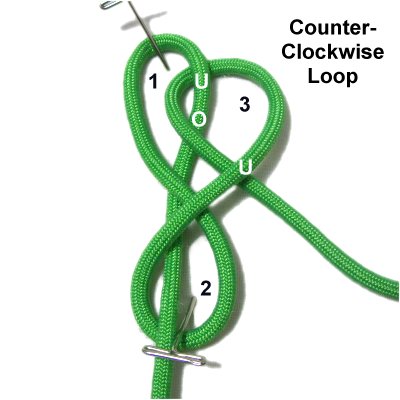
Step
3: Move the working end counter-clockwise,
passing under
- over the right side of Loop 1.
Complete Loop 3 by passing the working end
under
to form the crossing point.
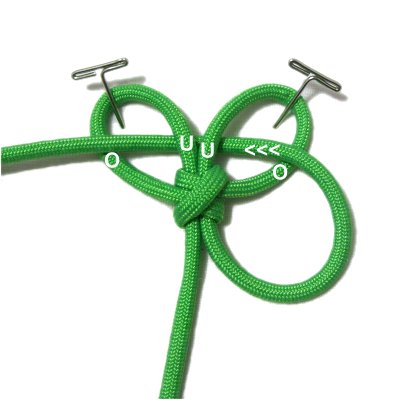
Step
4: To make Loop 4, rotate
the working end counter-clockwise.
Pass it through Loop 3 over
- under, arranged
vertically. Make sure it's to the
right of the secured end.
Then pass it through Loop 2 under
- over.
Designer's
Tip: The working end in step 4
follows the same path as the secured end.
So if the over - under pattern is confusing, just
compare the two ends.
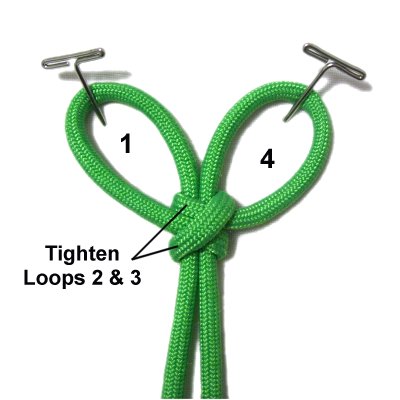
Step
5: Tighten Loops 2 and
3 until the center area
of the Figure Eight Stopper is firm.
You will need to pull on Loops
1 and 4, so they will get very
large. Reduce the size by pulling on
both ends of the cord. Leave enough
room for the next step.
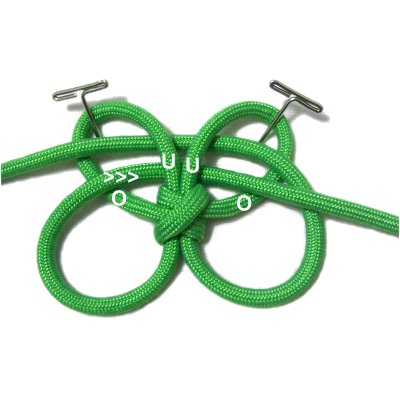
Step
6: Bring the working end
through Loop 4 horizontally, moving
from right to left (over
- under).
Pass it through Loop 1 (under
- over).
Step
7: Bring the secured end
through Loop 1 horizontally, moving left
to right (over
- under).
Pass it through Loop 4 (under
- over) between the working end
and the tightened portion.
You
can tighten the knot firmly
or loosely, depending on how you
are using it in your Macrame design.
Firmly
Tightened
Loosely
Tightened
By
using any text or images on Free Macrame
Patterns, you are agreeing to ourTerms
of Use