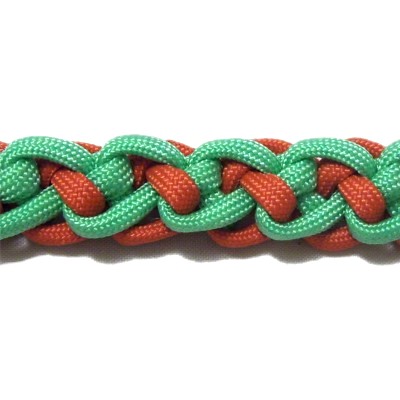
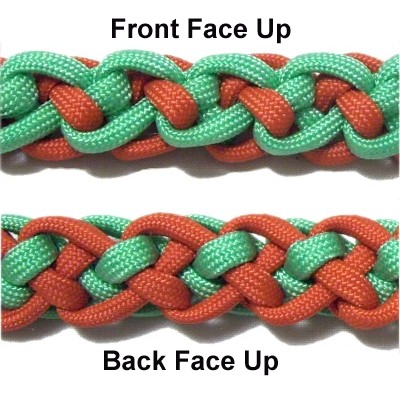
Description: The Double Zipper
is a variation of the Zipper Sennit.
It's made with two contrasting
colors.
In the front, the dark color will be under the
light color, which gives you the most contrast
(image above). In the back, the colors are
switched, so the light color will be under the
dark color (see image for step 7).
Since the sennit is reversible, you will need
to choose which side you prefer before the final
steps.
This decorative knot makes a great Paracord
bracelet. For that reason, the instructions
include a loop for a clasp (optional).
You can also use it to make key chains, belts,
and other Macrame projects where you need a flat
band of knots.
This design was found on the Fusion
Knots website, under
the name Back to Back Zipper
Bar.
Click on the link or image to visit the
website.
The video
gallery contains tutorials for
this pattern and other interesting
knotting techniques and designs.
Preparation:
You need two 60-inch cords to practice the Double
Zipper (two colors).
The cords should be at least 7
x the finished length you plan to make,
when using this technique for Macrame project.
Please read the bottom section of Cord
Preparation if you plan to use
Parachute Cord, as in the example shown.
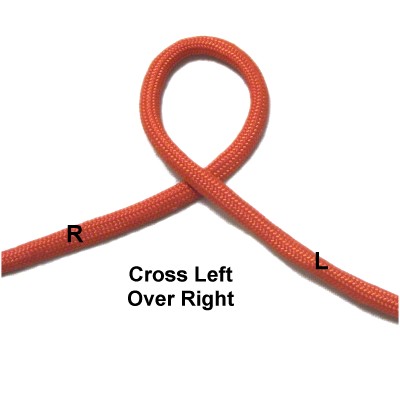
In the example, cord
A is orange and cord
B is green.
Step
1: Make a loop in the center of
cord
A, crossing left
over right.
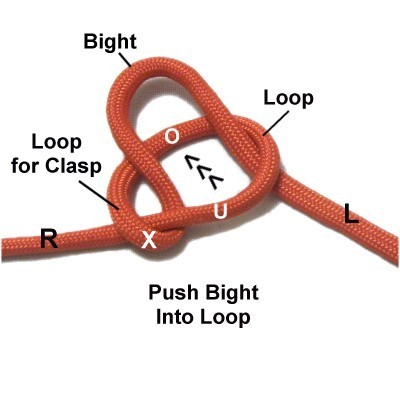
Fold the left
half of the cord to make a
bight. Pass it into the loop under
- over (from below). It
should be diagonal (arrows).
Tighten the loop by pulling on the
bight. Then pull the left half of
the cord to make the bight smaller.
Step 1,
continued: Check to see if both
halves of the cord are the same length. Make
adjustments if necessary.
Secure the loop in the area where it surrounds the
bight (see image below).
Pull on the lower left area of the knot
to make a small loop if you need one for
a clasp (optional). Secure the
loop to your board.
You can see the area you need to pull
in the previous image. The
segment is marked with an X.
Designer's
Tip: Because you crossed the cord
in step 1, the left and right halves are labeled
the opposite of where they actually rest.
The instructions describe them in their original
positions, but you can re-label them where they
rest now if that's easier for you.
Pass cord
B through the bight
horizontally from below (under
- over). Secure it to
your board.
The center of it should be in the
middle of the bight.
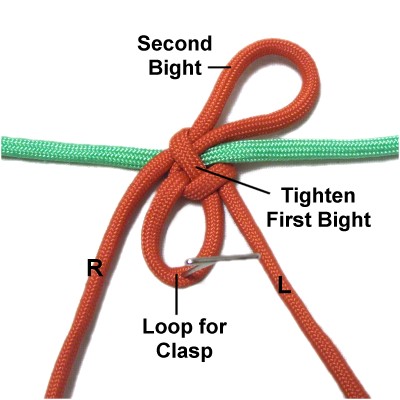
Step 2: Make a new
bight by folding the right
half of cord
A, which is currently on the
left.
Pass it into the first bight under
- over (from below).
Make
sure it passes over
cord B.
Pull on the left
half of cord
A to tighten the first bight
around the second.
Reduce the size of the second bight by
pulling on the right
half of the cord.
Make sure the loop for the clasp remains
the same size.
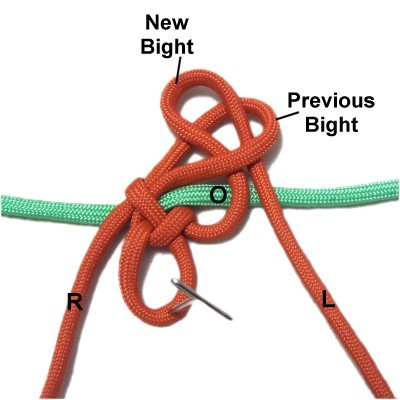
Step 3: Fold the left
half of cord
A to make a new bight.
Move it over cord B, then pass it into
the previous bight under
- over(from
below).
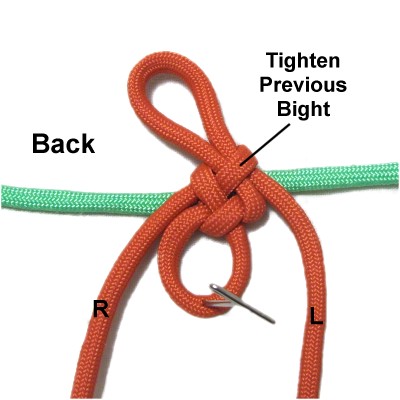
Tighten the
previous bight by pulling the right
half of cord A.
Pull the left
half to reduce the size of the
new bight.
The view you are seeing now is considered
the BACK of the Double Zipper pattern.
Concept
for Double Zipper:
When you work in the BACK of the sennit, you
pass each new bight through the previous one
from below (under - over), as shown in steps 2
and 3.
When you work in the FRONT of the sennit,
you pass the new bight through the previous
bight from the top (over - under), a shown in
step 4.
You make a bight with one half of the cord,
then use the other half for the next
bight.
After making two bights, you turn the design
over, then repeat.
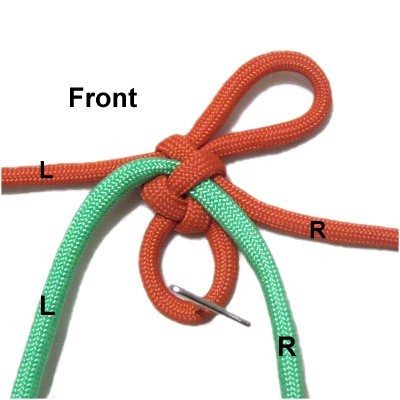
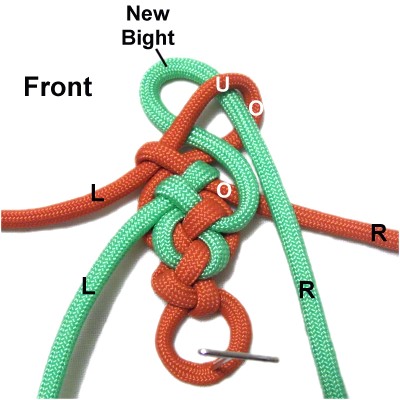
Step
4: Turn the knot over, so you are
working in the FRONT. Arrange both
halves of cord
A horizontally.
Mentally label the two halves of cord B,
after making sure it's balanced.
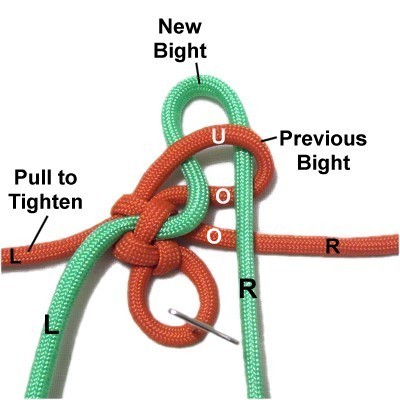
Make the next bight with the righthalf
of cord B.
Move it over
cord A. Pass it into the previous
bight over
- under (from the top).
Tighten the previous bight by pulling
on the left
half of cord
A.
The next bight is made with the left half
ofcord B.
Move
it over
cord A. Pass it into the
previous bight over
- under.
Tighten the previous bight by pulling
on the right
half of cord B.
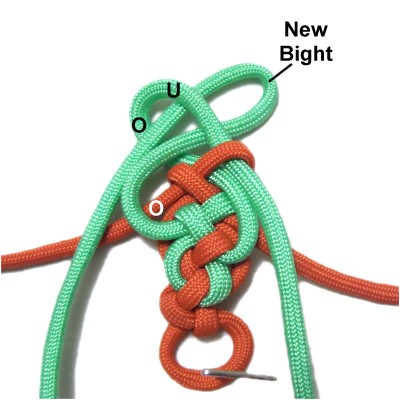
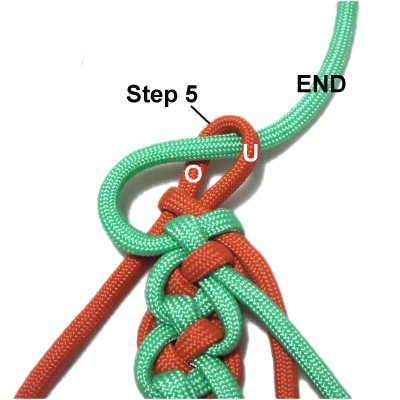
Step
5: Turn the Double Zipper over,
so you are working in the BACK again.
Make the next bight with the righthalf
ofcord A.
Move it over
cord B. Pass it intothe
previous bightunder
- over(from
below).
Tighten the previous bight.
Make the next bight with the left
half
ofcord A.
Move it over
cord B, then pass it into the previous
bight under
- over.
Tighten the previous bight.
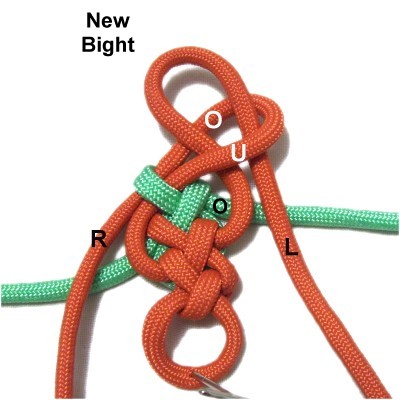
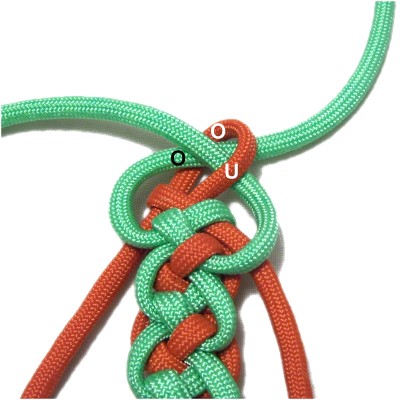
Step
6: Turn the sennit over so you
are in the FRONT.
Make the next bight with the right
half of cord
B.
Move it over
cord A, then pass it into the previous
bight over
- under.
Tighten the previous bight.
Make the next
bight with the left
half of cord
B.
Move it over
cord A, then pass it into the previous
bight over - under.
Tighten the previous bight.
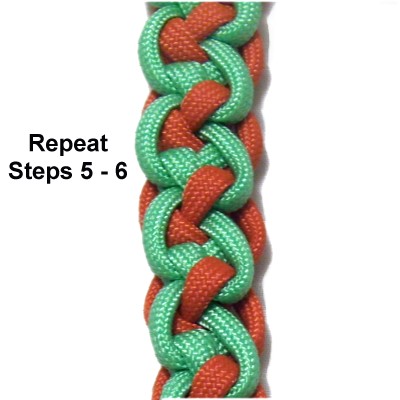
Step
7: Repeat
steps 5 - 6 several times, or
until the sennit is the size you need for
your project.
You need to decide if you prefer the front
or the back of the Double Zipper as you
are making it.
Continued
Below
Stop on step
5 if you prefer the FRONT.
Stop on step
6 if you prefer the BACK.
Turn the sennit over to the side you
prefer, so you are looking at it (face
up).
Step
8: For the FRONT face
up, pass one END of cord
B through the last bight you made
over
- under.
For the BACK face up, do this with cord
A, since the last bight is cord B
(step 6).
Pass the other
END of cord B (or cord A) through the
bight, too.
Make sure it goes through under
- over, crossing over
the other half.
Step 8,
continued: Tighten the last bight
as much as possible. You can apply glue as
you tighten, if you are making something with the
Double Zipper.
Inspect the sennit to make sure the curved
portions are all the same size, and everything is
tightened the same.
Make adjustments, then finish off ends of the cord
you did not use in step 8.
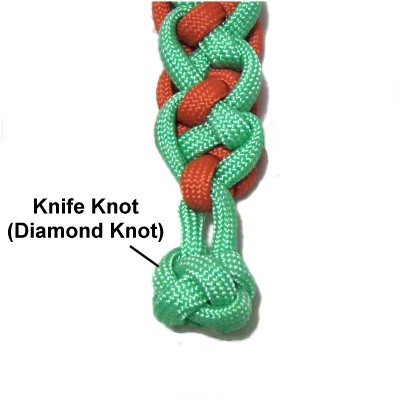
Step
9: You can now make a
button knot if you need one for a clasp
(optional).
This shows the Knife Knot,
also called the Diamond knot.
The Oysterman
knot is another option.
Both halves work together if you decide to
make this knot.
By
using any text or images on Free Macrame
Patterns, you are agreeing to ourTerms
of Use