|
|
| |
|
|
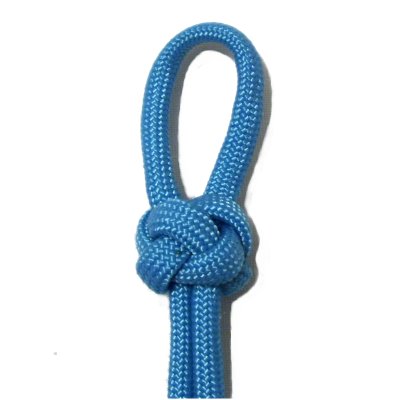
Description: The
Knife Knot is also called a Diamond
Knot, or a Knife
Lanyard.
Sailors used to create these knots
with thick rope. They would pass a
knife through the knot and secure the
loop to a belt.
You can tighten the knot completely,
or make the knot with two cords, if
you don't want a loop at the top.
These options are described below.
|
|
| |
| |
|
| |

|
|
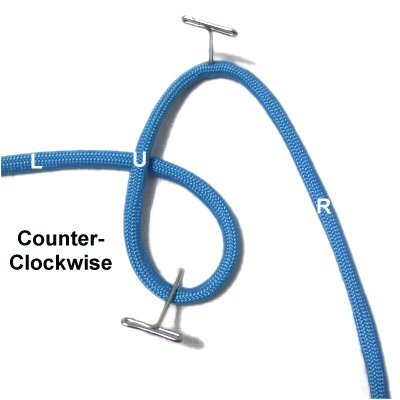
Step 1: Fold a 36-inch
cord in half, securing it to your board
at the center.
Make a counter-clockwise
loop with the left
half, passing under
the vertical segment to form the
crossing point.
|
|
| |
|
|
|
|
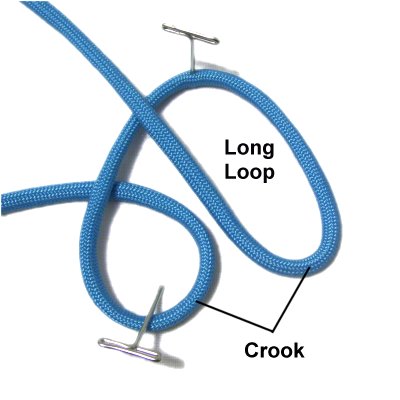
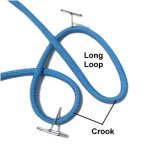
Step
2: Make a long loop with
the right
half of the cord, moving clockwise.
The crook of both loops should line up. |
|
|
|
| |
|
|
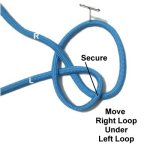
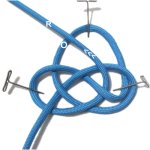
Step
3: Move the right loop under
the left loop.
Secure both loops where they cross (at the
crook).
|
|
| |
|
| |

|
|
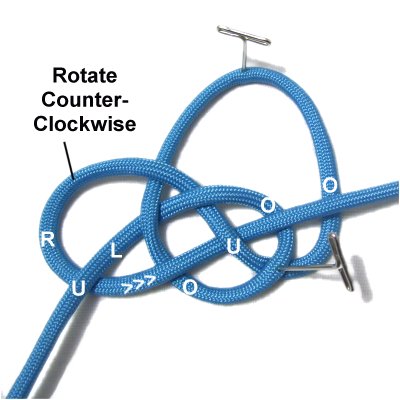
Step 4: Move the right
half of the cord under
the left half, rotating counter-clockwise.
Pass it through the first loop over
- under - over, as you bring it
to the right side of the Knife
knot.
It goes over
the segment furthest to the right.
|
|
| |
|
| |

|
|
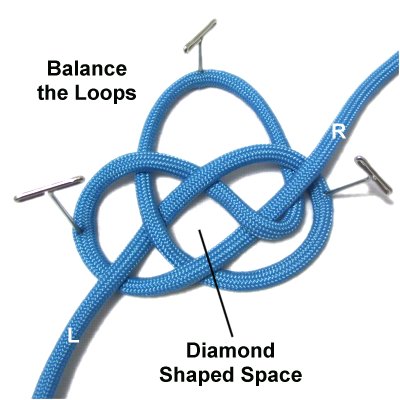
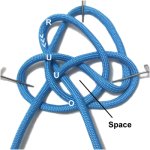
Step
5: Tighten the knot slightly,
and balance it so the loops are the same
size. Secure all three loops.
Identify the diamond shaped space in
the center of the knot.
|
|
| |
|
| |
|
|
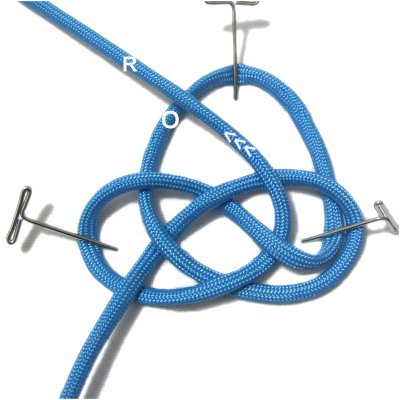
Step 6: Move the right
half
of the cord to the left, passing over
the segment that leads to the top of the
knot.
|
|
| |
|
| |
|
|
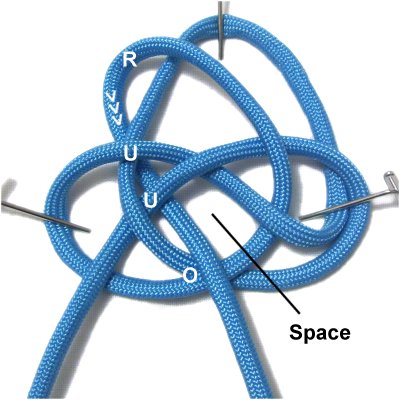
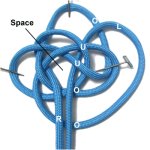
Step 7: Bring the right
half of the cord through the
diamond shaped space from below.
To do this, you pass under
a few segments and over
the crossed area at the bottom of the
knot.
|
|
| |
|
|

|
|
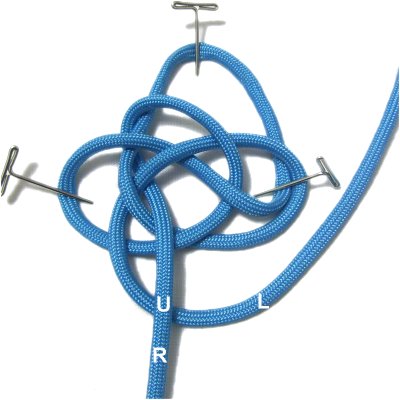
Step
8: Move the left
half of the cord to the right,
passing it under
the right half in the area outside the
knot.
|
|
|
|
|
|
|
Step
9: Bring the left
half over
the segment leading to the top of the knot
(on the right).
Pass it through the diamond shaped space
from below, following the same path as the
right half.
|
|
|
|
|
|
|
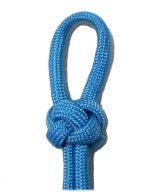
Step 10: Tighten the
Knife Knot by first making adjustments
to the size of the loop at the
top. I recommend you keep it
secured while tightening the rest of the
knot.
Follow the cord all the way through
the knot, removing the slack gradually
until it's firm.
|
|
|
|
|
|
|
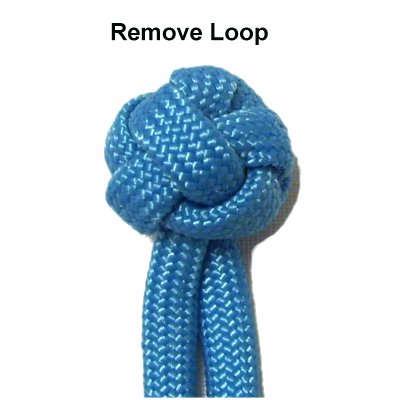
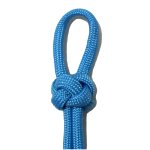
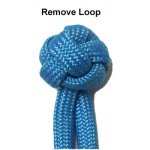
You can remove
the loop at the top simply by tightening
the knot completely.
|
|
|
|
|
|
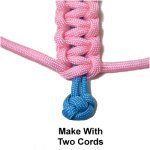
You can make a
nice clasp by creating a a small loop at
one end of the bracelet or necklace.
At the opposite end, make the Knife Knot
with two
cords. When it's tightened,
cut off the extra material. |
|
|
|
|
|
|
By using any text
or images on Free Macrame Patterns, you are
agreeing to our Terms of Use
|
|
|
|
|
Have
any comments about the Knife Knot? Contact
Me.
|
|
|
|

|
|
| |
| |