Description:
This Charm Bracelet is a very basic
Macrame design. It features Square Knots and
has a Buttonhole clasp.
You can decorate this Micro-Macrame bracelet with
buttons, as seen in the example, along with
charms. You could also use different
types of knots and apply beads, especially in the
center section.
The charms cannot be removed easily. For
that reason, I recommend you use split
or jumprings
on the loops of the charms. You can open the
rings if you need to change the charms for any
reason. Using the rings also allows the charms to
dangle more freely.
In the example shown, Satin cord material was
used. If you decide to try this delicate
material, be sure to lean
the pins rather than push them through it.
Cut one holding cord, 32 inches long.
Cut one working cord 72 inches long, for a Charm
Bracelet 8
inches or less.
For a longer bracelet, increase the length of both
cords.
Prepare the ends with glue to prevent
unraveling. Secure both cords to your board,
at the center.
Make sure the working cord is on the right.
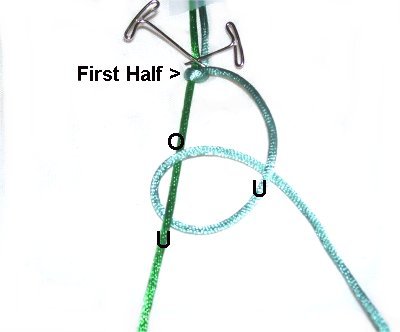
Step
1: Tie the first half of a
vertical Larks Head knot by passing the
working cord over
- under the short holding cord,
rotating clockwise.
Bring it over
the working cord as you pull it right.
Step
2: Tie the second half of
the knot by passing the working cord under
- over the holding cord.
As you bring it to the right, pass it under
the working cord.
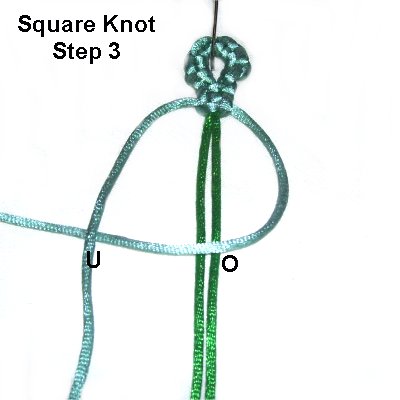
Step
3: Tie 2 or 3 more Larks
Head knots, making sure the sennit is slightly
larger than the button.
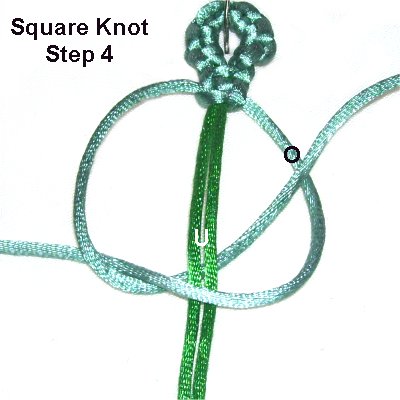
Step
4: Turn the knots around,
and go back to the center.
Tie the same number of Larks Head knots,
rotating counter-clockwise.
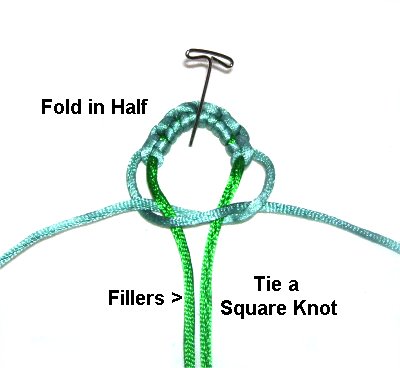
Complete the
Buttonhole Clasp by folding the Larks head
knots to form a loop.
Tie a tight
Square Knot with the working cords.
Pull the fillers firmly after the knot is
tied, to remove any slack.
The
instructions for the Square Knot are
below.
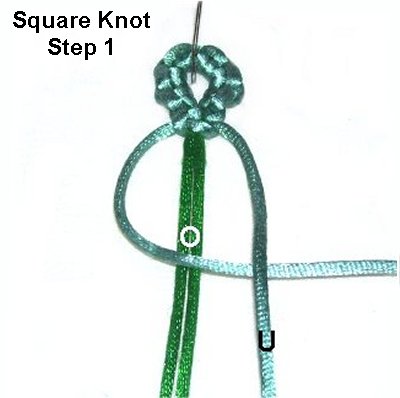
Square Knot Instructions
<<
Move the working cord on the left towards
the right. Pass it over
the fillers and under
the right working cord.
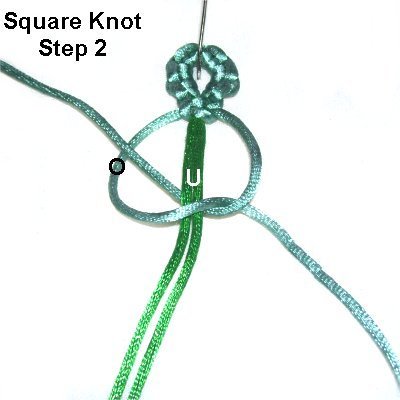
Bring the right working cord under
the fillers and over
the left working cord, as you bring it to
the left side of the knot.
>>
The second half of the Square knot is tied like
the first half, but in the opposite
direction.
So the first cord is curved to the left
instead of the right.
<<Move the working cord on the
right to the left. Pass it over
the fillers and under
the other working cord on the left.
Move
the working cord on the left under
the fillers and over
the other working cord on the right.
>>
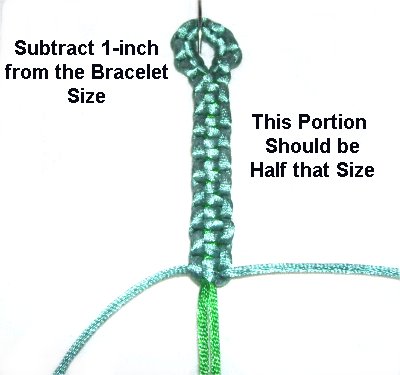
Step
5: You need to
do a little math now:
Take the finished length of the bracelet
and subtract
1 inch.
The first portion of the Charm bracelet
should be HALF
that length. Include
the Buttonhole when you measure.
Tie Square Knots until you reach the
correct size.
Design
Tip: The Charm Bracelet I made was
8 inches long. So here are the calculations
I made:
8 inch finished length - 1 inch = 7
inches.
7 inches divided by 2 (half) = 3.5 inches
Step
6: Place a button or
bead on the filler
cords (optional). Slide the
right working cord through the ring of 1
charm.
As you tie the next Square knot, pull part
of the right
working cord to the right, so
it's looser than the other side.
This will form a small picot so the charm
can dangle.
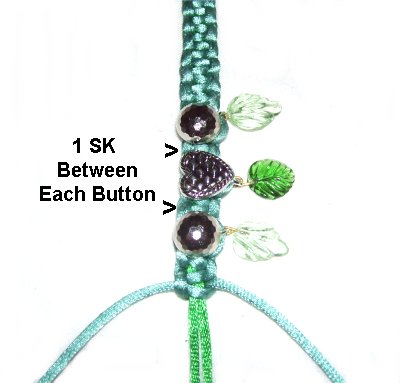
Step
7: Tie one SK, then repeat
step 6.
Tie the next SK and repeat
step 6 again.
Count the number of SK you tied in the
first half of the Charm Bracelet.
Include the one you tied for the
clasp.
Step 7,
continued: Tie the same numberof
knotsfor the second half, and add one extra SK.
Measure the bracelet
to be sure it's balanced.
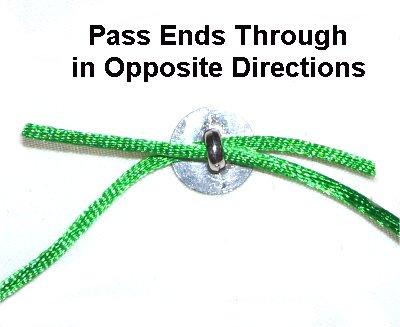
Step
8: Pass the two filler
cords through the button used for the
clasp, in opposite
directions.
Pull the ends to slide the button close to
the last SK tied in the second half of the
bracelet.
Step
9: Turn the Charm Bracelet
over, so you are working in the
back of it.
Bend the fillers
towards the other knots. Apply glue
on the back of the knots that lie close to
the button.
Step 9,
continued: Tie a Square Knot, so it
rests on the glue. Hold it in place with a
clip until the glue dries.
Cut off the excess material or weave the ends
through the SK.
By
using any text or images on Free Macrame
Patterns, you are agreeing to ourTerms
of Use