Description:
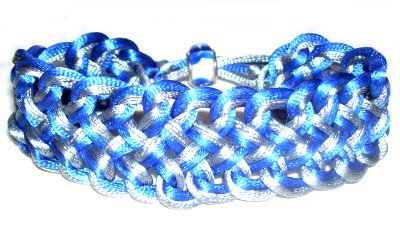
This Celtic Bracelet is a Micro-Macrame
design that features the Figure Eight knot, which
can be used for other items, such as Macrame
belts.
On a separate page is the necklace called the Figure Eight Choker,
which uses this same weaving technique.
The Macrame bracelet described in this pattern
features a closely woven series of loops linked
together horizontally.
The Figure Eight knot can be made in other ways,
so this is just one option. I recommend you
experiment with the other variations of this
interesting knot.
This bracelet pattern has a simple bead clasp, and
features two colors of Satin material. When
using Satin or other delicate cords, be sure to
either LEAN
the pins to secure the loops, or the Cross
Pin Technique. This project is rated Easy, but is
time
consuming. It
will take
several hours to
make the small adjustments necessary, so the
knots are all the same size.
Preparation:
Cut two cords, each 3 yards long (for a bracelet
up to 8 inches).
Prepare the ends with glue.
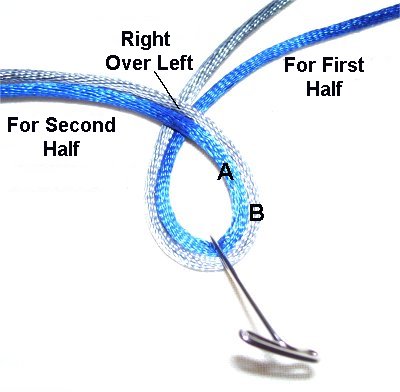
Step 1:
Make the lower loop of the first Figure
Eight knot with both cords, crossing right
over left.
You will use the cords now on the right
to make the first part of the Celtic
bracelet, so secure the other half for
now.
Color A = BlueColor B= Silver
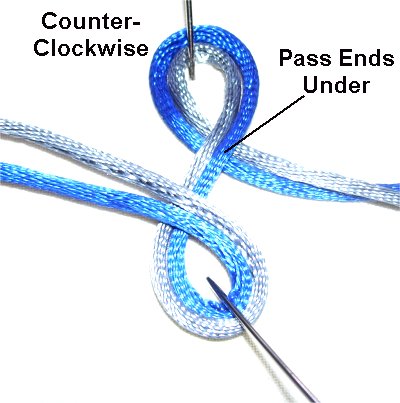
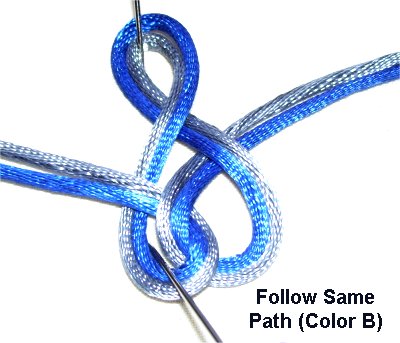
Step
2: Make the top loop in a
counter-clockwise
direction, passing the end under
to form the crossing point. Make
sure you keep the cords flat and close
together.
Notice
that the colors have shifted:
Color A
=
outside
Color B
= inside
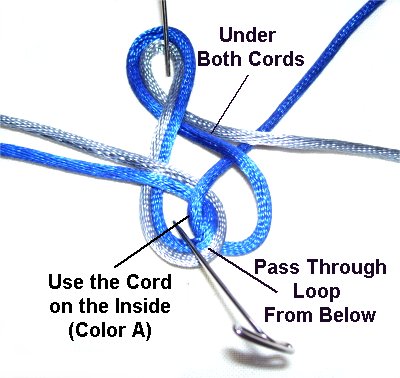
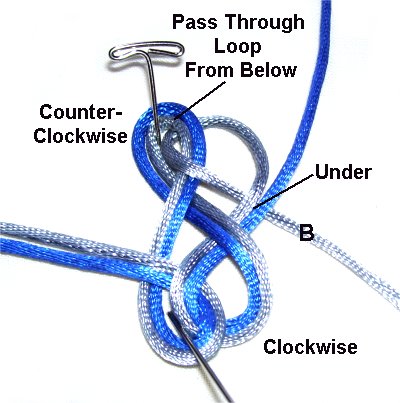
Step
3: Select the Color
A cord, since it will be on the inside
when you make the next loop. Pass it
through the lower loop of the first Figure
Eight from
below.
Rotate it clockwise,
and bring it under
the two cords as you move it towards the
top of the knot.
Design Tip:
Using the two cords separately is much easier than
trying to construct the loops with both acting
together.
Just remember to always use the cord on the inside
first.
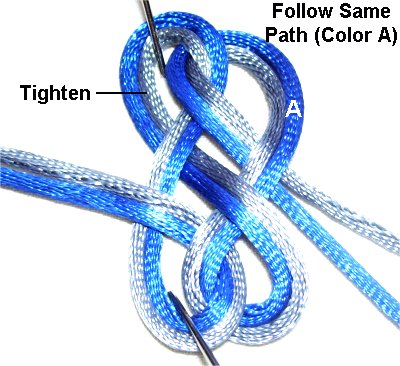
Step
4: Use the other cord to
follow the same path as the first,
arranging it around the loop.
You can now tighten the lower
loop of the first Figure Eight if
you wish, or you can wait until after the
next loop is made.
Design
Tip: After you link and make
a new loop, you can tighten the loop you passed
the cord through. This helps to hold
the cords in place, and allows you to hold the
Celtic Bracelet in your hands as you construct it.
The tightening process becomes more clear as you
progress. Try to make each loop the same size, and
small enough for the figure eight design to be 1/2
to 1-inch in size, top to bottom.
Step
5: Pass the cord on the
inside (color
B) through the top loop from
below.
Rotate it counter-clockwise
and pass it under
both cords as you bring it down.
Step
6: Follow the same path
using the other cord (color
A), fitting it around the other
loop.
You can now tighten the top loop of the
first Figure Eight knot.
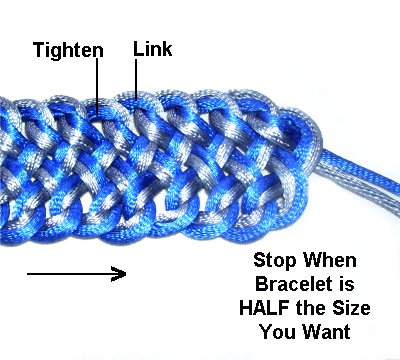
Step
7: Here's another view of
the tightening process, showing the first
half of the bracelet. Each time you
make a "link" tighten the loop to the left
of it.
Since you started at the center, stop when
the Celtic Bracelet is half
the size you need.
Step
8: In order to make the
second half while stillmoving
left to right, you need to flip
the bracelet over, so the back
is facing up.
Your other option is to move right
to left for the second half.
Step 8,
continued: Adjust the three figure
eights closest to the center, then tie the second
half with the other end of the cords.
Stop when the bracelet is the size you want.
The
following instructions are for a simple
bead clasp. To see another
option, using a button and loop, view theFigure
Eight Choker.
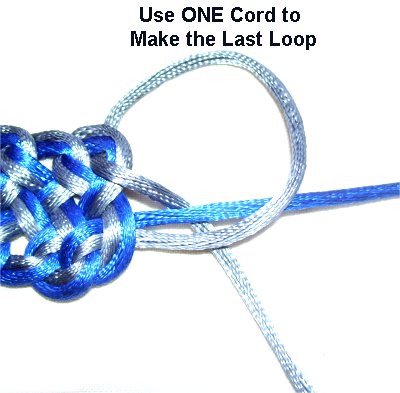
Step 9: Use one
cord to make a final loop, as you did the
others. Pull the end firmly to tighten the
loop all the way.
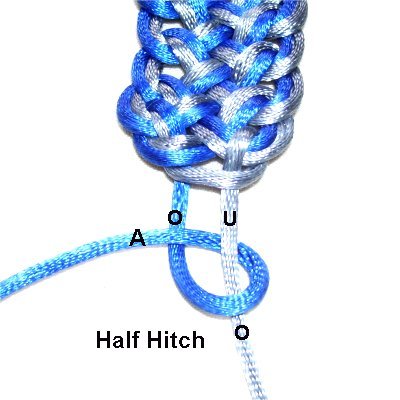
<<
Use color
A to tie a Half Hitch onto color
B, as shown.
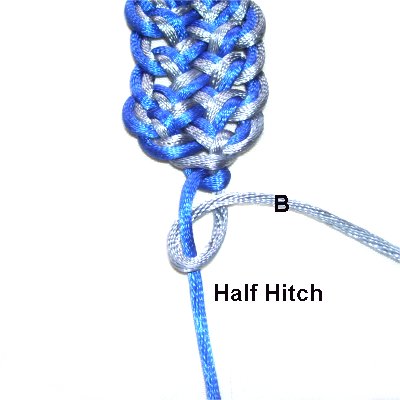
Use color
B to tie the next Half Hitch,
onto color A. >>
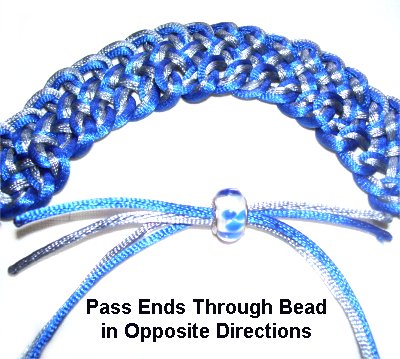
Pass two ends
through the large bead for the clasp.
Pass the other two ends through it as
well, in the opposite
direction.
Step
10: Close the Celtic Bracelet
completely by pulling on the ends.
You must leave at least 2 inches of space
between the bead and the next knot, so the
hand can fit through.
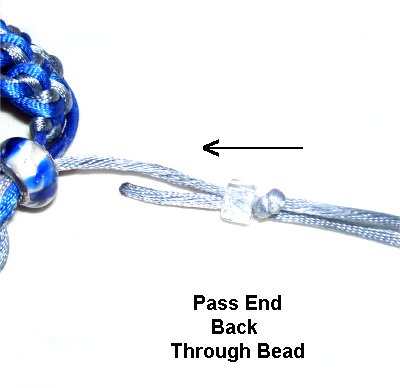
Apply a small bead, followed by an
Overhand knot.
(Optional)
Pass the end back through the bead.
It will be a tight squeeze, so use a bead
threader if needed.
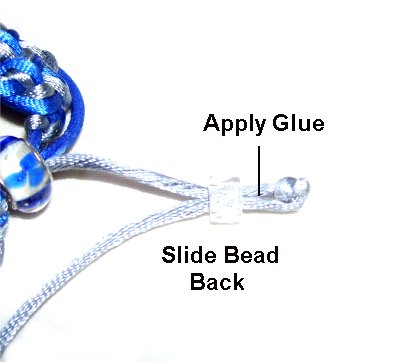
Moving the bead away from the knot will
help.
Slide the bead
back slightly and apply glue to the area
next to the knot. Move the
bead over the glue and allow it to dry
completely.
Cut off the extra material flush with the
bead (on the opposite side from where the
knot rests).
Repeat
step 10 with the other three ends
to complete the Celtic Bracelet.
By
using any text or images on Free Macrame
Patterns, you are agreeing to ourTerms
of Use