Description:
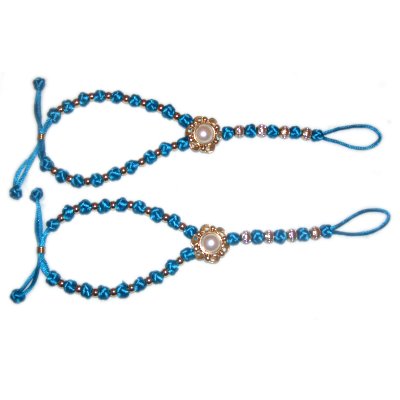
The Button Sandals feature not only
button knots, but they also have regular buttons
for decoration. The closure for these
Barefoot Sandals is a sliding bead clasp, making
the design adjustable.
By using Satin Cord, as in the example, along with
high quality beads, you end up with very elegant
Foot Jewelry. When using Satin, make sure
you do not push pins through the material, since
it's fragile. Lean
the pins over the cords, or use theCross-Pin
technique.
The best knot for this design is the Knife Knot,
also called the Diamond knot. It's the
easiest to tighten and place in the right
position. But you can also use the Sliding
Celtic Button if you wish.
This Micro-Macrame design is rated moderate, since
button knots in general are a challenge. The
overall design is very simple, since only 2 knots
are used in construction. Make sure
you practice the knot prior to attempting this
design.
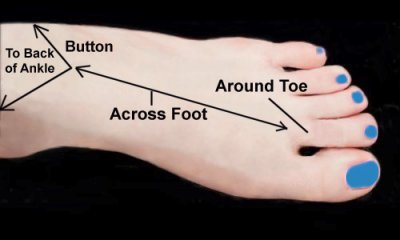
Before you start your Button Sandals, first
measure your feet in three areas:
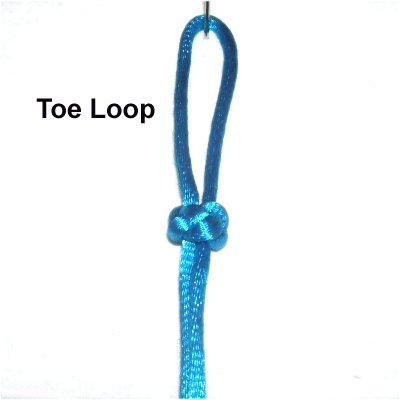
Toe
Loop: Measure around the
second toe and add 1-inch. The first knot
should rest past the toe crease.
Center
Piece: Measure from the toe
crease to the place you want the straps to
branch off, which is where the button will
rest.
Ankle
Straps: Measure from the
button area to the back of the ankle.
Preparation,
continued: Add the results of all three
measurements to get the total length of your
Button Sandals.
Multiply the total length by 10, and cut one cord
to that size.
Cut a second cord 18
inches shorter than the first, unless you
prefer to cut both the same size.
Prepare the ends with glue to prevent unraveling
and to stiffen the material for beading. You
can also use the lighter to melt the tips
slightly, if using nylon.
Toe Loop - Knife Knot Instructions
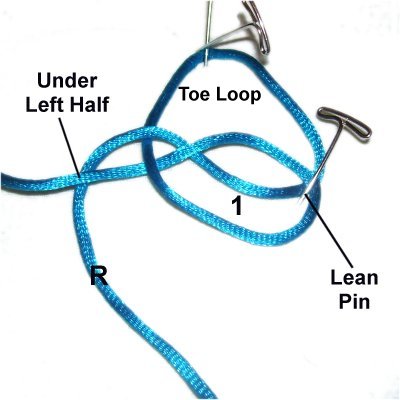
Step
1: Fold the longest cord in
half and secure it to your board at the
center.
Divide
your toe loop measurement in half
and move down that distance from the
center.
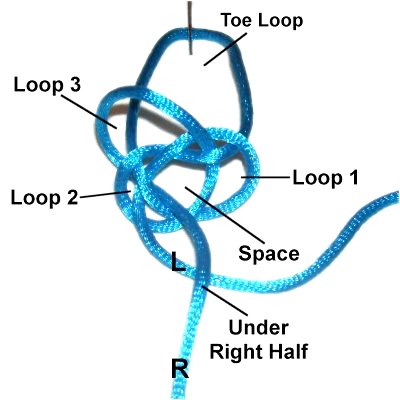
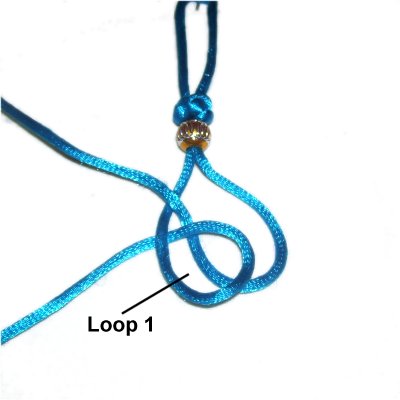
Make a counter-clockwise
loop with the left
half of the cord, passing under
at the crossing point.
Step
2: Curve the right
half of the cord to the left, so
it rests partially
under loop 1.
It should pass over
the left half of the cord in the area just
above loop 1.
Step
3: Move the right
half of the cord under
the left half, as you bring it to the
right.
Secure the first loop by leaning a pin
over the cord in that area.
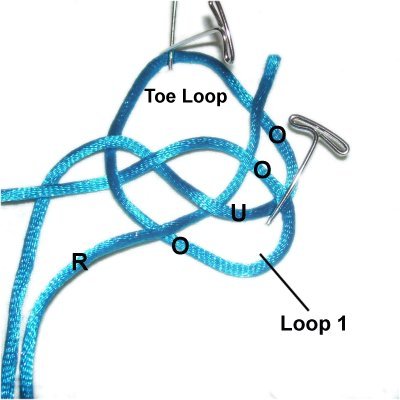
Step
4: Pass the right
half of the cord through loop 1,
over
- under - over - over the four
segments.
This creates loop 2 on the left.
Step
5: Tilt loops 1 and 2
towards you, so the knot is standing
upright. The toe loop
should be flat on the board.
Tighten the knot slightly and balance it,
so you can clearly see the space in the
center.
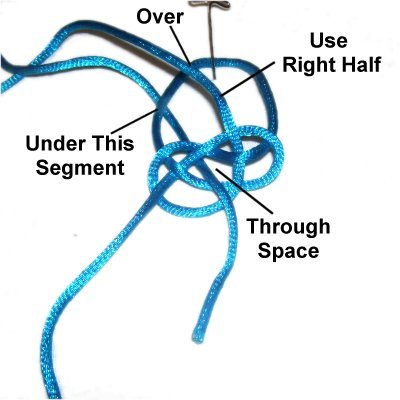
Step
6: To create loop 3, move
the right
half of the cord to the left side
of the knot, over
the toe loop portion (behind loops 1 - 2).
Pass it under
the leftsegment
of the toe loop, moving down closer to the
two loops.
Move it through the space in the center,
pulling it towards you (back to front).
Design Tip:
All four loop should be large enough to see
clearly, and about the same size.
Step
7: To start loop 4, move
the left
half of the cord under
the right half, as you move it to the
right.
Step
8: To complete loop 4,
rotate the left
half of the cord in a counter-clockwise
direction.
Pass it over
the right
segment of the toe loop, and
through the space in the center(back to front).
It should rest to the right of the other
half of the cord.
Important:
The appearance of your Button Sandals depends on
how neatly the knots are tightened.
Pay close attention to the following steps,
which show the most effective way to tighten the
Knife knots.
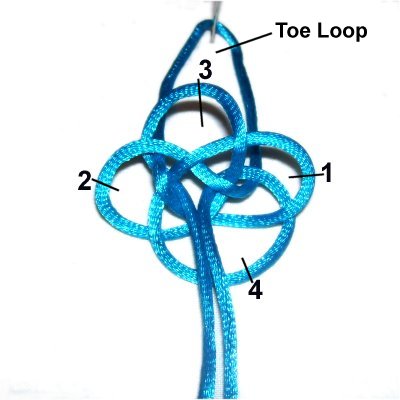
Step
9: Mentally number the four
loops as shown, which is the order they
were made.
Make sure they are standing
upright, with the toe loop flat
on the board.
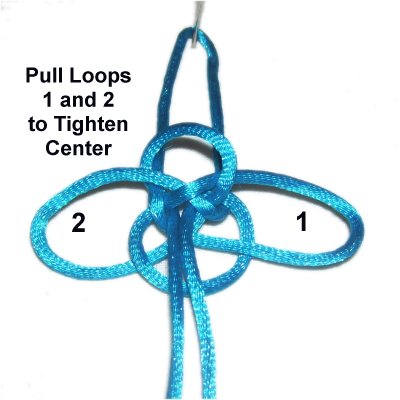
Step
10: Pull loops 1 and 2 horizontally,
which will tighten the center of the
knot.
This will also tighten loops 3 and 4,
which is OK as long as you can still see
them.
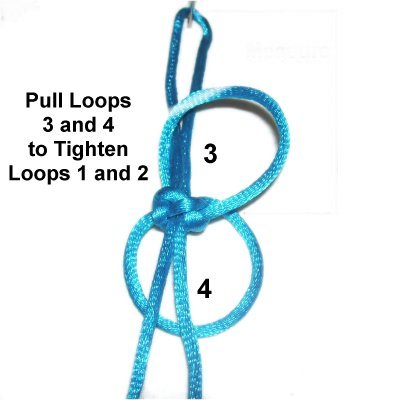
Step
11: Pull on loops 3 and 4 vertically,
to tighten loops 1 and 2.
Put the toe loop on your foot to see if
the knot is in the right place.
Loosen the knot if changes are needed, by
pulling on the four loops.
Step
12: Once the knot is where
you want it, pull the two halves of the
cord to tighten loops 3 and 4.
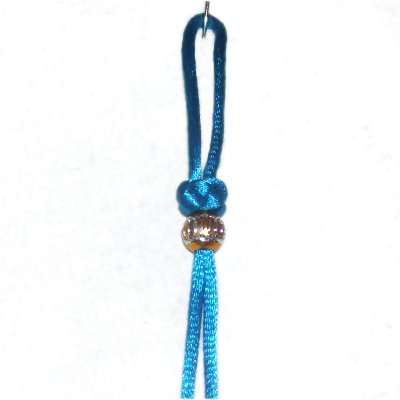
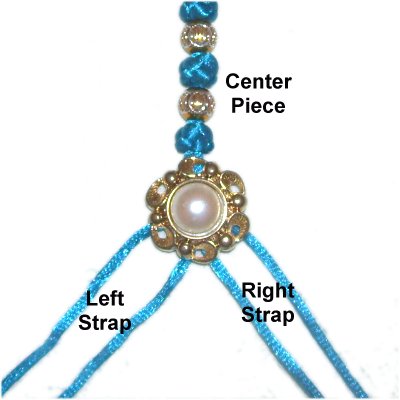
Center Piece
The center piece for your Button Sandals is a
combination of the same knot you just tied with
beads.
This is the portion that fits along the top of the
foot. The final step is to add the button.
Do not rely only on the measurements you got in
preparation. You should put the sandals on your
foot to determine the size of this area.
Step
13: Add one 8mm bead.
Make sure the bead slides easily,
since Satin Cord can be damaged if the
beads are too tight.
Step
14:Repeat
steps 1 - 12 to tie the next
Knife knot.
When you tighten loops 1 and 2 (step 11),
make sure the knot rests against
the bead. Then tighten
loops 3 and 4.
Step 15:Repeat
step 13 and 14 several times, until the
center piece for your Button Sandals is the size
you want.
Keep in mind you still need to add the button, if
you wish to do so. That will add another
inch to the length of the center piece.
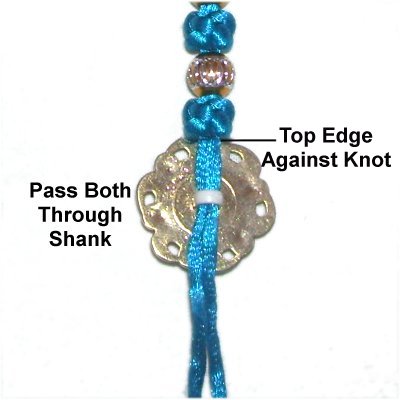
Step 16:
Turn over the center piece, so the front
of it is touching the board. Pass
both halves of the cord through the shank
of the button (shank face up).
The top edge of the button should rest
against the last Knife knot you
tied.
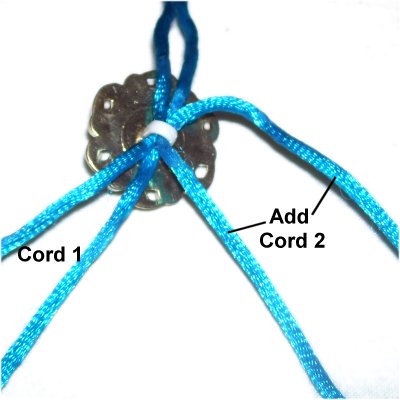
Step
17: Add the second cord by
sliding it through the shank, placing it
to the right of the other cord.
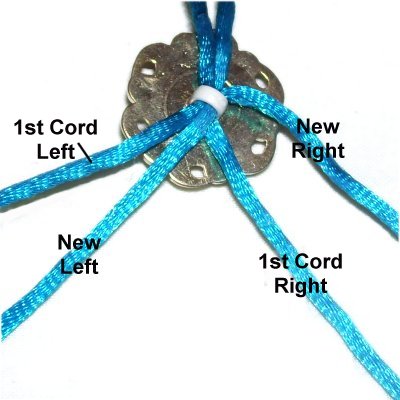
Step
18: Arrange the two cords
as follows:
The left half of the first cord is
followed by the left half of the new
cord. Then it's the right half of
the first cord, followed by the right half
of the new cord.
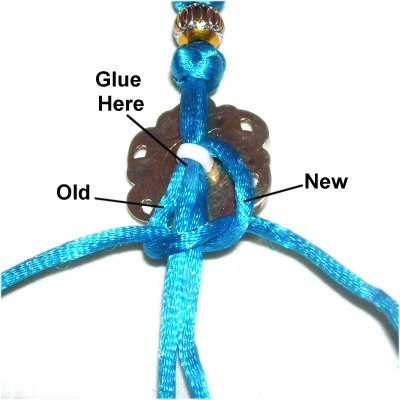
Step
19: Use the right half of
the new cord along with the left half of
the first cord to tie the first
half of a Square Knot. The
other two cords are the fillers.
Before tightening, apply a SMALL amount of
glue next to the shank. Make sure
the button is in the right position, then
tighten the knot firmly.
Turn over the
Button Sandals, so the button is face up.
Allow the glue to dry completely before
moving on.
Straps and Clasp
Step
20: The straps for your
Button Sandals are similar to the center
piece, but you should use the smaller
beads (6mm).
The first Knife knot should rest as close
to the button as you can get it, without
resting underneath it.
Step 20,
continued: Alternate the beads and
knots until the you reach the strap
measurement you got in Preparation.
Put the sandal on
your foot to make sure the strap is the
right size. The last knot should rest in the
back of your ankle, keeping in mind that there
will be a bead for the clasp.
Repeat the same process to create the second
strap.
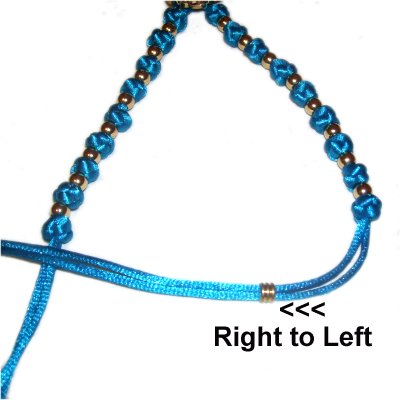
Step
21: Pass the ends coming
from the right
strap though the bead for the
clasp, from right
to left.
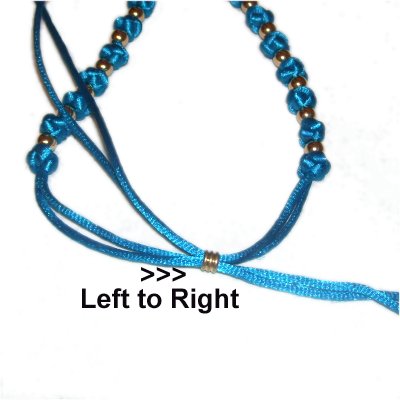
Pass the ends
coming from the left
strap through the bead, heading left
to right.
Make sure the bead slides easily
as you pull on the ends. It still
needs to grip the material or the Button
Sandals will open too easily. Change to a
different bead if necessary.
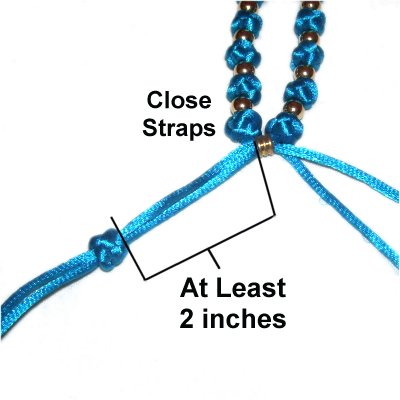
Step
22: Pull on the ends to
close the straps.
Move
downat
least 2 inches, and tie a Knife
knot with one pair of cords.
Do the same with the other two cords,
placing the knot in the same place
(compare them).
Step 22,
continued: Apply a small amount of
glue between the two ends where they exit the
knots.
Allow it to dry, then cut off the ends close to
the knot. For nylon material, you can melt
the tips with a lighter.
Step
23: Repeat
Preparation and Steps 1 - 22 to
make the second Button Sandal.
By
using any text or images on Free Macrame
Patterns, you are agreeing to ourTerms
of Use