Description:
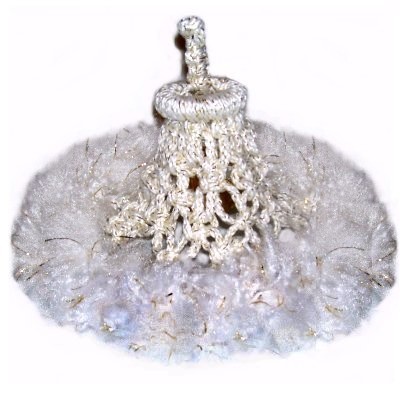
The Bell Wreath features a bell shaped
area in the center combined with a brushed fringe
as the wreath. A small metal bell can be
added on the inside to give this unique wreath a
musical jingle.
Only basic knots are used for this wreath
ornament, so this is an easy project suitable for
beginners.
Make sure the material you use is the type that
can be unraveled and brushed to form the
wreath. The material used in the
example is Bonnie Braid with metallic fibers.
The finished size is approximately 5 inches tall
and 7 inches wide.
There
is no need to prepare the tips if using braided
cord. When using twist
style material, tie Overhand knots at the tips.
Designer's
Tip:You can make changes
to the ring size
of the Bell Wreath if you want a larger
design. Cut the 45-inch cords as you mount
them to the small ring. This way you will
cut only the amount that can fit on the
ring.
The number of cords you cut need to be a multiple
of 4 (12, 16, 20, etc.)
If you want to increase the height
of the bell design, cut the cords longer.
Tie additional rows of ASK in step 7.
The Hanger
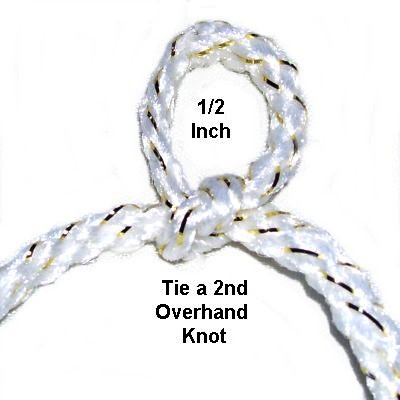
Step 1:
Begin the knotted hanger for the Bell
Wreath by folding one 30-inch
cord in half. Tie an Overhand
knot.
Adjust the
knot so there is a 1/2-inch loop.
Tie a second
Overhand knot below the first.
Tighten firmly.
All
the Square Knots (SK) in the Bell Wreath
pattern will be made following the directions
below:
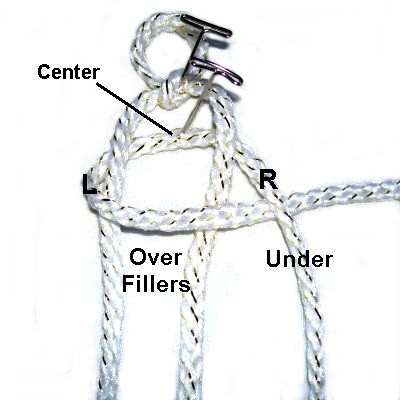
Step 2:
Fold a new 30-inch cord in half and secure the
center of it under
the first cord.
The two halves of the new
cord are used to tie the SK. The two from
the loop are the fillers.
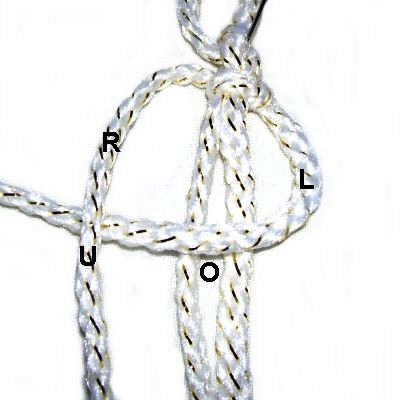
Move the left
half of the new cord to the right, passing
over
the fillers and under
the right half of the same cord.
Move the right
half under
the fillers. Pass it over
the left half of the cord as you pull it
left.
Tighten firmly.
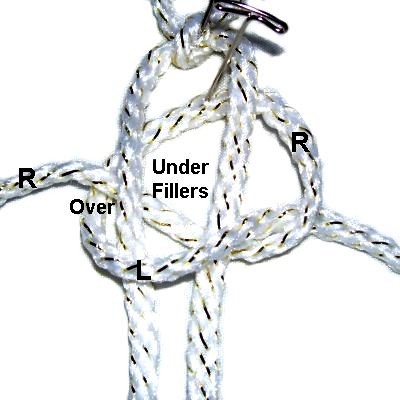
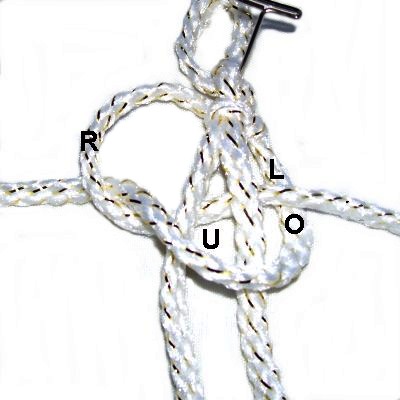
The two
halves of the working cord have switched
places. So you need to make
the second half of the Square knot in the
opposite direction:
Move the left
half of the new
cord to the left, passing it over
the fillers and under
the right half.
Bring the right
half of the cord under
the fillers and over
the left half as you pull it to the
right.
Tighten
firmly.
Step 2,
continued: Tie 2 to 4 more Square
knots to complete the hanger for the Bell Wreath.
Mounting Cords to Small Ring
Step
3: Attach each of the
45-inch cords to the ring with a reverse
Larks Head Knot, as shown below:
Fold one cord
in half and place it under
the 2-inch ring as shown.
Bend the
folded area forward over
the ring.
Pass the ends over
the folded area of the cord and pull them
toward you.
Tighten
firmly.
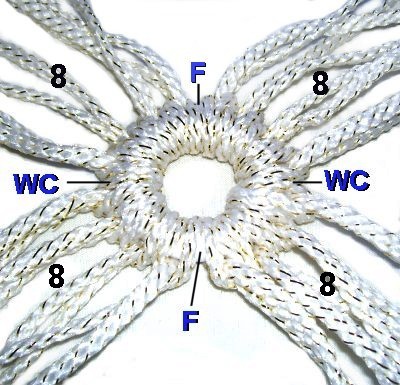
Arrange the
cords into 4 groups of 8. The four
groups should form and X shape.
As you attach the hanger in the next step,
the fillers (F) will be attached to the
top and bottom of the ring,between
the groups of long cords.
The working cords (WC) will be
attached on each side.
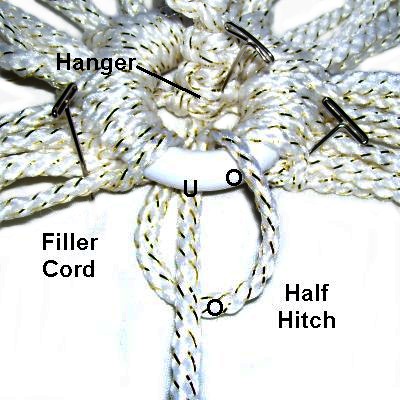
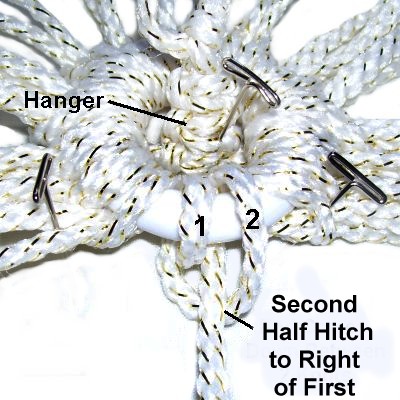
Step 3,
continued: Place the hanger inside the
ring (upright). Secure it so it cannot
move. Arrange the four cords in the spaces
shown on the image above, placing them under
the ring.
Move the other cords out of the way as you tie the
next set of knots.
Select one of
the filler cords so you work in the front
area of the ring first.
Make a Half Hitch, passing it over
- under the ring.
As you pull it toward you, bring it over
the cord. Tighten
firmly.
Tie a second
Half Hitch to the right of the
first. Make sure the cord comes out
between
the two knots.
Attach the remaining cords from the hanger
to the ring in the same way.
Remember that the other filler cord is
attached to the back of the ring and the
working cords are attached to the sides.
Designer's
Tip:When you attach the
cords to the large ring for the Bell Wreath, you
will use Double Half Hitches again.
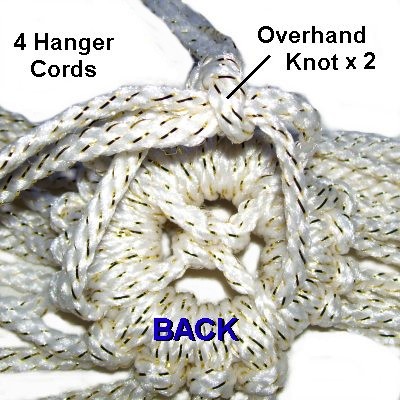
Turn
the ring upside down so you are
working in theback.
Locate the four hanger
cords.
Combine two
cords on the right and left to
tie 2 Overhand knots.
Apply glue as you tighten the second knot.
When it's dry, cut off the excess
material.
Designer's
Tip: The small bell can be
attached where the Overhand knot is located, but
you need to wait until the Bell Wreath design is
almost finished.
Do not attach it now
because it will get in the way.
You will need to use a piece
of wire to attach the bell, since they
usually have small holes.It can be tied around the Overhand knot.
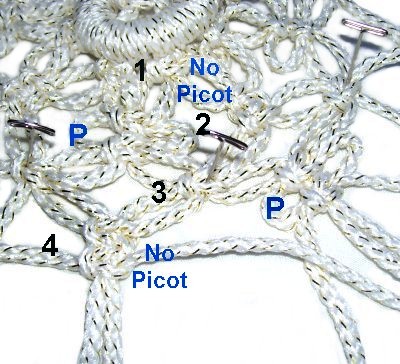
Creating the Bell
The main area of the Bell Wreath is made with
alternating rows of Square Knots. I added
picots to some of them to make the design more
interesting.
This is optional if you prefer not to tie them at
all. In that case, just tie regular SK.
Step
4: Tie the first row of
Square knots using groups of four
cords. Each knot should have two
working cords and two fillers.
While tightening, pull on the fillers
so the SK will rest against the knots on
the ring.
Step 5:
Mentally number the cords from two
knots resting next to each
other.Use cords 3 and 4 from
the SK on the left combined with 1 and 2
from the right.
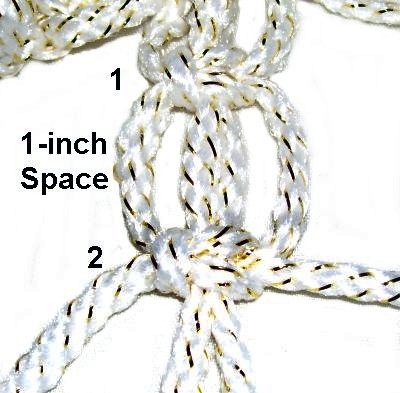
Tie a new Square knot with the 4
alternated cords.
Tighten it 1-inch
below the first row of Square
knots.
Tie a second
Square Knot using the same four cords.
The two knots should rest 1-inch apart if
you want to form picot loops.
Tie the
knots close together if you don't want
picots.
Slide the
second knot toward the first one while
holding the filler cords.
This will form the two picot loops.
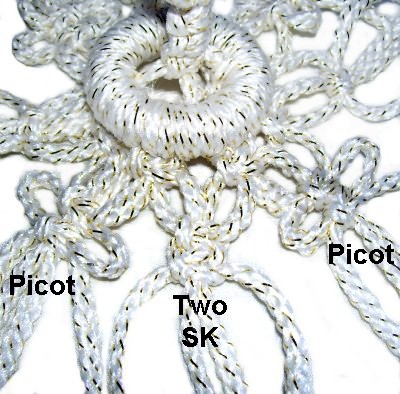
Step
5, continued: Use the remaining
cords to tie the rest of the second row,
but don't put the picots next to each
other.
In
every other group you should tie
the two SK so they rest close together.
Step
6: Alternate the cords
again to tie the third row. Move down 1-inch and tie one
SK with the alternated
cords.
Repeat with the remaining cords.
Step
7: Repeat
steps 5 and 6 to create
the 4th and 5th rows of the Bell Wreath
design.
In row 4, the groups used to make the
picots need to be opposite
from those in row 2.
So if there is a picot design in row 2,
tie the two SK in row 4 without them.
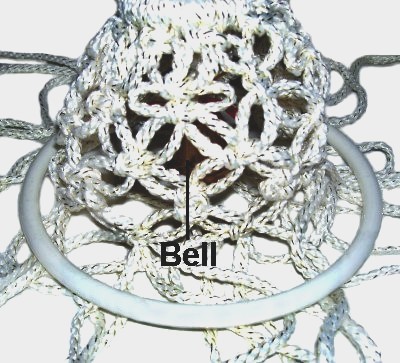
Important: The Square
Knot design for the Bell Wreath will begin to bend
upward in a dome as you complete step 7. Don't
try to make the design lie flat.
I recommend you secure the knots in one row while
tying those in the next
one.
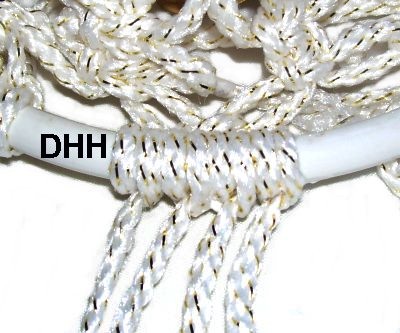
Lower Ring
Now it's time to attach the cords to the lower
ring for the Bell Wreath.
You do so with the Double Half Hitch, just as you
attached the hanger
to the upper ring.
Step
8: Attach the small metal
bell onto the hanger if you decided to use
one.
Slide the 7-inch
ring over the top of the bell and
move it down so it rests on your
board. Make sure all the cords rest
under
it as you organize them into the groups
you finished with in step 7.
Attach each
cord to the large ring with a Double Half
Hitch. It's best if you attach 4
cords at a time, placing them so they rest
close to the SK in the last row.
Tighten all these knots firmly.
There will be space between each set of
knots, which will be filled in later.
Step 8,
continued: When all the cords are
attached to the ring, turn
it over so you can reach inside.
Apply glue to the back
of all the knots and allow it to dry before moving
on.
The Wreath
Now it's time to create the brushed area at the
bottom of the Bell Wreath.
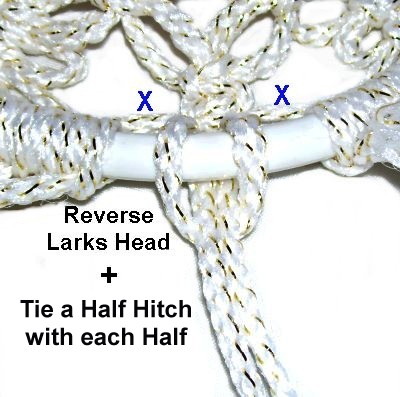
Step
9: Attach two
20-inch cords into each of the 8 spaces
between the DHH using reverse Larks Head
knots (same technique as in step 3).
Use each
half of the new cords to tie 1
Half Hitch on either side of the
Larks Head knot.
Step 9,
continued: Slide two
8-inch cords through spaces around the SK resting
against the inside
of the ring. The spaces are indicated with
(X) in the image above.
Match the ends so they are folded at the center.
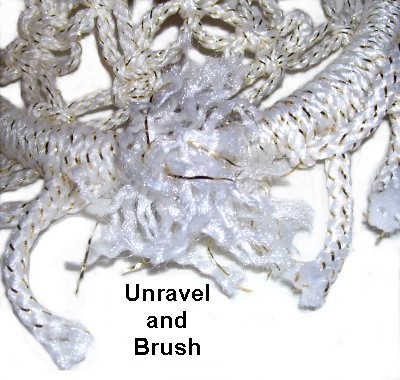
Unravel and
brush all the cords one
at a time.
Do the same with the 8-inch pieces that
are not attached to the ring, but hold
both ends as you brush.
Trim the cords
as needed. You can use the scraps to fill
in some of the thin areas. Just
slide them through spaces on the inside of
the ring.
This is what the Bell Wreath should look
like when you are through.
By
using any text or images on Free Macrame
Patterns, you are agreeing to ourTerms
of Use