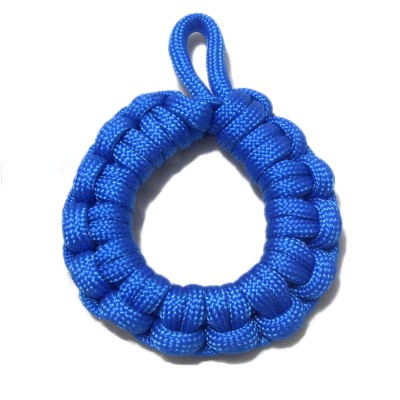
Description: The Barnacle Knot
is a great way to make knotted loop designs for
Macrame projects.
This technique can be used for jewelry pendants
and earrings. To use it as a holiday
ornament, make it large and suspend bells or
other decorations inside the loop.
Nylon Paracord was used in the example
shown. Please read Cord Preparation
to find out how to prepare it properly, if you
decide to use this material.
The Ashoka
Chakra is a similar
technique. You tie a series of
Slipknots rather than Larks Head knots.
Click on
the link or image to visit that page.
A video tutorial of this beautiful
decorative knot can be found on theFusion
Knotswebsite.
Click on the image or link to see the
website and videos.
Preparation: To make this knot
earring size,
use 2 mm size cord material and cut one 36-inch
cord.
To make a pendant,
use 2 mm to 4 mm material and cut one 60-inch
cord.
For other sizes, you need at least 30 inches of
material for every inch in size.
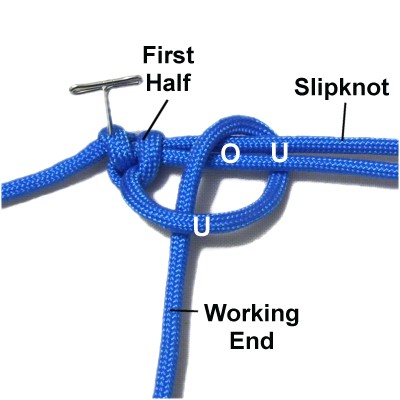
Secure one end of the cord to your
board (tail).
Move over 2 inches, and make a counter-clockwise
loop.
The working end should pass under
the secured end to make the
crossing point.
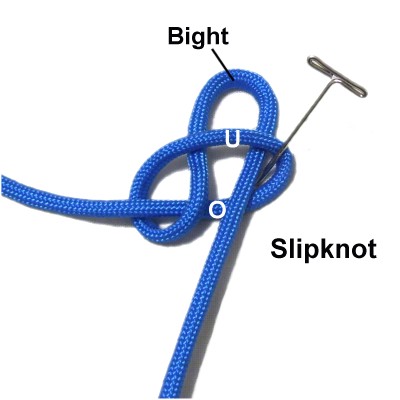
Step 2: Fold the
working end to make a bight, and push it
through the first loop over
- under.
This creates a Slipknot. Pull on the bight
to tighten the loop around it.
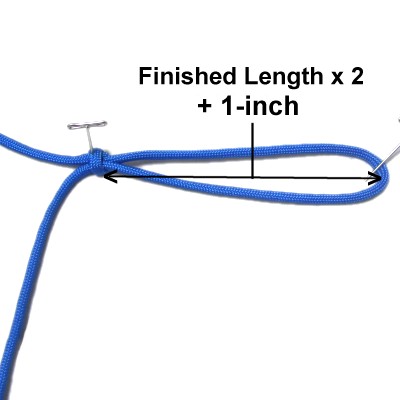
The length of
the Slipknot determines the finished
size of the Barnacle knot, so it
needs to be adjusted to the size below.
Earrings: Finished
Length x 2 + 1/2-inch(for
loop)
Other: Finished Length x 2 +
1-inch
Designer's
Tip: The finished length is the
size you are aiming for, measuring from top to
bottom. You need to add extra length so you
have a loop at the top.
When making earrings, you only need a small
1/2-inch loop at the top to attach the hook. All
other items should have a 1-inch loop.
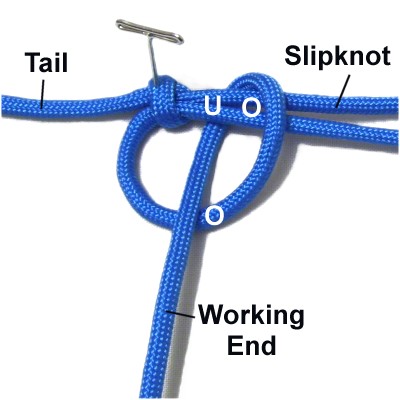
Step
4: Secure the Slipknot
horizontally with
tension.
To make the first half of the Larks Head
knot, bring the working end over
- under the Slipknot.
As you pull it forward, pass over
the working end to complete the
loop. Tighten
FIRMLY.
Step 5: To make the
second half of the Larks Head, pass the
working cord under- over the Slipknot
As you pull it forward, pass under
the working end. Tighten
FIRMLY.
Steps
4 + 5 = one Larks Head Knot.
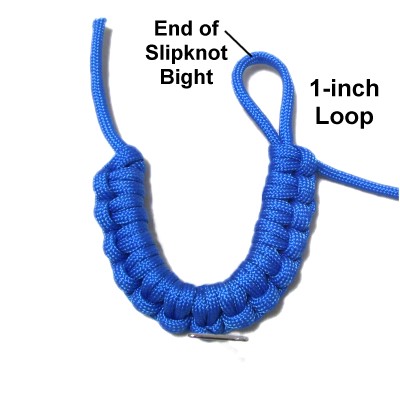
Step
6:Repeat
steps 4 and 5 several times,
until the last knot is 1-inch
from the end of the Slipknot bight
(1/2-inch for earrings).
Make sure the knots are close together and
do not overlap.
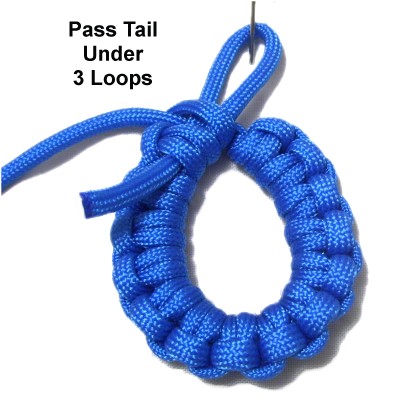
Step 7: Turn
the Barnacle knot upside down so you are
working in the BACK.
Pass the 2-inch
tail through the loop.
Loosen the last 2 Larks Head knots
tied.
Step 8: Pass the tail
under
the loose Larks Head knots.
Pull on the tail to form the oval
shape. Apply glue, then re-tighten
the knots.
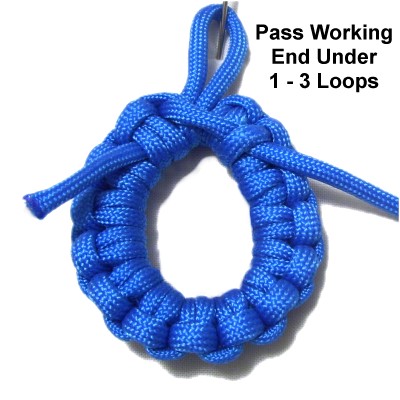
Step 9: Pass the
working end under 1 - 3 loops in the
back of the knot on the opposite side of
the tail. Apply glue to secure it.
Place it on the opposite side from
where the tail was secured.
Straighten the loop at the top of the
Barnacle knot. Make sure the last two
knots are still tight.
Wait several hours for the glue to dry
completely. Then cut off the
excess material.
By
using any text or images on Free Macrame
Patterns, you are agreeing to ourTerms
of Use