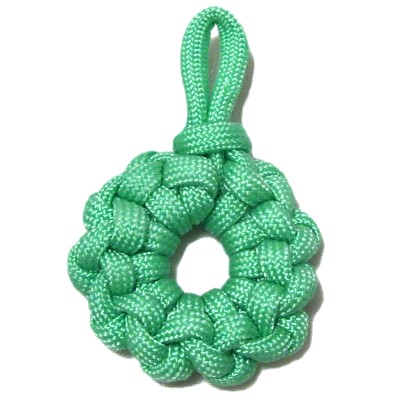
Description: The Ashoka Chakra
design features the Slipknot.
There is a loop at the top, so it is great for
making earrings, pendants and frames for stones
or focal beads. It can also be used as a
holiday
wreath if made with thick material.
History: The Dharmachakra is
one of the most well known ancient symbols,
usually described as a wheel with spokes.
This icon has been traced back to the time of
the Buddhist king Ashoka.
It is known globally as a symbol for the
Buddhist faith, and is sometimes called the
"Wheel of Life".
The Barnacle
Knot is a related
technique, so be sure to practice it as
well.
The video
gallery contains tutorials for
a variety of unique decorative knots.
Preparation:
To make this knot earring
size (1-inch wide), cut one 36-inch cord
(2 mm material).
To make a pendant
(1.5 inches wide), cut one 60-inch cord (2 mm to 4
mm size material).
For other sizes, you need at least 30 inches of
material for every inch in size.
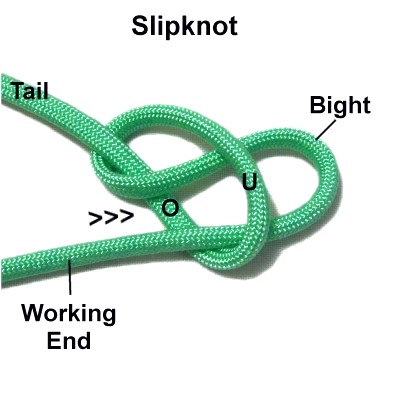
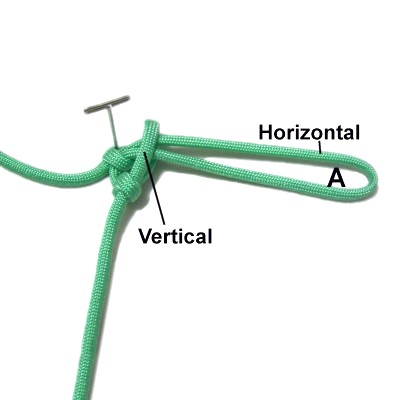
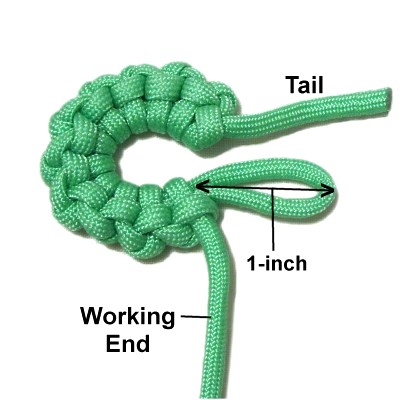
Step
1: Secure one end of the cord
to your board. Move down 2 inches,
and make a counter-clockwise
loop.
Make sure the working end passes under
the secured end (tail) to form the
crossing point.
Fold the working end to make a bight.
Push it through the
loop over
- under(from
the top).
Tighten the Slipknot by pulling on the
bight.
Mentally label it Bight
A.
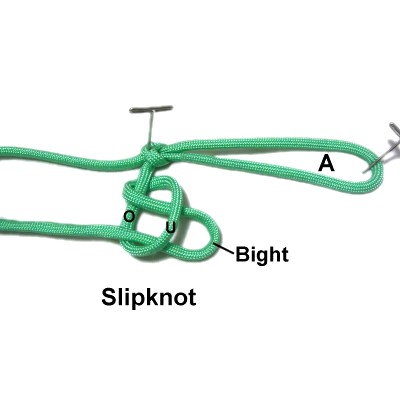
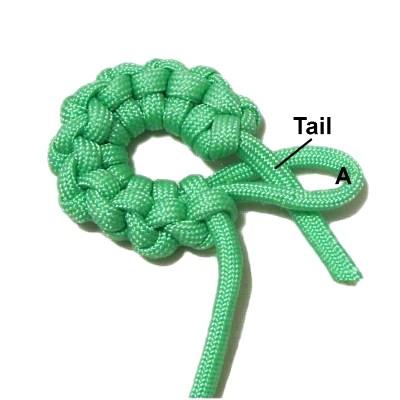
Step
2: Secure the knot
to your board (not the loop), so the
working end is closest to you.
The length of Bight
A determines the finished size
of the entire Ashoka Chakra design.
(see below)
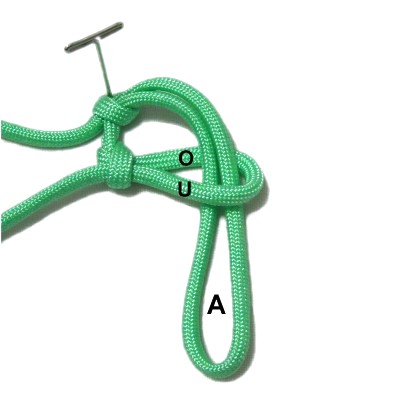
Decide the
finished size you wish to make, then multiply
that by 2. Add
at least 1/2-inch
so you have a loop at the top.
Here are the most common sizes:
1-inch Earring size = 2.5-inch bight
1.5-inch Pendant size = 3.5-inch bight
Increase (or decrease) the length to the
appropriate size for your project.
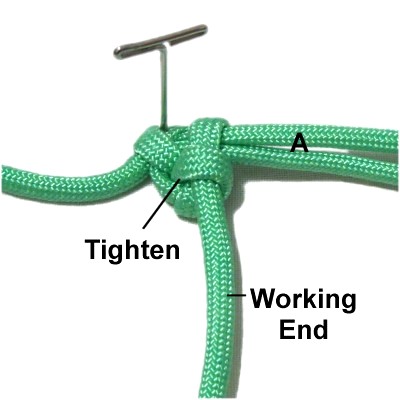
Step 3: Make a counter-clockwise
loop with the working end to start a
second Slipknot.
Rotate under
to make the crossing point.
Make a bight with the working end,
passing it through the loop horizontally
from the top (over
- under).
Tighten the
Slipknot gradually.
Adjust the size of the bight to 1-inch by
pulling on the working end. Arrange
it horizontally as shown.
The two knots should be no more than
1/4-inch apart when you are finished
tightening. Reduce the amount of
space between the two knots if you are
using 2 mm material.
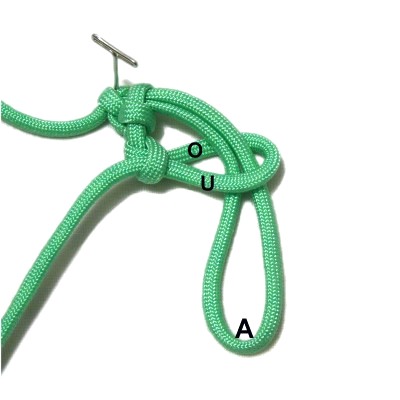
Step 4: Pass Bight
A (first Slipknot) through the
new oneover
- under (from the
top).
Move Bight A
back to a horizontal
position.
Move the second knot so the working end is
vertical.
It should rest close to the secured
portion of the first knot.
Designer's
Tip: The reason why you put a small
amount of space between the two Slipknot is so you
can turn the second knot vertical, and to make
sure the tightened portions rest next to each
other.
You can adjust the spacing for the remaining knots
as needed.
Tighten the second
knot by pulling on the working
end.
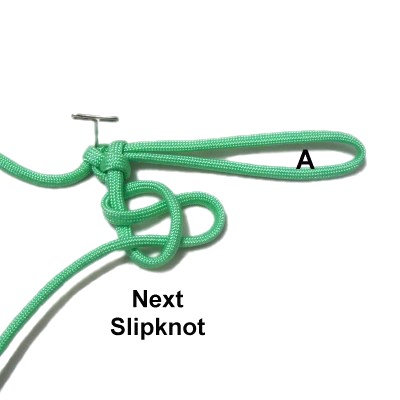
Step 5: Repeat
step 3 to make the
next Slipknot.
Repeat
step 4, passing Bight A through
the new knot.
Then turn and tighten the new knot, so it
rests to the right of the previous one.
Step 6:Repeat
steps 3 and 4 several more
times, until the last knot is 1-inch
from the end of Bight A.
The following steps show you one way to
complete the Ashoka Chakra. This
is optional if you prefer a different
method for securing the cord.
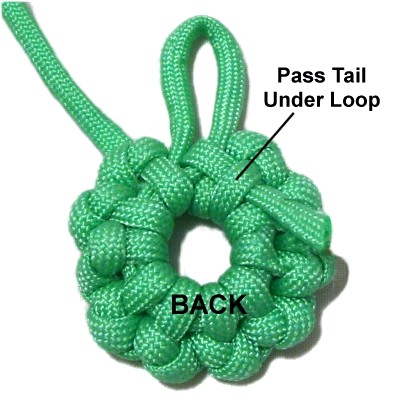
Step 7:
Pass the 2-inch
tail through Bight A.
Turn the Ashoka Chakra upside down so
you are working in the BACK.
Fold the 2-inch tail, and pass it under
one or more loops. Apply glue to
secure the tail to the back of the design.
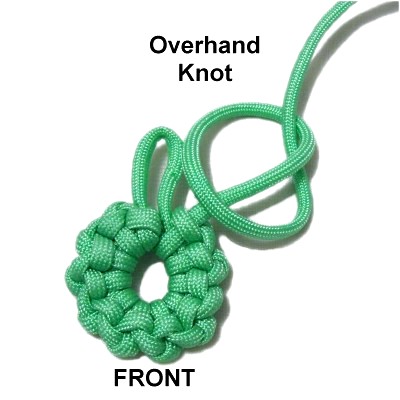
Turn the
design over, so you are working in the
front again.
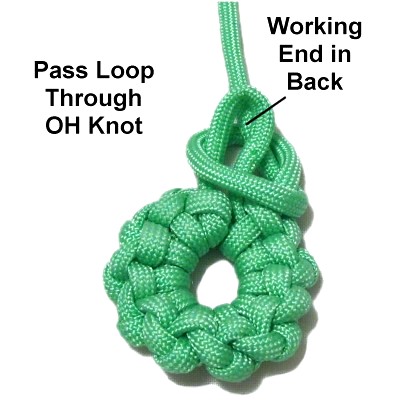
Make an Overhand knot with the working
end. Don't tighten it yet.
Pass the loop
(Bight A) through the Overhand knot.
As you tighten the Overhand knot, make
sure the working end and the crossed area
rests in the back
of the design.
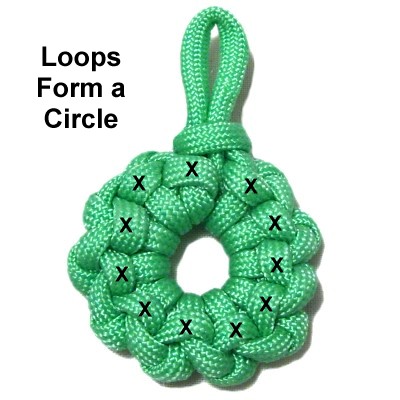
Make sure all
the loops indicated in this image form a
circle. Make adjustments as needed.
Finish off the working end, sliding it
under a loop in the back of the Ashoka
Chakra. Apply glue and cut off the
excess material.
By
using any text or images on Free Macrame
Patterns, you are agreeing to ourTerms
of Use