Description:
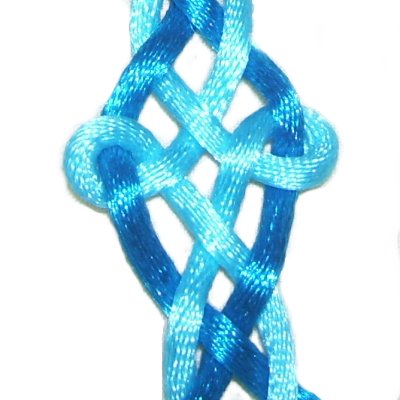
The Woven Cross Bracelet has elements
similar to those of the Celtic
Cross.
The loops on each side of the woven design
represent the arms of a cross. There are
crisscrossed areas above and below the arms.
This Celtic bracelet is easy to make, and is a
suitable Micro-Macrame project for
beginners. You can also use this design to
make a necklace or a belt.
The clasp is a simple loop - button closure, which
can be changed if you prefer something else.
Satin cord was used in the example shown. Paracord
is another great option.
Go to the video gallery and you will find
the tutorial for this knot (Woven
Celtic Cross).
Supplies
Needed:
2mm cord material in
2 colors
One button for clasp --
optional
Project Board and pins
Tape
Fabric Glue that dries clear
Preparation and Loop
Step
1: For bracelets up
to 7 inches, cut 1 cord of each color, 60
inches long. Larger sizes require more
material.
Prepare the cords by applying glue to the
tips. For Satin and Paracord, you should
heat the tips to prevent unraveling, before adding
the glue.
In the images, cord A is dark blue,
and cord
B is turquoise.
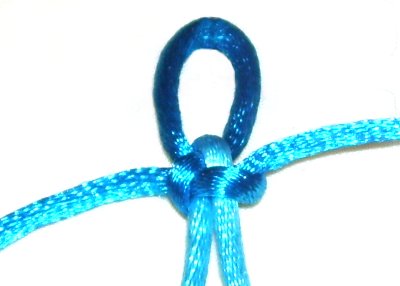
Step 2:
The four images below show you how to make
the loop at one end of the Woven Cross
Bracelet.
At the other end, a button is attached.
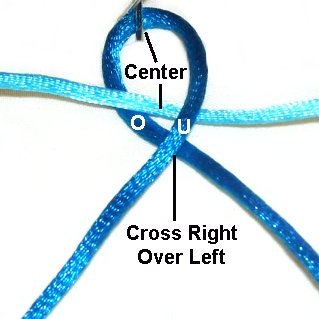
<<
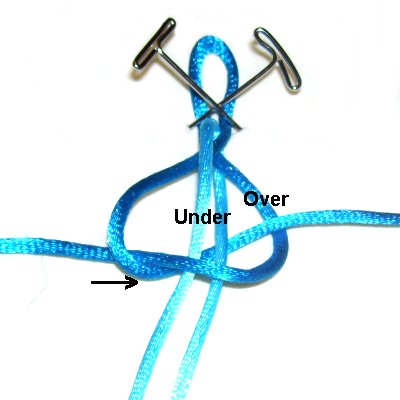
Form a loop in the center of cord
A, crossing the ends
right over left. Pass cord
B through the loop over
- under.
Bring the left
half of cord
B
over the front
of the crossed area.
The right
half goes behind
it. >>
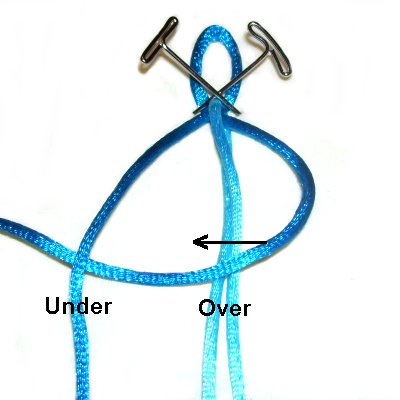
<<
Move the right
halfofcord
A to the left, over
cord B. Pass it undertheleft
half of cord A.
The left
half of cord
A passes under
cord B and over
the right half of cord A(Half
Knot).>>
Step 3:
Adjust the size of the loop so the button fits
through it, and then tighten the Half Knot firmly.
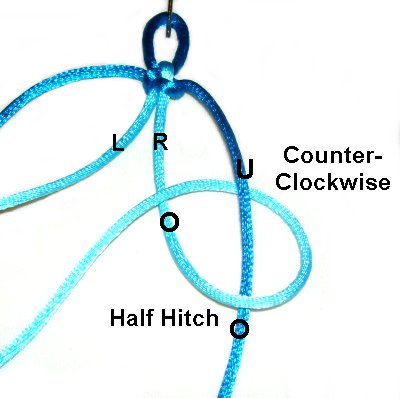
Woven Celtic Cross Design
Step
4: Rotate the right
half of cord
Bcounter-clockwise,
passingover
- under cord A (on the
right).
As you pull it left, the end should pass over
to make the crossing point of the loop.
Step
5: Rotate the left
half of cord
Bclockwise,
passing under
- over cord A (on the
left).
As you pull the end right, it should pass
under
to make the crossing point of the loop.
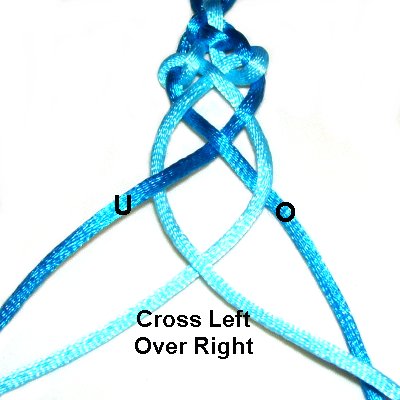
Step
6: Tighten both knots, and cross
the left half of cord
B over the right half.
Important:
When describing the crossing of cords for the
Woven Cross Bracelet, the ends are described where
they are currently resting (right or
left).
<<
On the right, move the end of cord
Aover
cord B. On the left, move it under
cord B.
Cross the ends left
over right.
Just below, repeat with cord
B (same over-under pattern) >>
Tighten and
balance the first design, so it resembles
the image at the top of the page.
Step 7:Repeat
steps 4 - 6 several times, until
the Woven Cross Bracelet is the size you
want.
Finishing + Clasp
Step
8: Before you complete the clasp,
you should tie a Square Knot
to secure the last cross design. The
best place is afterstep
6.
Use the ends of cord
A as the working cords and cord B as the
fillers.
Apply glue to the fillers
before tightening the Square knot(so it's on the inside of the SK).
Fold the ends of cord
B to the back
of the Woven Cross Bracelet.
Apply glue under them and use a clip to
hold them against the back of the the last
cross design.
When the glue is dry, cut off the excess
material.
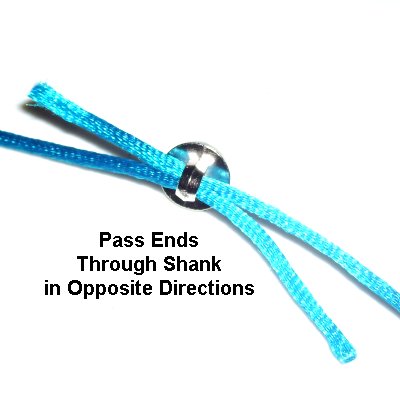
Pass the ends
of cord
A through the shank of the
button, in opposite
directions.
Tie a tight Overhand
knot to secure the button,
once it's positioned where you want
it. Apply glue to the shank
during tightening. When it's dry,
cut off the extra material.
By using any
text or images on Free Macrame Patterns, you are
agreeing to ourTerms of Use.