Description:
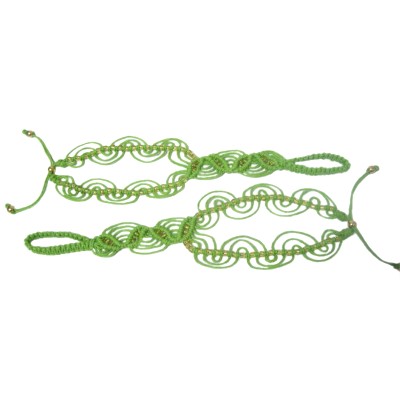
The Wave Sandals feature tiny leaf-shaped
designs that rest along the top of the foot.
There are wavy segments between the leaves and on
the straps. The toe loop is knotted, and the
closure is a simple bead clasp.
This Macrame project is a great way to expand your
skills if you enjoy Barefoot Sandals. It's
rated Moderate, since you need to be familiar with
shaping Double Half Hitches.
Foot Jewelry usually contains beads. In this
Micro-Macrame design, the beads are inside the
leaves, which helps to form the shape.
The straps are simply beads alternating with
knots. Glass seed beads (size 6/0) and Hemp
cord were used in the example shown.
Since you won't know how many beads you actually
need until you create the sandals, purchase at
least 150.
There are three parts
that make up the Wave Sandals: The toe loop,
the leaf design, and the straps.
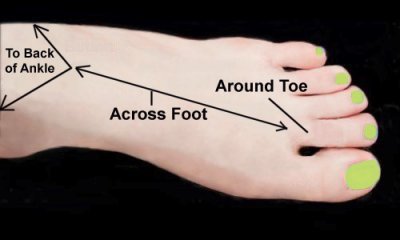
Measure the areas described below and write the
results on paper.
Toe
Loop: Measure around the
second toe to the top of the foot where
you want the leaf design to start.
Leaf
Design: Measure from the
starting point close to the toe to where
you want the straps to branch off.
Straps:
Measure from the branch-off point to the
back of the ankle.
Add all three measurements together to determine
the total length of the Wave Sandals.
Short cords --Multiply the total length by
9 and cut 2 cords to that size.
Long cords -- Cut 2 cords 12 inches longer
than the short cords (above).
Prepare the tips of the cords with glue to prevent
unraveling.
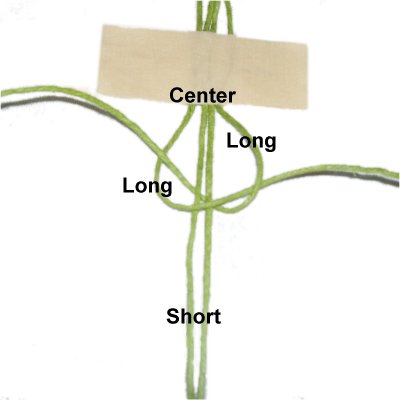
Toe Loop
Step 1:
Locate the center of the four cords, and place
them on your board vertically. Apply a piece
of tape across the cords, so the lower edge is at
the center.
The two short cords should rest between the two
long ones.
Tie a Square Knot (SK) using the two long
cords, around the short ones, which are
the fillers.
When you tighten the knot, make sure it
rests against
the tape.
Step
2: Tie several more SK, until the
sennit is 1/2
the toe loop measurement (from
preparation).
Count the knots as you tie them.
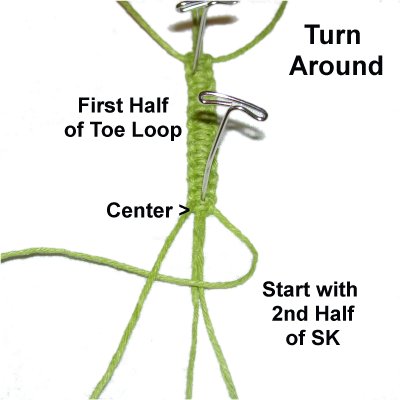
Step
3: Rotate the entire sennit
around on your board after removing the
tape.
To make the remainder of the toe loop,
return to the center and tie the second
half of a SK (with the other half of the
cords).
Then tie the same number of knots as in
step 2.
Step
4: Fold the toe loop in
half. It should be standing
on one edge, so the back
surfaces face each other.
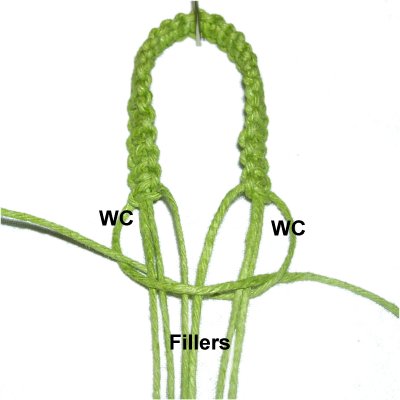
Note: In this image, the loop is tilted
inward slightly so you can see the
surfaces better.
Identify the working cords (WC) from the
edge the loop is standing on.
Step
5: Close the toe loop by
tying a Square Knot with the two working
cords around all the others, which are
fillers.
Apply glue so it's on the inside
when the knot is tightened.
Leaf Design
The center portion of the Wave Sandals is a
series of small leaves. The design rests on
the top surface of your foot.
Tie as many leaves as you can to match the
measurement you determined in Preparation.
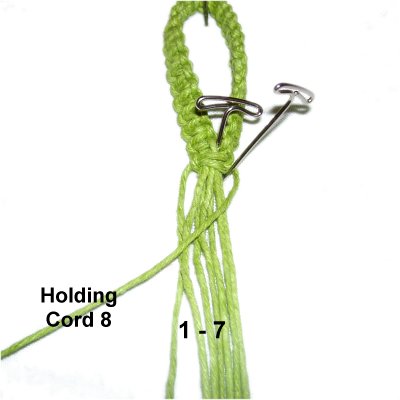
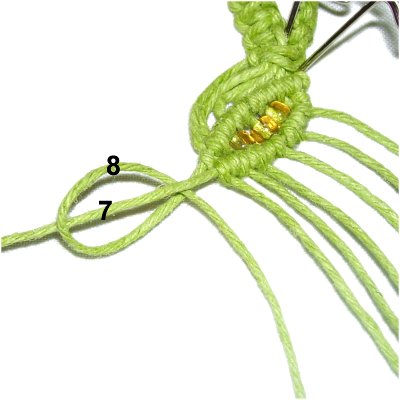
Step
6: Mentally number the
cords 1 - 8, from left to right.
Move cord
8 to the left diagonally, resting
on top of the other cords.
Cords 8 and 7 are the holding cords for
the entire leaf design.
Making
Curved Leaves: To shape the leaves
for your Wave Sandals, you must change the angle
of the holding
cordsas you progress.
For that reason, it's better to hold it in
one hand and tie the DHH with the other.
Also, label the two holding cords with tape. Write
their numbers on the tape, so you can easily
identify them.
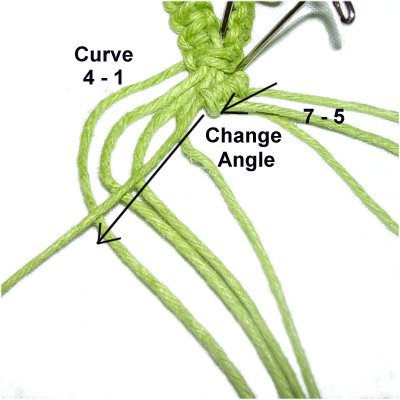
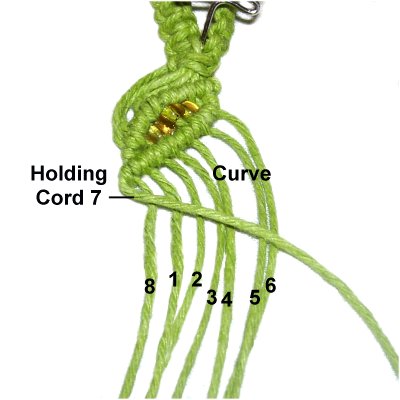
Step
7: Arrange holding
cord 8 so it has only a small
diagonal slant. Attach cords
7 - 5 to it with clockwise
DHH.
Move cord 8 to the right to change the
angle, then attach cords
4 - 1, so they curve
outward.
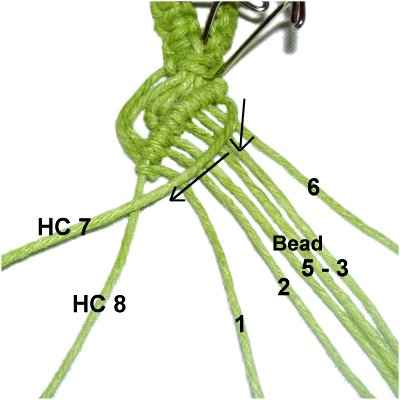
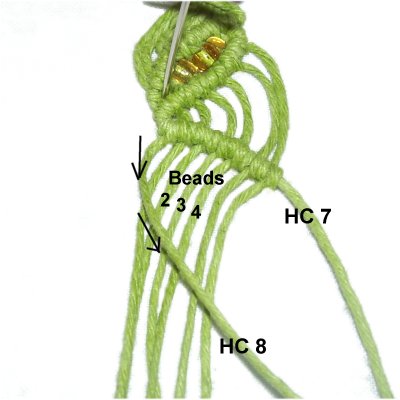
Step
8: Add beads to cords 5 -
3.
Move holding
cord 7 on top of the other cords,
so it's almost vertical. Attach cords
6 and 5 to it with clockwise
DHH.
Move cord 7 upward,
so it's closer to the top row of DHH, and
attach cords
4 - 1.
Close the
first leaf for your Wave Sandals by
attaching cord 8 to cord 7.
Step
9: Move holding
cord 7 to the right, on a small
diagonal slant.
Attach cords
8 and 1 to it with counter-clockwise
DHH.
Move cord 7 left
to change the angle, then attach cords
2 - 6, curving them outward.
Step
10: Move holding
cord 8 to the right. Place
beads on cords 2 - 4.
Start with the holding cord almost
vertical, and attach cords
1 - 2 to it with DHH. Move
cord 8 towards the top row (upward) and
attach cords
4 - 6.
To close the leaf, attach cord 7 to cord
8.
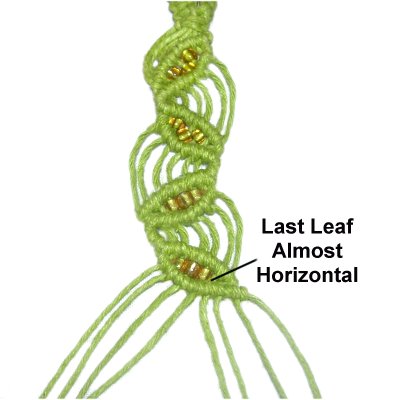
Step
11:Repeat
steps 7 - 10 as many times as
needed, until this portion of your Wave
Sandals is the length you need (leaf
design measurement from preparation).
The last leaf you make should be almost
horizontal, so the straps come off it more
evenly.
Ankle Straps
The ankle straps for your Wave Sandals are made
with beads alternating with Double Half
Hitches. The beads are attached to the
holding cord.
Make sure you keep the holding cord as straight as
possible. The cords attached to it should be
curved.
Divide the cords into two groups of four.
Mentally number the cords in the right
group.
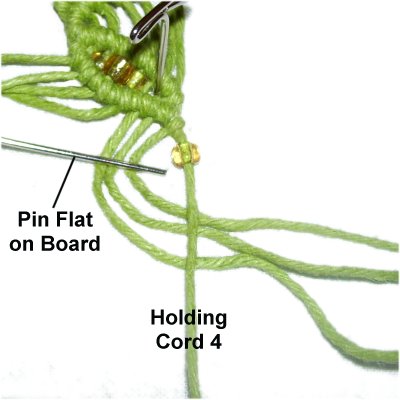
Step
12: Arrange holding cord 4
vertically, after attaching a bead.
Curve cords
1 - 3 to the right,
and slide them under
cord 4.
Place a pin on the curved area, so it
rests flat on the board.
Attach cords 3 - 1 to the holding cord
with clockwise
DHH. Place
a bead between each knot.
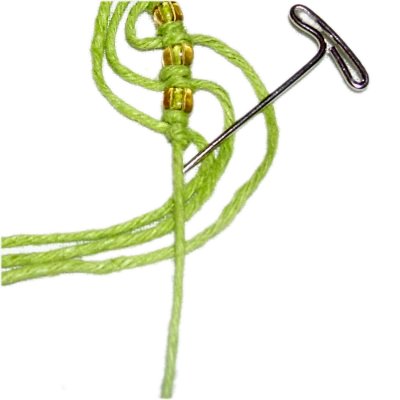
Step
13: Place a bead on holding
cord 4. Curve cords 1 -3 to the left
and slide them under it.
Attach them with counter-clockwise
DHH. Make sure there are beads
between each knot.
Step 14:Repeat
steps 12 and 14 several times, until the
right strap for your Wave Sandals is the size you
need.
Step
15: Tie an Overhand knot with the
entire group of 4 cords, making sure it's
as neat as possible.
Don't tighten it completely. Leave it a
little loose, in case you need to remove
it.
Step 15,
continued: Put the Wave Sandal on your
foot to make sure the Overhand knot will rest
close to the center of your ankle (in the
back).
Keep in mind you still need to add one bead for
the clasp.
Tighten the Overhand knot, applying glue so it's
on the inside. The knot should rest against
the last DHH tied in the strap.
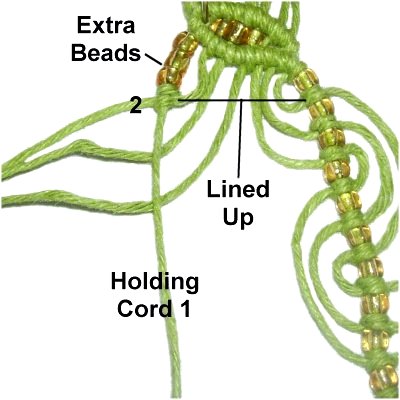
Step
16: Since the last leaf was
not entirely horizontal, you will need to
add more than one bead to the holding cord
(1) prior to starting the left
strap.
This is to make sure the first knots are
lined up, so the straps are the same size.
Step 16,
continued:Repeat
steps 13 and 12 several times, to create
the left strap. Cord 1 is the holding cord,
and cords 2 - 4 are attached to it.
Repeat
step 15.
Sliding Bead Clasp
A sliding Bead Clasp is the best closure for the
Wave Sandals. The hole size for the bead
should be large enough for four cords, but not
have a lot of extra room. It needs to grip
the material, or the straps will open too easily.
For that reason, I recommend the hole size be
between 3mm and 3.5mm.
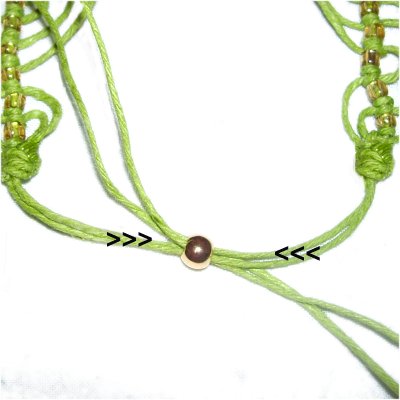
Step 17:
After the glue is completely dry, cut off two
cords from each strap. That will leave
four for the clasp.
Pass the two
cords from the left
strap through the bead from left
to right. Pass the cords
from the right
strap through from right
to left.
Make sure nothing is twisted, then pull
the cords to close the clasp. The bead
should rest against the Overhand knots.
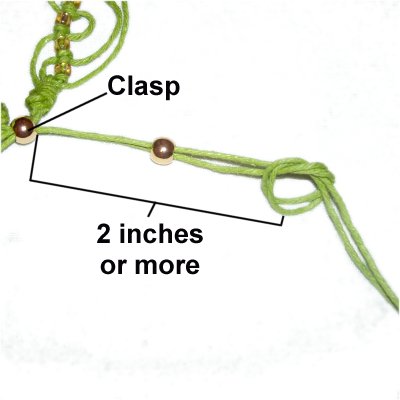
Step
18: Slide a bead onto the
two cords from the left strap.
Tie an Overhand knot at
least 2 inches from the bead
applied in the last step (clasp).
You need this extra space so you can open
the straps wide enough for your foot to
pass through.
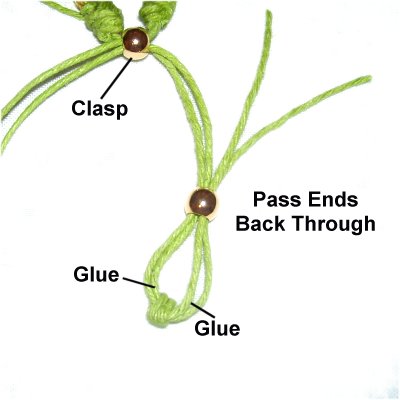
Step
19: Pass the ends back
through the bead.
Apply glue in the area near the Overhand
knot, then push the bead against it.
Pull the ends firmly.
Apply more glue on the other side of the
bead. When it's dry, cut off the
ends close to the bead.
Step 20:Repeat
steps 18 and 19 with the two cords from
the right strap.
Step 21:Repeat
Preparation and steps 1 - 20 to make the
second sandal.
By
using any text or images on Free Macrame
Patterns, you are agreeing to ourTerms
of Use