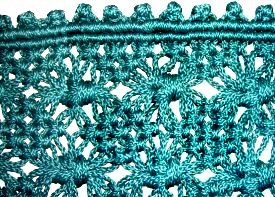
Step 1: To make the special
loops for the top of the Vintage Curtain, follow
the instructions below. These are
optional, if you prefer to attach the cords
directly onto the rod.
Each loop and
button requires 2 cords.
Important:Create
all of the button/loop designs before
moving on to step 3.
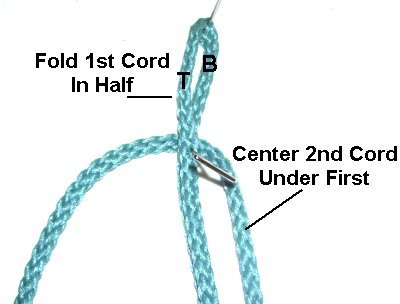
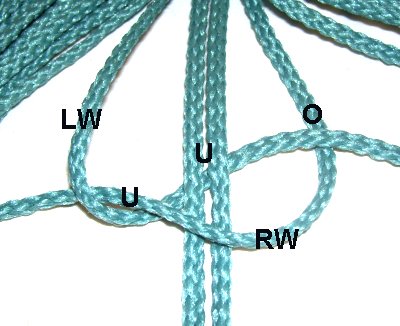
Fold one cord in half and secure it to
the board so that one
half is on top and the other.
See next image.
Place a second cord under
the first and center it, matching the
ends. This is the working
cord.
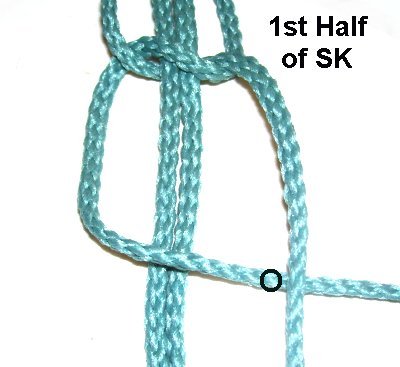
Tie the first half of
a Square Knot using the working cord
(2). The two halves of cord 1 are the
fillers.
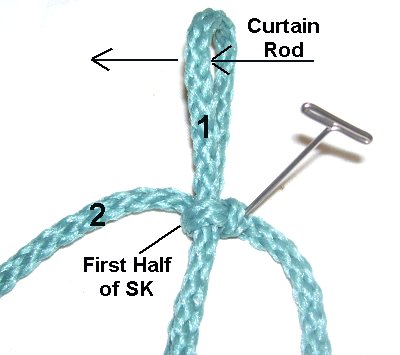
You should now have a loop, in which
the opening is sideways.
The curtain rod will fit through it
horizontally.
Important:
Adjust the size of the loop by pulling on the
ends of cord 1.
It should be double
the
thickness of the rod, plus a little extra.
You will be folding the loop in the following
steps, which will make it smaller.
In the example,a 1/2-inch
rod was used, so the loop was 1 inch with an
added 1/8-inch.
You may need to experiment a little to make
sure the loops are the right size for your
Vintage Curtain:
Complete the next two steps.
You can remove the knot to make adjustments if
necessary.
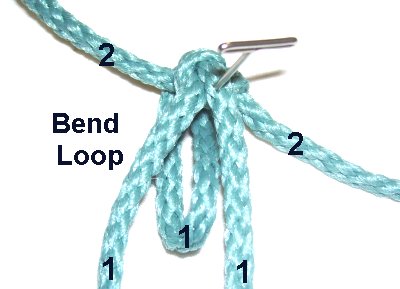
Step 2:
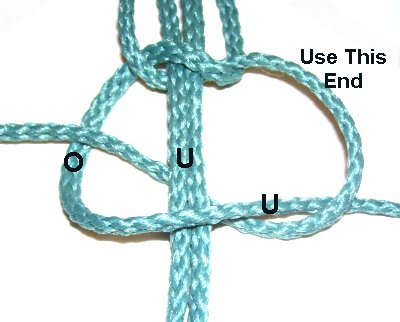
Bend the loop backwards
and down.
Make sure the ends of the working
cord (2) are to the sides.
The ends of cord 1 should be vertical.
Use working cord 2 to tie the second
half of the SK.
The
loopand the ends
of cord
1 are the fillers, so
make sure you go around both as you tie
the knot.
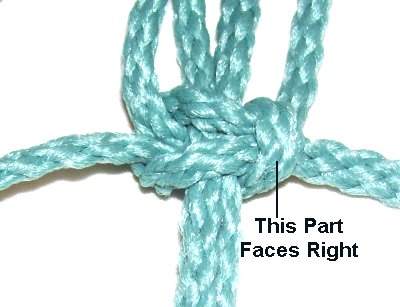
Tug on the ends of the working
cord (2) until the button is
round and neat.
The loop
should bebehind
it.
Note: In this image,
the loop was pulled upward and the
button tilted slightly, so you could see
it more clearly.
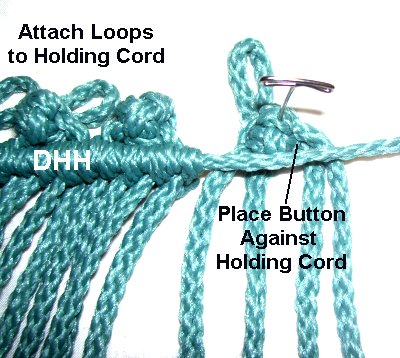
Step 3: Once ALL the
loops are finished, secure a holding
cord on your board
horizontally, so it's taut.
Place a button/loop design above
the holding cord,resting
against it as close as possible.
Step 3,
continued: Attach the four ends to
the holding cord with Double Half Hitches.
Tighten both Half Hitches firmly,
to eliminate any gaps between the holding cord and
the button.
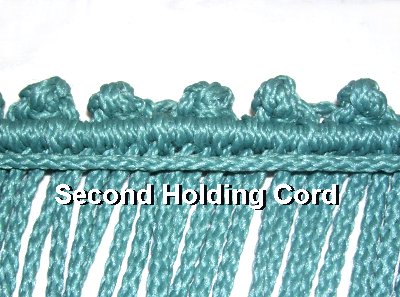
Repeat with the remaining loop/button
designs. Push them close together as you
progress, and measure
to make sure the total width is what you need.
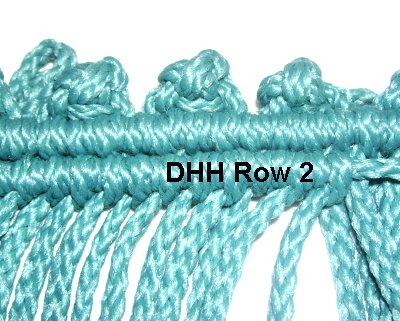
Step
4: Place the second holding
cord on top of the working cords,
horizontally.
It should rest just below the first row of
DHH. Make sure it has tension when
you secure it.
Attach each working cord to the 2nd
holding cord with DHH.
Tighten them firmly so the two bars are
as close as possible.
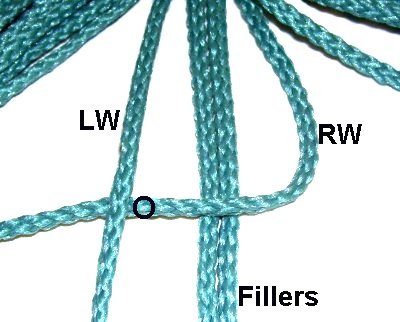
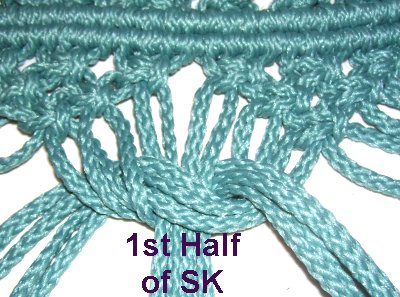
Right Square Knot Instructions
You will be tying RIGHT
Square Knots for the entire Vintage
Curtain design, so
below is a review of the steps.
You can tie left
SK instead of right, if you wish to
change this design. Make sure all the knots,
including the large ones, are facing the same
direction.
Use four cords, so you have two working
cords and two fillers.
Move the right
working cord (RW) towards the left. The
left working cord (LW) should rest over
it.
Bring the left
working cord under
the right one, and then under
the fillers.
Bring it overthe right working cord, as you
pull it out on the right side of the
knot.
Tighten the first half by pulling on
both ends.
Move the working cord that is now
on the left, over to the right.
Pass the other working cord over
it.
Movethe
right
working cordunder
the left, and then under
the fillers.
Bring it overthe left cord as you pull it
out on the left side of the knot.
This
is what the right facing SK will all look
throughout the Vintage Curtain design.
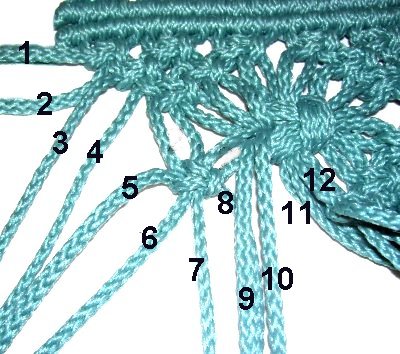
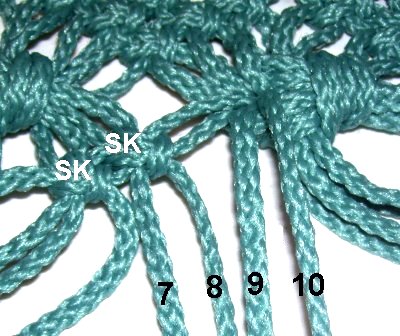
V Shaped Designs
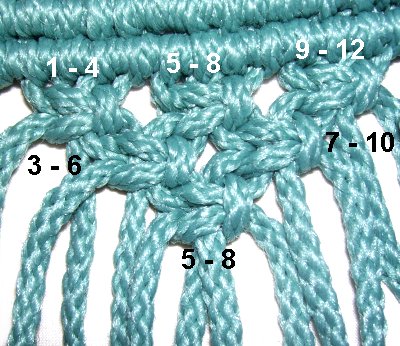
Step 5:
All the V designs along the top of the Vintage
Curtain are to be made with 12
cords. Divide the cords into
separate groups.
Complete the following step with each
group of cords:
Mentally number the cords 1 - 12. Tie
the first row of Alternating Square
Knots using 1 - 4, 5 - 8, and 9 - 12.
The second row is tied with 3 - 6 and
7- 10.
The knot in the third rowis tied with cords 5 - 8.
Design Tip: The V designs show
up better if all the ASK are tightened firmly,
and arranged close together.
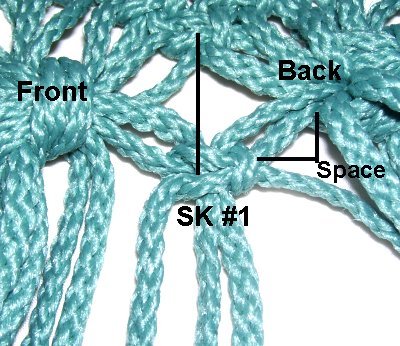
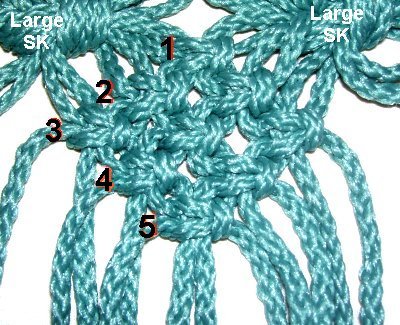
Large Square Knots
The Large Square Knots rest between
the V designs.
Follow the steps below to make each one,
repeating the process all the way across the
Vintage Curtain.
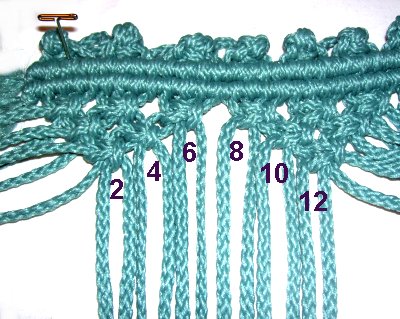
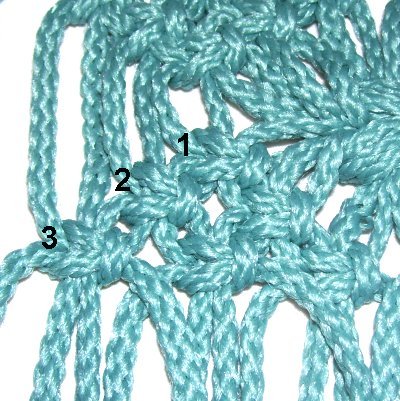
Step 6: Start at the left
edge, and push
the
first 6 cords aside.
These are coming off the left
edge of the first V design, on the left
side of the curtain.
Note that at the bottom
point of the V shape two cords will be
pushed aside, and the other two will be used in
the following steps.
Locate the 12 cords you need for the
large SK. Six cords come off the right edge
of the first V shape on the left.
The remaining 6 cords come from the left edge
of the V design to the right.
Mentally number the cords 1 - 12. The
left working cords are 1 - 4. The
fillers are 5 - 8, and the right working
cords are 9 - 12.
These cords work
together to make the large
right Square Knots. Try to
keep them as organized as possible.
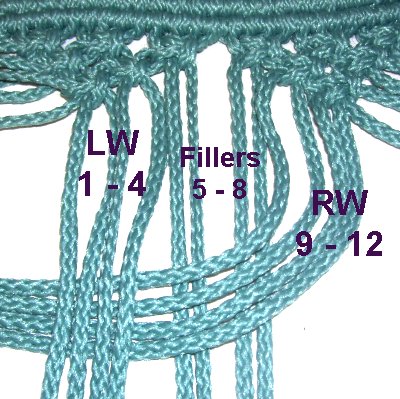
Important:The cords should rest side-by-side in the
area above and below the knot. They will
overlap within the knot, but keep them as neat as
possible.
This is the most challenging area of the Vintage
Curtain, so take your time making these knots.
Tie the first half
of the large SK.
Tighten it so it rests just below
the lowerpoints
of the two V designs.
Tie the second half of the large SK.
In this image, notice how the cords
start off neatly arranged so they don't
overlap.
Tighten the second half firmly,
so the large SK is as tight as possible.
Tie the large SK with the remaining
cords, all the way acrossthe
Vintage Curtain.
Make sure all the knots are between
two V designs.
The
first and last 6 cords at
the edges are not used for these
large knots.
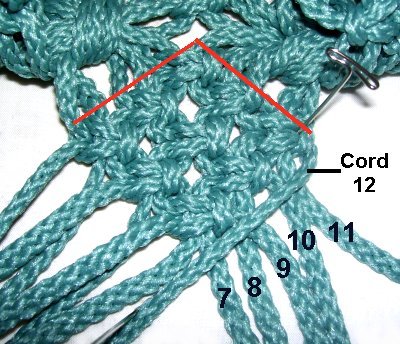
Diamond Shapes
The
Diamonds for the Vintage Curtain are made with
both increasing and decreasing rows of ASK.
In the first three rows you will use more cords (increase)
as you progress.
The final two rows are decreasing, since you will
drop
cords.
Step 7: Organize the cords in
groups of 12, starting at the left edge.
Mentally number each set 1 - 12.
Note: The
diamond shapes at both edges
will be slightly different than the
others. Some of the cords come straight
down from the V designs near the top of the
Vintage Curtain. The others come from the large
Square Knots.
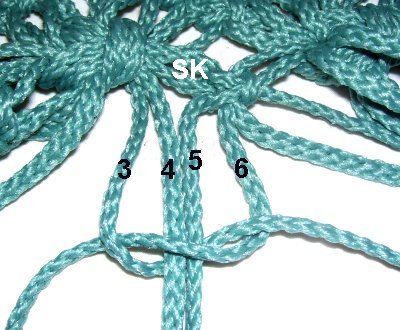
Row 1:
Use cords 5 - 8 to tie one SK.
Leave some space so it matches the area
just above it.
Row 2:
Tie one ASK using cords 3 - 6 and
another one with cords 7 - 10.
Row
3: Use cords 1 - 4, 5 - 8 and 9
- 12.
Row 4:
Use cords 3 - 6 and 7 - 10 (not shown).
Row 5:
Use cords 5 - 8. (not shown)
Step 8:
Select the next 12 cords to make another diamond
shape.
These will come from
two large SK. Organize them before tying the
knots.
Six cords will come from the right
side of the SK on the
left.
The next six should come from the left
side of the SK on the right.
Row 1:
Tie a right SK with cords 5 - 8.
This first knot should line up with the
point of the V shape above.
There should be a small amount of space
between this knot and the two large
ones.
Row 2:
Use cords 3 - 6 to tie the first ASK.
Use cords 7 - 10 to tie the next ASK in
the second row.
Row
3: Use cords 1 - 4, 5 - 8,
and 9 - 12 to tie the ASK.
Row 4:
Use cords 3 - 6 and 7 - 10 to tie the
ASK.
Row 5:
Use cords 5 - 8.
Step 9:Repeat
Step 8,
all the way across the Vintage Curtain design.
When you get to the right
edge, repeat
step 7. Mentally number the cords
from right
to left, so you can use the same
instructions.
Step 10:Repeat
Steps 5 - 9 to make the curtain
longer (top to bottom).
Stop when it's the desired length.
Important:Make sure you stop on step
9, so you finish the curtain with the
diamond shapes.
Finishing the Bottom
Step 11: Organize the
12 cords coming off the bottom of one
diamond shape.
Move Cord
12 (on the right), down along
the right
lower edge of the diamond (diagonal).
This is a holding cord,
so make sure it's taut.
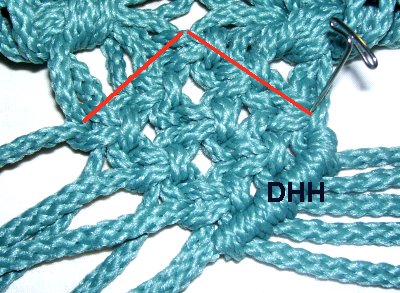
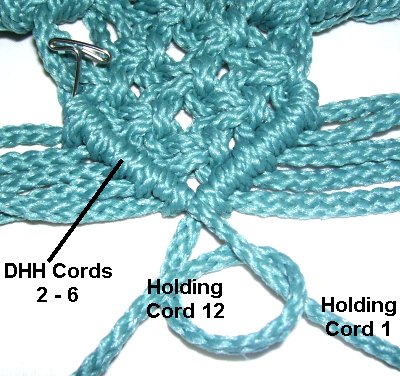
Step
12: Attach cords 11 - 7 to it
with clockwise
Double Half Hitches (in that order).
Step
13: Move cord
1 along the left
lower edge of the diamond. Attach cords
2 - 6 to it with DHH, rotating counter-clockwise.
Attach holding
cord12
to it with DHH, to make the point at the
bottom.
Step
14:Repeat
steps 11 - 13 all the way
across, to finish the lower edge of each
diamond.
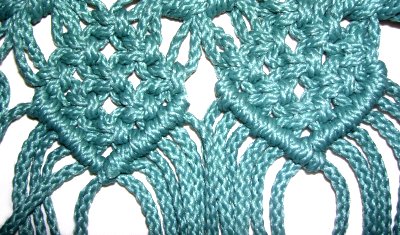
Step
15: Trim the ends and unravel each
one completely to form a wavy
fringe.
To make a beaded
fringe, trim the ends, apply small beads, and tie
a Barrel Knotjust
below. Apply glue before tightening.
Once the glue is dry, you can cut off the extra
material.
Slide the rod through the loops at the top of the
Vintage Curtain, and then attach the rod to your
window frame.
By using any
text or images on Free Macrame Patterns, you are
agreeing to ourTerms of Use